I met a data scientist named Joris Muller via one of my general statistics blog feeds, and he was working on cool project to show how easy it was to make reproducible workflows. I thought this was awesome, and wanted to help giving a go at plopping the entire thing into a container (see the comment thread). He put together a toy example that he could share with me looking at a public drug database, and I went to town!
If you just want to see the demo of what the container produces, look no further. If you want an interactive-ish demo of running the container and looking at files, check out the asciinema below. What I really want to talk about in this post is the thinking process for building a container environment for something that you don’t understand. It can seem scary to be handed a code base without knowing all the details, but I assure you that there are logical steps one can answer to go from folder to container in no time. If you are interested in this thinking process, continue reading.
The Core Goals
Not surprisingly, the job description for many data scientists looks something like this.
Have data thing. Look and understand data thing. Show someone else cool stuff.
The ability to concurrently explore, visualize, and then synthesize is what makes data science fun, but it also makes it hard. It’s hard because the steps of exploration and visualization usually come down to:
- get some lump of data
- have software to do stuff to data
- produce nice looking thing for someone to see
- share nice looking thing
…and then you have to hand the entire thing off to someone else to run from beginning to end! With the R software, things can get a bit buggy and crash into dependency hell pretty quickly. Thus, our goal is go from step 1 to completion without a hitch. Get data, run some scripts, and show a result.
An Abstraction
I like to move through problems by asking and answering questions. So when I received a link to the code repository, I quickly abstracted the goals to a very basic set of questions.
- Where does this thing start?
- What does it produce, and where does it produce it?
- What software is needed to do that?
Step 0: Where am I running this?
The most basic question is “What kind of operating system thing should be the base for my container?” In the case of having something in R, since I know that R is hard to install with the correctly compiled libraries, etc., my first goto was to find a Docker container that had a linux based operating system already installed with R. I found a bunch very quickly, and immediately recognized r-base as the package that I’d normally install on Ubuntu, so I thought it reasonable to try. A lot of people might slow down in this step if they attempt to install R afresh in an Ubuntu (or generally a Debian) base. This might be necessary if you need a custom install, but for our purposes, this is a more optimal approach to take. So to quickly answer the question of “Where to run this?”
I am running this on a linux operating system with the R statistical software installed.
Step 1: What are my dependencies?
This step comes down to writing the Dockerfile, which is a specification to build the image. The first thing I do when I know a base is to start my Dockerfile. I usually write the beginning and end, and then fill in the meat as I better understand the application. For my purposes, since I knew the base I could do:
FROM rocker/r-base
MAINTAINER vsochat@stanford.edu
and then at the end I knew I’d be dumping all the code from the repo in the container, so I made a directory called /code and did that with the ADD command.
RUN mkdir /code
RUN mkdir /data
ADD . /code
RUN chmod u+x /code/*
WORKDIR /code
A quick shout out to my colleague Chris, who is the one that embedded using the base /code for containers into my head. Notice that I also made a directory called /data. I’ve come to do this, by default, because it’s commonly the case that I want the container to produce some output, and then the output to map to my local machine. Running with docker, that might look something like this:
docker run -v /tmp:/data vanessa/explore_drug_database script.sh --output /data ...
The above command isn’t specific to this problem at hand, but is a general example of running some script.sh (let’s assume the container expects that as input) and then writing output to the directory /data inside the container. Then, in order to see the output in /tmp, I’m using the argument -v, which means “volume.” Specifically, my volume is mapping /tmp on my local machine to /data in the container, so I’ll see it spit out there.
Step 2: Develop inside the container
Next, you need to figure out what is needed to make the script run. Running it on your local machine isn’t sufficient, because you may have some library already installed that isn’t in the image. Thus, what I like to do is quickly build the container, and shell into it interactively, like:
docker build -t vanessa/explore_drug_database .
docker run -it vanessa/explore_drug_database bash
Note that we are in the repository’s base. This will get you inside the container, and then you can try running the script for R. Your goal is two fold. You first want to know how to run the thing. A good container has some kind of “controller” script that can take command line arguments, and serve as a communication between the container and the user running it. If your code repo doesn’t have this, you need to make it first. In my case, Joris did a great job in providing a script called run_all.R which met this need nicely.
Once we know how to run things, we want to figure out all the software / library dependencies needed for that running. While some “run scripts” are simply enough to have the container run directly, many times you want multiple things to happen, and it makes more sense to have your container call a shell script with more than one command in it. We need to write this script as our next goal. How do we go about this? Well, to find what is broken, the easiest route is to try breaking it. Once shelled into the container, I would try this:
Rscript /code/run_all.R
and here is the fun part (at least I think so). You are going to hit a bunch of errors, one right after the other, telling you something is missing. For sure the ones that I hit are missing system libraries for curl, ssl, and xml. This step is like untangling curly hair. You work through the steps, one at a time, until the knots are out and the brush runs smoothly. What that came down to was installing a few system libraries, and then some R packages:
# Install curl, ssl, and xml libraries
RUN apt-get update && apt-get install -y libcurl4-gnutls-dev \
                                         libssl-dev \
                                         libxml2-dev

# Install pandoc
RUN wget https://github.com/jgm/pandoc/releases/download/1.19.2/pandoc-1.19.2-1-amd64.deb
RUN dpkg -i pandoc-1.19.2-1-amd64.deb

# Install dependency packages
RUN R -e 'install.packages("rvest", repos = "http://cran.us.r-project.org")'
RUN R -e 'install.packages("tidyr", repos = "http://cran.us.r-project.org")'
RUN R -e 'install.packages("dplyr", repos = "http://cran.us.r-project.org")'
RUN R -e 'install.packages("ggplot2", repos = "http://cran.us.r-project.org")'
RUN R -e 'install.packages("rmarkdown", repos = "http://cran.us.r-project.org")'
RUN R -e 'install.packages("XML", repos = "http://cran.us.r-project.org")'
RUN R -e 'install.packages("readr", repos = "http://cran.us.r-project.org")'
RUN R -e 'install.packages("DT", repos = "http://cran.us.r-project.org")'
RUN R -e 'install.packages("wordcloud2", repos = "http://cran.us.r-project.org")'
Technically, once we have installed these things, the analysis runs without a hitch to produce output inside the container. This answers our question about dependencies:
The most basic dependencies are the system libraries and software to run the analysis as it was intended.
and we can trigger this this to happen automatically when the container is run by first creating a bash start script, run.sh:
#!/bin/sh
echo "RUNNING ANALYSIS..."
/usr/bin/Rscript /code/run_all.R
and adding the following line to our Dockerfile so run.sh is what the container executes when you run it:
CMD /code/run.sh
A few tips when you write this script:
- write comments to document it. These are intended for some future user or developer
- print output to the console so the user knows what is happening
- specify the correct interpreter (e.g, `#!/bin/sh`), in the case that the user executes it without handing it to one.
Step 3: Expose the result to the user
But we can do better than that. The above will produce some outputs inside the container, but how do we show the user what was made? Minimally, we could plop the data in a folder in the container, and tell the user to map it to a volume on their local machine (as we showed with the example above) and then “render it yourself, bro.” A better way would be to serve the content for the user. This is another example of where you need to step back and think “What software do I need?” For example:
- If I am producing something with python, a jupyter notebook server would do the trick.
- If I have markdown, I could go all out and plop the content into some jekyll site that renders it when it changes.
- For more robust webby things, you would be best to run another container as a web server, and then serve your application with something like uwsgi or gunicorn. And of course for a server, you can install apache or nginx.
- You could also use flask (python) similar to the above.
My go-to tends to be nginx with uwsgi, and here is an example docker-compose file.
But let’s be real, I was doing this at the wee hours of the morning, and way too disabled to put coherent thinking together. I went for something simple and stupid. This approach would not be suitable for serving anything “for reals,” but would do well to show a result in a container. I did the following:
- install nginx web server
- use python `http.server` to serve a directory on some port
- expose the web ports of the container to the local machine
- write a redirect file for the user to go from the server root --> port.
Here is what installing nginx looks like (this is toward the end of the Dockerfile, but before we’ve added our code to it:
# Add a simple nginx web server to serve Rmd notebooks
RUN apt-get install -y nginx python

# forward request and error logs to docker log collector
RUN ln -sf /dev/stdout /var/log/nginx/access.log \
	&& ln -sf /dev/stderr /var/log/nginx/error.log

EXPOSE 80 443
I don’t even technically need port 443, because that is a port if you set up https (which I’m not setting up) but I really was that lazy, and put it anyway.
Great! Now we need to add some commands to our run.sh to start the web server, serve the directory with python, and then create a simple redirect file. First, let’s start nginx:
service nginx start
Docker is running as sudo, so we don’t need to write sudo service nginx start, as would be the case on most systems. We then change into the folder /code/reports to serve it using python (remember our script plops a bunch of rendered .html files into here. We also print a little “this is what’s going on!” for the user:
cd /code/reports
echo "PREPARING HTML RESULTS..."
The way web servers work, the default settings have some folder that is serving static content. For nginx that is usually /var/www/html, and if you peek in there after installation you will see a default index provided by nginx. This means that if the user browses to the ip address of the image with the web server, the user will see the content here. SO what do we want to do? We want to:
- find the IP address
- redirect the user to our python port serving our files.
Those steps look like this. We can use awk to grab the container’s IP address from /etc/hosts, and then we plug that into a meta html tag to do the redirect, with a 0 to specify we don’t want to pause:
IPADDRESS=$(awk 'END{print $1}' /etc/hosts)

# Create a redirect page in html root
cat << EOF > /var/www/html/index.html
<!DOCTYPE html>
<html>
<head>
    <meta charset="UTF-8">
    <meta http-equiv="refresh" content="0;URL='http://$IPADDRESS:9999'" />
</head>
</html>
EOF
We also want to tell the user the address, so we add this to the end:
echo "Open browser to $IPADDRESS, and press CTRL+C to stop."
and finally, once we are inside of the reports folder, we use our container’s python to serve it:
python -m SimpleHTTPServer 9999
Note that when I installed python, I installed version 2.7. If you have python3 or greater, that same command looks like this:
python -m http.server 9999
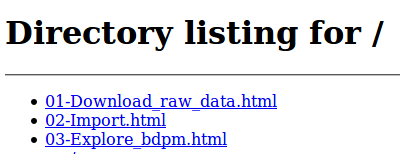
So when you go to a url that looks something like http://172.0.0.2 it redirects you to http://172.0.0.2:9999. But we still have a problem! If you browse to either of those sites, you don’t see something pretty, you see a web directory listing:
GROSS! We want to make this pretty. But how can we do it dynamically? The answer is to generate a silly index.html on the fly, with direct links to each of our output files. I did this by first throwing together a quick template, and then writing a small python script, functions/make_html.py to take the folder to render as input:
#!/usr/bin/env python
# This is a little python script to render results into a template
import sys
import os
from glob import glob

# The input is the folder with results .html files
# The results index.html and template.html are also assumed here
folder = sys.argv[1]
template_folder = sys.argv[2]

output_file = "%s/index.html" %(folder)
template_file = "%s/template.html" %(template_folder)
sub = "[[RESULTS]]"

results_files = glob("%s/*.html" %(folder))
results_files.sort()

replacement = ""
for results_file in results_files:
    relative_path = os.path.basename(results_file)
    replacement = "%s\n<li><a href='%s'>%s</a></li>" %(replacement,
                                                       relative_path,
                                                       relative_path)
with open(template_file,'r') as filey:
    content = filey.read()

content = content.replace(sub,replacement)

with open(output_file,'w') as filey:
    filey.writelines(content)
The above snippet reads in the files in folder that end with .html, and writes them into a string as an html list, and then replaces the content [[RESULTS]] in the template with that string. I then write the output file, one called index.html, directly into the same folder (/code/reports) that have the other .html files that is being served by my python script. The above is so hacky I didn’t even write functions! We run the above by adding this line to our run.sh:
# [command] output directory | template directory
/usr/bin/python /code/functions/make_html.py /code/reports /code/templates
And then the result is much more pleasing for the user, specifically instead of seeing the file index you see this in your browser.
In a nutshell, how did we expose the result to the user?
We decided that static html was the format to share, and then use nginx and python to serve a folder to show the user report output.
Step 4. Share away, Merrill!
Sharing is a little more than just putting a container on Docker Hub. You should include with the repository (and code base) instructions for running, and changing your container. For example, I’d first tell the user to install Docker. The “quick start” is the command to run the container:
docker run -t --name explore_drug_database vanessa/explore_drug_database
And give detail about what you are doing. In the case above, I note that we are using the -t argument to ensure that any kill signals (eg, Control C) to stop the server are sent to the container terminal. We then might mention that the --name argument makes it easy to stop and remove the container:
docker stop explore-drug-database
docker rm explore-drug-database
We then might tell the user what to expect from the container, in terms of output, and what happens next. And finish by providing instructions for how to develop or “peek into” the container. E.g.,:
git clone https://github.com/vsoch/explore_drug_database
cd explore_drug_database
docker build -t vanessa/explore_drug_database .
and to poke around in the shell:
docker run -it vanessa/explore_drug_database bash
Summary
I hope this post has been somewhat useful to help with showing general options for serving an analysis result, and more importantly, the thinking process to make it. This entire thing happened in probably 30 minutes to an hour, but in a half sleep state. In an awake state, it probably would take 20-30 minutes, and this amount of time investment is worth it for reproducibility. Further, once you have a few templates that you like, it becomes very easy to plug in other (similar) analyses to share. Party on, dinosaurs!
Suggested Citation:
Sochat, Vanessa. "R Analysis in a Container." @vsoch (blog), 29 Jan 2017, https://vsoch.github.io/2017/explore-drug-database/ (accessed 14 Jul 26).