I’m working on developing Research Software Engineering Services to drive initiative to support Research Software Engineers at Stanford, and what would the effort be without having a little fun? Since learning about the value of checklists and being tickled by how something so simple can be so wonderful for practices from technology to healthcare, I’ve wanted to design a checklist that, based on my own experience, is a solid affirmation of the reproducibility of a repository. But I didn’t just want text on a screen. I wanted:
- An interactive tool
- Generation of criteria from version controlled data files with identifiers for each criteria
- A badge generated with text and color that corresponded to a score
- To serve custom badges statically on GitHub pages
The last point was the most challenging, because it would come down to parsing svg attributes from a URL. Thankfully, this is something that we can do. In this post, I’ll walk you through the user experience, and along the way show tidbits about how it was done. If you don’t care, just check out the generator, or play around with the url parameters for a generated badge.
The Checklist
I had first written the criteria into the html on a page, and then I groaned. What if I wanted to easily change something, or have a second page with the same content? I needed the content to be fed in from a data file. Yaml to the rescue!
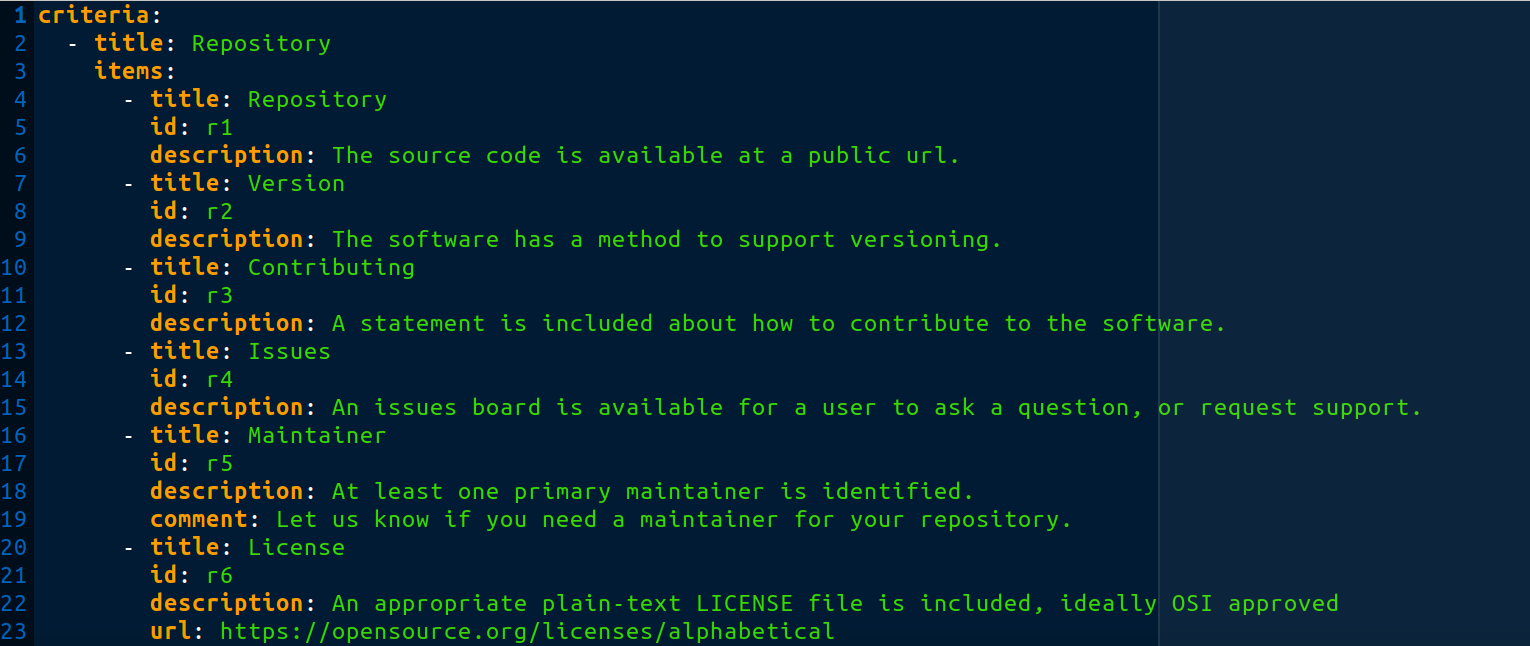
In the criteria I included features of the repository, documentation, continuous integration, and artifacts, and each was given a unique identifier. Using a data file instead of writing directly to html allowed me to render the content onto two pages - one for the generation of the badge, and one for the badge’s link that would show the requester details about what criteria were included.
Generating the Badge
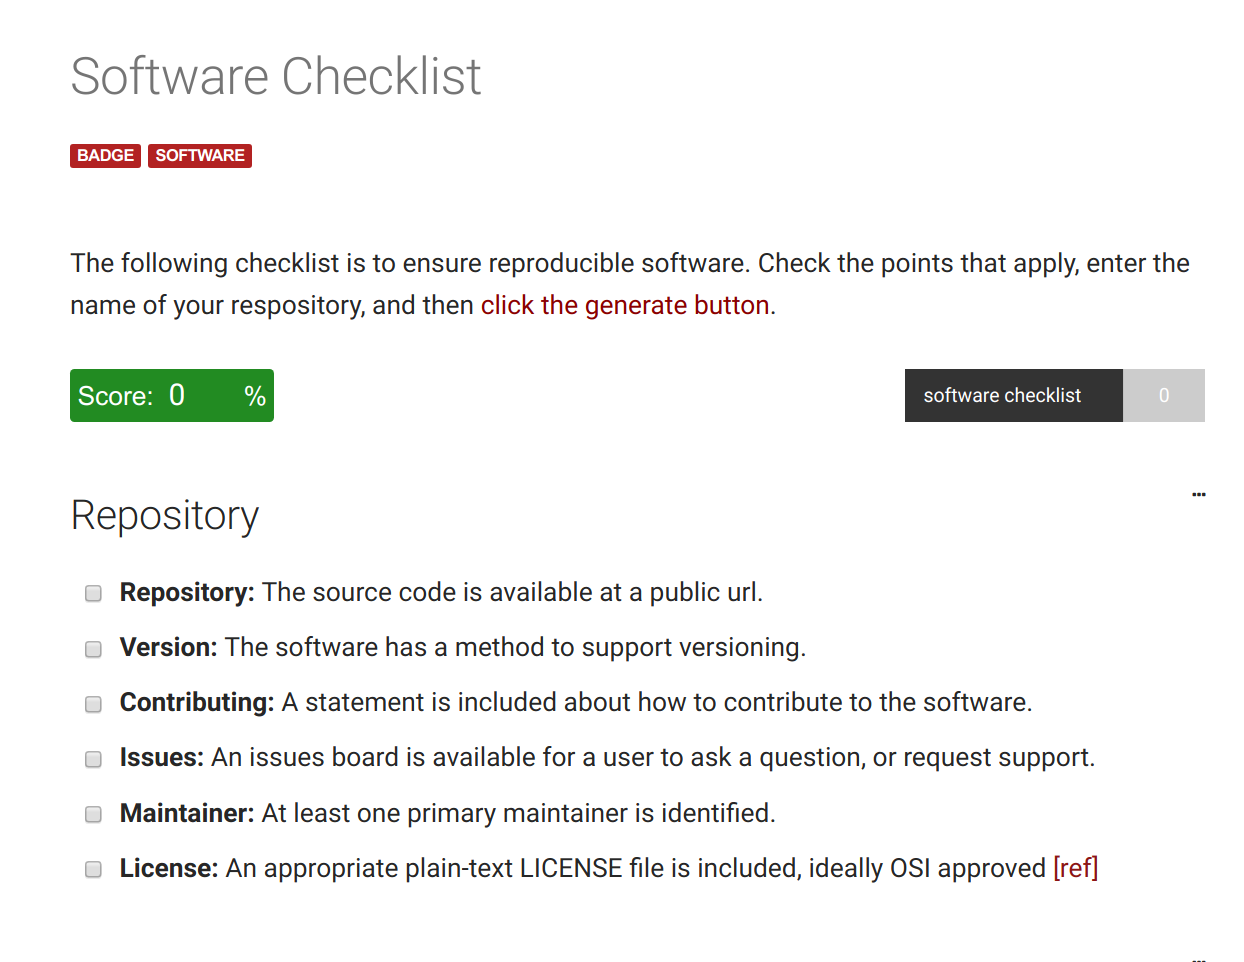
Let’s walk through that. When we go to the generator, we start with an empty badge, and a bunch of checkboxes.
As we click through items, not only does the score get updated, but the color of the badge also changes!
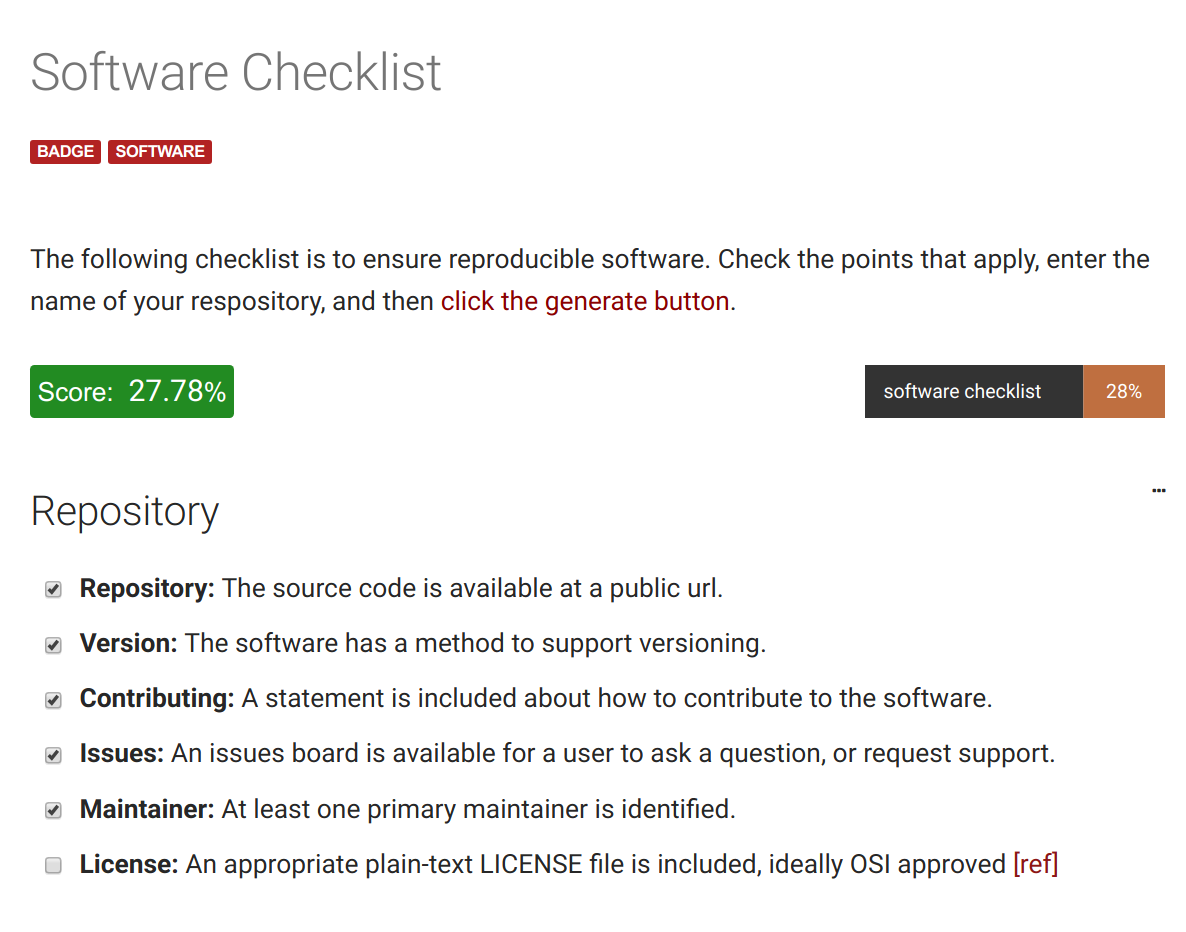
I used colorDot to generate a nice spectrum, and these colors are also part of the data. Yes, this means if I add a criteria, I just need to add another color code to the list, and everything will update.

When you get to the bottom, you can click the Generate button to get the Markdown to include with your repository!
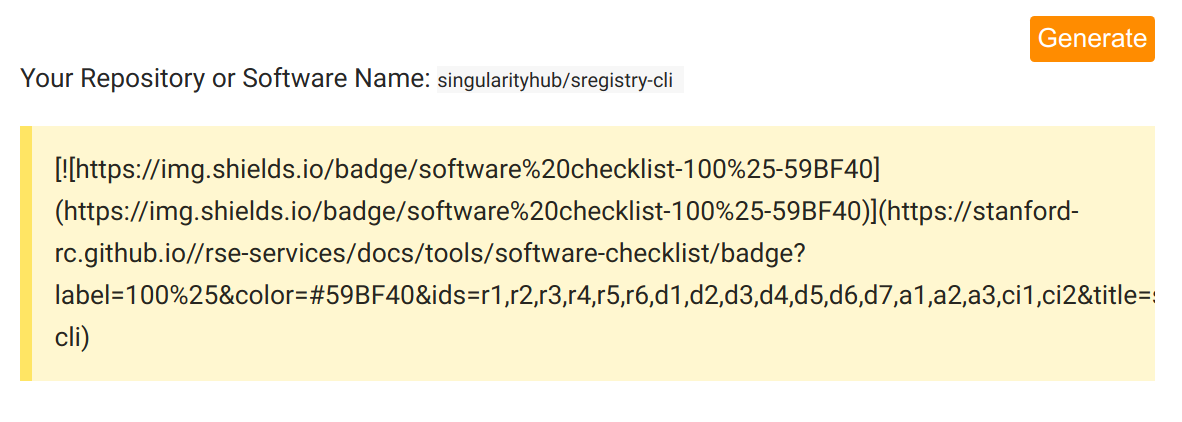
The overflow is hidden, but everything will copy paste for the user. And here is that actual markdown in action, rendered on this page!
This badge lives in the wild at singularityhub/sregistry-cli. Before we move on too quickly, let’s walk through the components that you see.
The SVG
I don’t have great graphics software, but I actually pulled off generating the base svg using Inkscape. I first tried generating it in a text editor, but getting the paths just right was really hard. For others that try this, may the force be with you!
SVG Parameters
If you inspect the source of the svg at the URL, you’ll notice that there is a script embedded with it. The script allows us to use parameters external to the svg (such as from the url) to define content within it. For our URL with the image, we define a label (the right portion with the score), and a color (the color corresponding to the final score). That renders directly into the correctly generated badge. If you are interested, that page is simply a jekyll include template that can take default parameters for color and extra attributes, along with from the URL via the embedded script.
But now I am going to break your heart a little bit. This wouldn’t work to embed on GitHub in a markdown, because GitHub has to sanitize parameters for svg. In fact, if you try to include the actual (working image) that you just clicked above as is, it’s disappointingly empty:
![]()
Badges.io
I was so heartbroken when the entire project came crumbling down due to not being able to embed the graphic in GitHub flavored markdown, which is just about the only place I needed it to work. But for me, initial heartbreak translates pretty quickly to dinosaur-level motivation. I tried various tricks with embedding (iframe, embed, and an image as base64, none of them worked). I also tried a variation of having the user download the image, and while this worked, I don’t think that downloading an image and having to add it to the repository’s code is easy enough or something that I’d want to do. I then realized that I could use badges.io to generate just the image, and use the dynamic bits on the generator and inspection pages. The one thing I’ve learned about this perception of failure is that I’ve only failed when I’ve given up. There is always something to try, and in this case it meant being resourceful. Thank you badges.io, for existing, powering the embedded versions of my little badges!
Inspecting the Score
For our URL with the details that the image links to, we also define the color and label, but we add to that a title for the repository, and a list of identifiers that correspond with the user’s choices. When you click on the badge, you are taken to this URL, and from it you can view the previously selected checkboxes of the user, along with the score and correct color. Here is that details page:
It’s like a details page that the repository can proudly show to indicate “reproducible practices here!”
Final Notes
Is Your Software Reproducible?
Give the checklist a try, and see if your software is reproducible! A cool detail is that if your score changes over time, you’ll still be able to access previously generated badges in the git history of your repository. If you need any help, don’t be afraid to reach out, especially if you are at Stanford - I’m looking for you to do exactly that.
Lessons Learned
It took me almost an entire Saturday workday to figure out how to get this all working with Jekyll, Vue.js, rendering from common data files, and working to dynamically generate and then serve on GitHub pages. For every tiny thing that worked, I can assure you that there were about 10 that didn’t. The important thing is not to do, but to keep going until you are done. Happy Saturday, friends.
Suggested Citation:
Sochat, Vanessa. "The Software Checklist." @vsoch (blog), 03 Aug 2019, https://vsoch.github.io/2019/software-checklist/ (accessed 14 Jul 26).