Getting Started
Features
User Interaction
If you look at any header field on the page, you’ll notice three little dots (called an elipsis) that if you mouse over, will open up to give you options for Permalink, Edit this Page, and Ask a Question. These are to ensure that a user is able to link someone else directly to a section of interest (Permalink), contribute a fix or suggestion to the documentation itself on GitHub (Edit this page) or open up an issue that links directly to where the user has the question. Documentation is hard, and sometimes unclear, and the site should make it easy to ask a question or suggest a change.
Search
The entire site, including posts and documentation, is indexed and then available
for search at the top of the page. Give it a try! The content is rendered
from this file
into this json data structure
that feeds into the search defined in assets/js/application.js. If you want to
exclude any file from search, add this to its front end matter:
---
layout: null
excluded_in_search: true
---
The example above is for a css file in the assets folder that is used as a template, but should not be included in search. If you need to disable search entirely for a page, you can add the disable_search header:
---
layout: null
disable_search: true
---
Disabling search will remove the search box at the top.
External Search
If you have an external site with a search GET endpoint (meaning one that ends
in ?q=<term>, then you can automatically link page tags to search this endpoint.
For example, on an HPC site I’d want a tag like “mpi” to do a search on
http://ask.cyberinfrastructure.org for mpi.
See the tags section below for how to configure this.
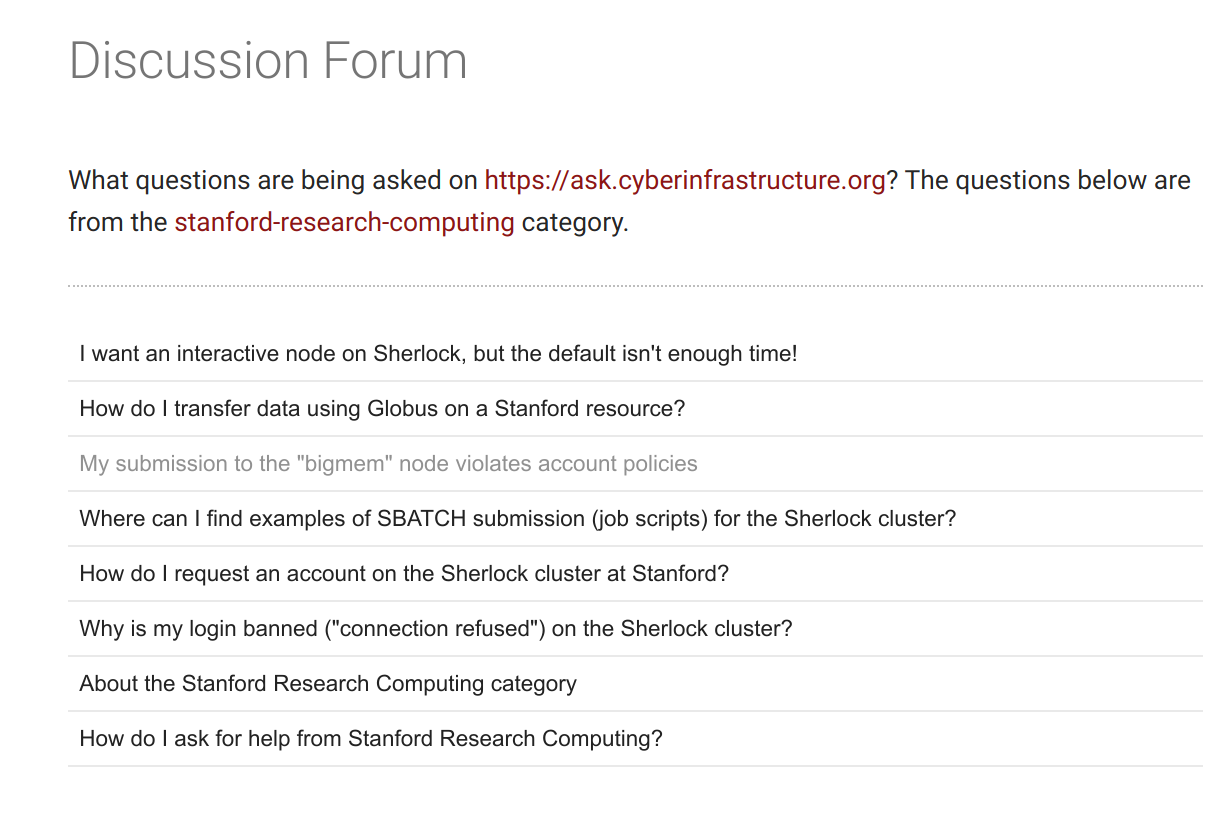
Discourse Forum
If you have a discourse forum that you want to show questions from,
there is an easy way to embed them here. Specifically, there is an include {% include embed/discourse.html %} that is deployed at /forum and added to the table of contents under Extra -> Discussion Forum. You can add this include to wherever you want the questions to appear. The follow parameters are defined in the config.yml:
discourse_site: "https://ask.cyberinfrastructure.org"
discourse_per_page: 10
discourse_category: "stanford-research-computing"
discourse_tags: null # comma separated string, leave null to not filter
For the above, we embed 10 topics from the stanford-research-computing category of AskCI, and render 10 per page. Since there are few topics, we don’t filter down to tags. If we did, we should provide a list of comma separated values. The page looks like this and is live here:
Note that you aren’t required to only embed one category - you can easily modify the code to include more than one by copy pasting the d-topics-list.
info
To use this for your discourse site, you must enable the 'embed topics' setting.
Documentation
Documentation pages should be written in the docs folder of the repository,
and you are allowed to use whatever level of nesting (subfolders) that
works for you! It’s a Jekyll collection, which means that you
can add other content (images, scripts) and it will be included for linking to.
Organization
The url that will render is based on the path. For example, if we had the following structure:
docs/
  getting-started.md
  clusters/
     sherlock/
         getting-started.md
The first page (akin to the one you are reading) would render at it’s path,
/docs/getting-started/.
Linking
From that page, we could provide the direct path in markdown to any subfolder to link to it, such as the second getting started page for sherlock:
[example](clusters/sherlock/getting-started.md)
Here is an example link to a relative path of a file (example-page.md)
in the same directory, and from that page you can test linking to a subfoldr.
In the case of not having a subfolder, we could write the link out directly:
[example]({{ site.baseurl }}/docs/clusters/sherlock/getting-started.md)
or better, there is a shortand trick! We can use the provided “includes” template to do the same based on the path to create a link:
{% include doc.html name="Sherlock Cluster" path="clusters/sherlock/getting-started" %}
The path should be relative to the docs folder.
Headers
While this is a personal preference, it’s recommended to create nesting of your docs via markdown sections in each of the files over creating more files. For example, take a look at the right side of this page, and you’ll see a level represented for each header. This strategy means that we have fewer overall pages (easier to find content) that are still browsable easily via search or the table of contents on the right.
Pages
The pages folder uses the same page layout, but is not part of the docs collection.
The two are provided to create a distinction between website pages (e.g., about,
feed.xml) and documentation pages.
Navigation
Whether you place your page under “pages” or “docs,” for those pages that you want added to the navigation,
you should add them to _data/toc.yml. If you’ve defined a permalink in the
front end matter, you can use that (e.g., “About” below). If you haven’t and
want to link to docs, the url is the path starting with the docs folder.
Here is an example of a flat structure:
  - title: "Getting Started"
    url: "docs/getting-started/"
  - title: "About"
    url: "about"
  - title: "News"
    url: "news"
And here is an example with nested children (currently active in the example):
  - title: "Getting Started"
    url: "docs/getting-started"
    children:
      - title: Features
        url: "docs/getting-started#features"
      - title: Development
        url: "docs/getting-started#development"
      - title: Customization
        url: "docs/getting-started#customization"
  - title: "About"
    url: "about"
  - title: "News"
    url: "news"
If you want to add an external url for a parent or child, do this:
  - title: GitHub Repository
    external_url: https://www.github.com/vsoch/mkdocs-jekyll
News Posts
It might be the case that your site or group has news items that would
warrent sharing with the community, and should be available as a feed.
For this reason, you can write traditional posts in the _posts
folder that will parse into the site feed
The bottom of the page links the user to a post archive, where posts are organized
according to the year.
Buttons
Buttons come in a nice array of colors. Here is the code for a basic example,
and you’d want to vary the .btn-<tag> to get different classes.
<button class="btn btn-success">.btn-success</button>
Badges
For news post items, it’s nice to be able to tag it with something that indicates a status, such as “warning” or “alert.” For this reason, you can add badges to the front end matter of any post page, and they will render colored by a type, with the tag of your choice. For example, here is an example header for a post:
---
title:  "Two Thousand Nineteen"
date:   2019-06-28 18:52:21
categories: jekyll update
badges:
 - type: warning
   tag: warning-badge
 - type: danger
   tag: danger-badge
---
And here is the post preview with the rendered badges that it produces:
warning-badge danger-badge
And the other badges that you can define include success, info, secondary, and primary.
success-badge info-badge secondary-badge primary-badge
Alerts
What is an alert?
An alert is a box that can stand out to indicate important information. You can choose from levels success, warning, danger, info, and primary. This example is an info box, and the code for another might look like this:
{% include alert.html type="info" title="Here is another!" %}
Just for fun, here are all the types:
tldr
TLDR means too long, didn't read
tip
This is a tip.
info
This is a piece of information, or you can use todo.
question
This is a question.
warning
This is a warning
danger
This alerts danger!
success
This alerts success
Quotes
You can include block quotes to emphasize text.
Here is an example. Isn’t this much more prominent to the user?
Development
Initially (on OS X), you will need to setup Brew which is a package manager for OS X and Git. To install Brew and Git, run the following commands:
/usr/bin/ruby -e "$(curl -fsSL https://raw.githubusercontent.com/Homebrew/install/master/install)"
brew install git
If you are on Debian/Ubuntu, then you can easily install git with apt-get
apt-get update && apt-get install -y git
Install Jekyll
You can also install Jekyll with brew.
$ brew install ruby
$ gem install jekyll
$ gem install bundler
$ bundle install
On Ubuntu I do a different method:
git clone https://github.com/rbenv/ruby-build.git ~/.rbenv/plugins/ruby-build
echo 'export PATH="$HOME/.rbenv/plugins/ruby-build/bin:$PATH"' >> ~/.bashrc
exec $SHELL
rbenv install 2.3.1
rbenv global 2.3.1
gem install bundler
rbenv rehash
ruby -v

# Rails
curl -sL https://deb.nodesource.com/setup_4.x | sudo -E bash -
sudo apt-get install -y nodejs
gem install rails -v 4.2.6
rbenv rehash

# Jekyll
gem install jekyll
gem install github-pages
gem install jekyll-sass-converter

rbenv rehash
Get the code
You should first fork the repository to your GitHub organization or username, and then clone it.
$ git clone https://github.com/<username</mkdocs-jekyll.git docs
$ cd docs
You can clone the repository right to where you want to host the docs:
$ git clone https://github.com/<username>/mkdocs-jekyll.git docs
$ cd docs
Serve
Depending on how you installed jekyll:
jekyll serve
# or
bundle exec jekyll serve
Preview
We provide a CircleCI configuration recipe that you
can use to preview your site on CircleCI before merging into master. You
should follow the instructions to set up a project,
and then in the project settings be sure to enable building forked build requests,
and to cancel redundant builds. The preview will be built on CircleCI, and saved
to static files for you to browse. The only change you will need is to edit
the static files location to be the name of your respository, which is at te
bottom of the .circleci/config.yml file:
      - store_artifacts:
          path: ~/repo/_site
          destination: mkdocs-jekyll
In the above, the destination should coincide with your repository name.
Remember that for most links, CircleCI won’t honor an index.html file in a subfolder
(e.g., subfolder/index.html will not be served as subfolder/, so for example,
you might need to turn this:
https://<circleci>/0/mkdocs-jekyll/docs/getting-started/
into this:
https://<circleci>/0/mkdocs-jekyll/docs/getting-started/index.html
Customization
config.yml
To edit configuration values, customize the _config.yml. Most are documented there, and please open an issue if you have questions.
Adding pages
To add pages, write them into the pages folder.
You define urls based on the permalink attribute in your pages,
and then add them to the navigation by adding to the content of _data/toc.yml.
Tags
If you include tags on a page, by default they won’t link to anything. However,
if you define a tag_search_endpoint url in your configuration file, by clicking
the tag, the user will be taken to this page to search for it. As an example,
we define the current search endpoint to be Ask Cyberinfrastructure, and
page tags link to a search on it:
tag_search_endpoint: https://ask.cyberinfrastructure.org/search?q=
tag_color: danger # danger, success, warning, primary, secondary, info
Note that you can also choose a color! The tags appear at the top of the page, as they do on this page. The tags should be defined like this in the front end matter:
tags:
 - jekyll
 - github
They are appended to the first h1 block, so generally your pages should have a header.