vsoch
vanessa villamia sochat
-
Oranges Apart
Rows upon rows, of choices to make! Tiny mountains of apple, orange and grape. The flurry of voices, and far cries around, “Only the best for sale! Not available year round!” The wafts of crisp peach, and then followed by cream. The little man was wide eyed - had he entered a dream? Hiding a nickel against his tiny brown wrist, the opportunity to spend it was too much to miss. The warmth of a hand that led him this day, it was the same hand that would lead him astray. The rest so predictable, but not the mind of this boy. No interest had he, in car, fence, or toy. His hunger, his famish, a rash burned in his look could only be soothed by the touch of a book.
A gesture toward fruit, and then a breaking of glass. A fear deep in his gut started to mass. Like full pots of curry rising to top, the tears bubbled and started to drop. The hand he held dear pushed him away. “You are too young boy, you put me to shame!” An entire display strewn onto ground. The life of the market held breath, and waited for sound.
Emerged from the silence, an old man stretched out his hand. “Why boy, do not mourn, we do what we can.” The tiny hand was cold from clenching the coin, and it is with this knob the old man’s hand did join. He picked up a basket, and started to move, picking up orange from hole, foot, and groove. With boy in one hand, and vision behind, there wasn’t a single doubt he couldn’t unwind. But when the basket was full, and it wasn’t enough space, the hope quickly withdrew from the boy’s sorrowed face.
“We’ll never get them all,” the boy forlongingly said. There is so much to take, and only so much room in my head. The old man looked down at the basket, curiosity in his eye. He looked back to the boy. “Tell me cause for this long, lonely sigh?”
“Our basket is sized according to rule. As with 12 seats, there are only 12 allowed in school. The ones we have chosen, are the ones we must take. There is no going back, we have made final stake. And yet you’ve chosen the ones that seem to be brown. They are freckled and different, they carry no crown. If I am to use my earnings on such, my father will be disappointed to lose so much.
The rush of his tears filled up the place, they covered the market, every corner and space. The amount to be known, was too much to take, but without such understanding, no scholar he’d make. The oranges were lost, reduced to the dirt by his feet, and the expectations of himself for the market he’d never meet. Amongst the smell of citrus, sun, and self doubt, his lips curled into a long final pout.
Now the old man, you see, also carried this pain. But he knew that personal condemnation had nothing to gain.
The fruit is prolific, he said with a smile. The joys that you might feel, they are equaled by sorrows. You might have one today, but it won’t be the same one tomorrow. You will never truly have one; from time you cannot borrow. But the experience of the flesh, the sweet juice run down your face. This joy belongs to you, it need not carry time or have place. Your evaluation of scope, you think you find rule. And perhaps this is how they teach you in school? But when one is great, must two then be better? What is one and two, but concepts of matter? The oranges you see, are not for the eye. Yet this is how you judge them, and by counting your pie. The colored bumps of brown, black and gold, indeed be sign that the fruit might be old. What you do not see, unless you take chance, is the way they tickle the tongue, the flavors that dance. It cannot be written in any scholarly pen. The nows take all preference, and never the when.
The boy understood when he looked down at his feet. His sampling of the space was never complete. But this was the beauty of life, not picking up all fruit to take. The cupfulls of unknown make for more interesting cake. The uncertainty hits hard, direct like a shot, and only this force can influence your plot. The fruit left behind carries no state. It is this truth left behind that you cannot partake.
He left from the market; he found what he sought. Unexpected by all, just one orange he bought. The burden of price was no longer useful to him, nor the incessant expectation to react to such whim. It was the best purchase he’d made, because it wasn’t driven by fear. It was his acceptance of blindness that would make him a seer. The journey for himself was his knowledge and heart. And he’d found the answer one orange apart.
for my dear friend
· -
The Research Container Standard
Containers, on the level of the operating system, are like houses. We carry an expectation that we find food in the kitchen, a bed in a bedroom, and toiletries in a bathroom. We can imagine a fresh Ubuntu image is akin to a newly furnished house. When you shell in, most of your expectations are met. However, as soon as a human variable is thrown into the mix (we move in), the organization breaks. Despite our best efforts, the keys sometimes end up in the refrigerator. A sock becomes a lone prisoner under a couch cushion. The underlying organization of the original house is still there with the matching expectations, but we can no longer trust it. What do I mean? If I look at a house from the outside and someone asks me “Are the beds in the bedroom?” I would guess yes. However, sometimes I might be wrong, because we are looking at a Bay Area house that has three people residing in a living area.
Now imagine that there is a magical box, and into it I can throw any item, or ask for any item, and it is immediately retieved or placed appropriately. Everything in my house has a definitive location, and there are rules for new items to follow suit. I can, at any moment, generate a manifest of everything in the house, or answer questions about the things in the house. If someone asks me “Are the beds in the bedroom?” knowing that this house has this box, I can answer definitively “yes!”
The house is the container, and the box represents what a simple standard and software can do for us. In this post I want to discuss how our unit of understanding systems has changed in a way that does not make it easy for reproducibility and scalable modularity to co-exist in harmony.
Modular or Reproducibile?
For quite some time, our unit of understanding has been based on the operating system. It is the level of magnification at which we understand data, software, and products of those two things. Recently, however, two needs have arisen.
We simultaneously need modularity and reproducible practices. At first glance, these two things don’t seem very contradictory. A modular piece of software, given that all dependencies are packaged nicely, is very reproducible. The problem arises because it’s never the case that a single piece of software is nicely suited for a particular problem. A single problem, whether it be sequencing genetic code, predicting prostate cancer recurrence from highly dimensional data, or writing a bash script to play tetris, requires many disparate libraries and other software dependencies. Given our current level of understanding of information, the operating system, the best that we can do is give the user absolutely everything - a complete operating system with data, libraries, and software. But now for reproducibility we have lost modularity. A scientific software packaged in a container with one change to a version of a library yields a completely different container despite much of the content duplicated. We are being forced to operate on a level that no longer makes sense given the scale of the problem, and the dual need for modularity and dependency. How can we resolve this?
Level of Dimensionality to Operate
The key to answering this question is deciding on the level, or levels, of dimensionality that we will operate. On one side of the one extreme, we might break everything into the tiniest pieces imaginable. We could say bytes, but this would be like saying that an electron or proton is the ideal level to understand matter. While electrons and protons, and even one level up (atoms) might be an important feature of matter, arguably we can represent a lot more consistent information by moving up one additional level to a collection of atoms, an element. In file-system science an atom matches to a file, and an element to a logical grouping of files to form a complete software package or scientific analysis. Thus we decide to operate on the level of modular software packages and data. We call these software and data modules, and when put together with an operating system glue, we get a full containers. Under this framework we make the following assertions:
a container is the packaging of a set of software and data modules, reproducible in that all dependencies are included
building multiple containers is efficient because it allows for re-use of common modules
a file must not encompass a collection of compressed or combined files. I.e., the bytes content
each software and data module must carry, minimally, a unique name and install location in the systemThis means that the skeleton of a container (the base operating system) is the first decision point. This will filter down a particular set of rules for installation locations, and a particular subset of modules that are available. Arguably, we could even take organizational approaches that would work across hosts, and this would be especially relevant for data containers that are less dependent on host architecture. For now, let’s stick to considering them separately.
Operating System --> Organization Rules --> Library of Modules --> [choose subset] --> New ContainerUnder this framework, it would be possible to create an entire container by specifying an operating system, and then adding to it a set of data and software containers that are specific to the skeleton of choice. A container creation (bootstrap) that has any kind of overlap with regard to adding modules would not be allowed. The container itself is completely reproducible because it (still) has included all dependencies. It also carries complete metadata about its additions. The landscape of organizing containers also becomes a lot easier because each module is understood as a feature.
TLDR: we operate on the level of software and data modules, which logically come together to form reproducible containers.
Metric for Assessing Modules
Given that a software or data module carries one or more signatures, the next logical question is about the kinds of metrics that we want to use to classify any given module.
Manual Annotation
The obvious approach is the human labeled organization, meaning that a person looks at a software package, calls it “biopython” for “biology” in “python” and then moves on. Or perhaps it is done automatically based on the scientists domain of work, tags from somewhere, or a journal published in. This metric works well for small, manageable projects, but is largely unreliable as it is hard to scale or maintain.
Functional Organization
The second is functional organization. We can view software as a black box that performs some task, and rank/sort the software based on comparison of that performance. If two different version of a python module act exactly the same, despite subtle differences in the files (imagine the silliest case where the spacing is slightly different) they are still deemed the same thing. If we define a functional metric likes “calculates standard deviation” and then test software across languages to do this, we can organize based on the degree to which each individual package varies from the average. This metric maps nicely to scientific disciplines (for which the goal is to produce some knowledge about the world. However if this metric is used, the challenge would be for different domains to be able to robustly identify the metrics most relevant, and then derive methods for measuring these metrics across new software. This again is a manual bottleneck that would be hard to overtake. Even if completely programmatic, data driven approaches existed for deriving features of these black boxes, without the labels to make those features into a supervised classification task, we don’t get very far.
File Organization and Content
A third idea is a metric not based on function or output, but simple organizational rules. We tell the developer that we don’t care what the software package does, or how it works, but we assert that it must carry a unique identifier, and that identifier is mapped to a distinct location on a file system. With these rules, it could be determined immediately if the software exists on a computer, because it would be found. It would be seamless to install and use, because it would not overwrite or conflict with other software. It would also allow for different kinds of (modular) storage of data and software containers.
For the purposes of this thinking, I propose that the most needed and useful schema is functional, but in order to get there we must start with what we already have: files and some metadata about them. I propose the following:
Step 1 is to derive best practices for organization, so minimally, given a particular OS, a set of software and data modules have an expected location, and some other metadata (package names, content hashes, dates, etc.) about them.
Step 2, given a robust organization, is to start comparing across containers. This is where we can do (unsupervised) clustering of containers based on their modules.
Step 3, given an unsupervised clustering, is to start adding functional and domain labels. A lot of information will likely emerge with the data, and this is the step I don’t have vision for beyond that. Regardless of the scientific questions (which others vary in having interest in) they are completely reliant on having a robust infrastructure to support answering them.The organization (discussed more below) is very important because it should be extendable to as many operating system hosts as possible, and already fit into (what exist/are) current cluster file-systems. We should take an approach that affords operating systems designing themselves. E.g., imagine someday that we can do the following:
We have a functional goal. I want an operating system (container) optimized to do X. I can determine if X is done successfully, and to what degree.
We start with a base or seed state, and provide our optimization algorithm with an entire suite of possible data and software packages to install.
We then let machine learning do it’s thing to figure out the optimized operating system (container) given the goal.Since the biggest pain in creating containers (seems to be) the compiling and “getting stuff to work” part, if we can figure out an automated way to do this, one that affords versioning, modularity, and transparency, we are going to be moving in the right direction. It would mean that a scientist could just select the software and data he/she wants from a list, and a container would be built. That container would be easily comparable, down the difference in software module verison, to another container. With a functional metric of goodness, the choices of data and software could be somewhat linked to the experimential result. We would finally be able to answer questions like “Which version of biopython produces the most varying result? Which brain registration algorithm is most consistent? Is the host operating system important?
If we assume that these are important questions to be able to answer, and that this is a reasonable approach to take, then perhaps we should start by talking about file system organization.
File Organization
File organization is likely to vary a bit based on the host OS. For example, busybox has something like 441 “files” and most of them are symbolic links. Arguably, we might be able to develop an organizational schema that remains (somewhat) true to the Filesystem Hierarchy Standard, but is extendable to operating systems of many types. I’m not sure how I feel about this standard given that someday we will likely have operating systems designing themselves, but that is a topic for another day.
Do Not Touch
I would argue that the following folders, most scientific software should not touch:
/boot: boot loader, kernel files/bin: system-wide command binaries (essential for OS)/etc: host-wide configuration files/lib: again, system level libraries/root: root’s home. Unless you are using Docker, putting things here leads to trouble./sbin: system specific binaries/sys: system, devices, kernel features
Variable and Working Locations
/run: run time variables, should only be used for that, during running of programs./tmp: temporary location for users and programs to dump things./home: can be considered the user’s working space. Singularity mounts by default, so nothing would be valued there. The same is true for..
Connections
Arguably, connections for containers are devices and mount points. So the following should be saved for that:
/dev: essential devices/mnt: temporary mounts./srv: is for “site specific data” served by the system. Perhaps this is the logical mount for cluster resources?
The point that “connections” also means mounting of data has not escaped my attention. This is an entire section of discussion.
Data
This is arguably just a mount point, but I think there is one mount root folder that is perfectly suited for data:
/media: removable media. This is technically something like a CD-ROM or USB, and since these media are rare to use, or used to mount drives with data, perhaps we can use it for exactly that.Data mounted for a specific application should have the same identifier (top folder) to make the association. The organization of the data under that location is up to the application. The data can be included in the container, or mounted at runtime, and this is under the decision of the application. Akin to software modules, overlap in modules is not allowed. For example, let’s say we have an application called bids (the bids-apps for neuroimaging):
the bids data would be mounted / saved at
/media/bids.
importing of distinct data (subjects) under that folder would be allowed, eg/media/bids/sub1and/media/bids/sub2. importing of distinct data (within subject) would also be allowed, e.g.,/media/bids/sub1/T1and/media/bids/sub1/T2.
importing of things that get overwritten would not be allowed.An application’s data would be traceable to the application by way of it’s identifier. Thus, if I find
/media/bidsI would expect to find either/opt/bidsor equivalent structure under/usr/local(discussed next).Research Software
Research software is the most valuable element, along with data, and there are two approaches we can take, and perhaps define criteria for when to use each. There must be general rules for packaging, naming, and organizing groups of files. The methods must be both humanly interpretable, and machine parsable. For the examples below, I will reference two software packages, singularity and sregistry:
Approach 1: /usr/local
For this approach, we “break” packages into shared sub-folders, stored under
/usr/local, meaning that executables are in a shared bin:/usr/local/ /bin/ singularity sregistryand each software has it’s own folder according to the Linux file-system standard (based on its identifier) under
/usr/local/[ name ]. For example, for lib:/usr/local/lib singularity/ sregistry/The benefits of this approach are that we can programatically identify software based on parsing
/usr/local, and just need one/binon the path. We also enforce uniqueness of names, and have less potential for having software with the same name in different bins (and making the determinant of which to use based on the$PATH). The drawbacks are that we have a harder time removing something from the path, if that is needed, and it will not always be the case that all programs need all directories. If we are parsing a system to discover software, for example, we would need to be very careful not to miss something. This is rationale for the next approach.Approach 2: /opt
This is a modular approach that doesn’t share the second level of directories. The
/optbin is more suited to what we might call a modern “app”. For this approach, each installed software would have it’s own sub-folder. In the example of using singularity and sregistry:/opt/ singularity/ sregistry/and then under each, the software could take whatever approach is necessary (in terms of organization) to make it work. This could look a lot like small clones of the Linux file system standard, eg:
/opt/
  singularity/
        /bin
        /lib
        /etc
        /libexec
or entirely different
/opt/
  singularity/
        /modules
        /functions
        /contrib
The only requirement is that we would need a way / standard to make the software accessible on the path. For this we could do one of the following:
require a
bin/folder with executables. The sub-folders in/optwould be parsed for/binand the bin folders added to the path. This would work nicely with current software distributed, which tends to have builds dumped into this kind of hierarchy.
In the case that the above is not desired because not all applications conform to having a bin, then the application would need to expose some environment variable / things to add to the$PATHto get it working.Approach 3: /opt with features of /usr/local
If the main problem with
/optis having to find/add multiple things to the path, there could be a quasi solution that places (or links) main executables in a main/binunder/opt. Thus, you can add one place to the path, and have fine control over the programs on the path by way of simply adding/removing a link. This also means that the addition of a software module to a container needs to understand what should be linked.Submodules
We are operating on the level of the software (eg, python, bids-app, or other). What about modules that are installed to software? For example, pip is a package manager that installs to python. Two equivalent python installations with different submodules are, by definition, different. We could take one of the following approaches:
represent each element (the top level software, eg python) as a base, and all submodules (eg, things installed with pip) are considered additions. Thus, if I have two installations of python with different submodules, I should still be able to identify the common base, and then calculate variance from that base based on differences between the two.
Represent each software version as a base, and then, for each distinct (common) software, identify a level of reproducibility. Comparison of bases would look at the core base files, while comparison of modules would look across modules and versions, and comparison within a single module would look across all files in the module.The goal would be to be able to do the following:
quickly sniff the software modules folder to find the bases. The bases likely have versions, and the version should ideally be reflected in the folder name. If not, we can have fallback approaches to finding it, and worse case, we don’t. Minimally, this gives us a sense of the high level guts of an image.
If we are interested in submodules, we then do the same operation, but just a level deeper within the site-packages of the base.
if we are interested in one submodule, then we need to do the same comparison, but across different versions of a package.Metadata
As stated above, a software or data module should have a minimal amount of metadata:
unique identifier, that includes the version
a content hash of it’s guts (without a timestamp)
(optionally, if relevant) a package manager
(optionally, if relevant) where the package manager installs toPermissions
Permissions are something that seem to be very important, and likely there are good and bad practices that I could image. Let’s say that we have a user, on his or her local machine. He or she has installed a software module. What are the permissions for it?
- Option 1 is to say “they can be root for everything, so just be conservative and require it.” A user on the machine that is not sudo, too bad. This is sort of akin to maintaining and all or nothing binary permission, but for one person, that might be fine. Having this one (more strict) level, as long as it’s maintained, wouldn’t lead to confusion between user and root space, because only operation in root space is allowed.
- Option 2 is to say “it’s just their computer, we don’t need to be so strict, just change permissions to be world read/write/execute.” This doesn’t work, of course, for a shared resource where someone could do something malicious by editing files.
- Option 3 is to say “we should require root for some things, but then give permissions just to that user” and then of course you might get a weird bug if you switch between root/user, sort of like Singularity has some times with the cache directory. Files are cached under
/rootwhen a bootstrap is run as root, but under the user’s home when import is done in user space.
I wish that we lived in a compute world where each user could have total control over a resource, and empowered to break and change things with little consequences. But we don’t. So likely we would advocate for a model that supports that - needing root to build and then install, and then making it executable for the user.
Overview
A simple approach like this:
fits in fairly well with current software organization
is both modular for data and software, but still creates reproducible containers
allows for programmatic parsing to be able to easily find software and capture the contents of a container.We could then have a more organized base to work from, along with clearer directions (even templates) for researchers to follow to create software. In the context of Singularity containers, these data and software packages become their own thing, sort of like Docker layers (they would have a hash, for example) but they wouldn’t be random collections of things that users happened to put on the same line in a Dockerfile. They would be humanly understood, logically grouped packages. Given some host for these packages (or a user’s own cache that contains them) we can designate some uri (let’s call it
data://that will check the user’s cache first, and then the various hosted repositories for these objects. A user could addanaconda3for a specific version to their container (whether the data is cached or pulled) like:import data://anaconda3:latestAnd a user could just as easily, during build time, export a particular software or data module for his or her use:
export data://mysoftware:v1.0and since the locations of mysoftware for the version would be understood given the research container standard, it would be found and packaged, put in the user’s cache (and later optionally / hopefully shared for others).
This would also be possible not just from/during a bootstrap, but from a finished container:
singularity export container.img data://anaconda3:latestI would even go as far to say that we stay away from system provided default packages and software, and take preference for ones that are more modular (fitting with our organizational schema) and come with the best quality package managers. That way, we don’t have to worry about things like “What is the default version of Python on Ubuntu 14.04? Ubuntu 14.06? Instead of a system python, I would use anaconda, miniconda, etc.
Challenges
Challenges of course come down to:
symbolic links of libraries, and perhaps we would need to have an approach that adds things one at a time, and deals with potential conflicts in files being updated.
reverse “unpacking” of a container. Arguably, if it’s modular enough, I should be able to export an entire package from a container.
configuration: we would want configuration to occur after the addition of a new piece, calling ldconfig, and then add the next, or things like that.
the main problem is library dependencies. How do we integrate package managers and still maintain the hierarchy?One very positive thing I see is that, at least for Research Software, a large chunk of it tends to be open source, and found freely available on Github or similar. This means that if we do something simple like bring in an avenue to import from a Github uri, we immediately include all of these already existing packages.
First Steps
I think we have to first look at the pieces we are dealing with. It’s safe to start with a single host operating system, Ubuntu is good, and then look at the following:
what changes when I use the package manager (apt-get) for different kinds of software, the same software with different versions
how are configurations and symbolic links handled? Should we skip package managers and rely on source? (probably not)
how would software be updated under our schematic?
where would the different metadata/ metrics be hosted?to one that does not
Organization and simple standards that make things predictible (while still allowing for flexibility within an application) is a powerful framework for reproducible software, and science. Given a standard, we can build tools around it that give means to test, compare, and make our containers more trusted. We never have to worry about capturing our changes to decorating the new house, because we decorate with a tool that captures them for us.
I think it’s been hard for research scientists to produce software because they are given a house, and told to perform some task in it, but no guidance beyond that. They lose their spare change in couches, don’t remember how they hung their pictures on the wall, and then get in trouble when someone wants to decorate a different house in the same way. There are plenty of guides for how to create an R or Python module in isolation, or in a notebook, but there are minimal examples outlined or tools provided to show how a software module should integrate into it’s home.
I also think that following the traditional approach of trying to assemble a group, come to some agreement, publish a paper, and wait for it to be published, is annoying and slow. Can open source work better? If we work together on a simple goal for this standard, and then start building examples and tools around it, we can possibly (more quickly) tackle a few problems at once.
1.the organizational / curation issue with containers
2.the ability to have more modularity while still preserving reproducibility, and
3.a base of data and software containers that can be selected to put into a container with clicks in a graphical user interface.Now if only houses could work in the same way! What do you think?
· -
The Counting Man
She pulled the papery dragon insect from her nose. It’s hyper-compressed form exploded instantly into an airy, delicate pattern of scales and space, and it flew around the room before perching on top of the bookshelf. She had been a sick child, and until she figured out that these dragons grew in her nose, life had been confusing and hard. It made it harder that no one, not even her parents, believed in the existence of her dragons, and she had no way to show them. They would emerge in her solitary living space, and fly out the window to hide in the trees to live a shady, verdant life. Did they know something that she did not? It was back in that window when she spent a lot of time wandering around the city. In the reflections of her face in the shop windows she was reminded of being in the present. But her mind mirrored the setting sun and the reflections on the puddles of the water that had not yet come to be. This was her present. She was constantly thinking of her future, and ruminating about her past.
On a cold December morning, she skipped her flying lessons to pay a visit to the old man that counted things. He lived three paces left of the best smelling bakery in the city, and just underneath one’s nose when the smell of strawberry and dough reached a nutty sweetness that indicates done-ness. If you counted one half a step too far, you would surely miss him. If the pastries burnt, you had already gone too far.
Nobody knew where he came from, how he persisted, or even how old he was. When the city governor miscalculated the earnings to expenditures of the city, a visit to the old man cleared the digital slate. When a distracted goose misplaced her goslings, the old man was just a waddle away to account for them properly. The girl imagined that he sustained on the gears turning in his head, the infinite space of numbers that gave him beauty and meaning, and the leftover croissants from the bakery.
On that afternoon, even the drones were not flying, and the girl was stuck in a while loop unable to let go of her conditions of the past. Thus, her desire to visit the counting man wasn’t to actually perform addition and subtraction of objects, but because she might count on having his company during this time of loneliness. His space was in perfect logical order, and in parallel, in complete unaccounted-for chaos. Today he had arranged a surface of glass shapes, and had removed the ground under them so you might fall to smithereens if you slipped into a margin of error. A wave of chill crashed over the small of her lower back. it was a situation of danger. But when you have a mindset like the girl, a risk that might topple some internal barrier presents itself only as exciting opportunity. And so she stepped forward onto the surface.
Her moves were cautious at first, pressing gently on the glossy shapes to estimate how well they liked her. But soon, she felt her heart relax, her mind release into the rhythm, and she gave in to allowing the stones to capture the memory of her feet. She did this until exhaustion, and then stepped off of the glass back onto the crisp, well-defined apple earth. Her eyes moved from her exposed toes to the feet, knees, and finally face, of the old counting man.
“Can you tell me how many?” she asked. Although she had lost track of time, she was confident that she had done it so quickly - and imagined her dance as a well-scoped problem to tackle to ensure that her strategy was robust. She had hit the smaller states of the glass continent by brushing her feet over them in a horizontal motion, and having reassurance of her influence when they glowed and smiled.
The old man also smiled. “You danced over great depths, and gave the glass much memory today. Perhaps you should come back tomorrow, and I might count then.”
This practice continued, day after day, and the girl learned to dance genuinely. The shapes would dance with her sometimes too, and change their locations, as shapes often like to do. She approached the same task with a clean pair of feet each day, and a new trick in her mind for how to make sure she covered all the space. It wasn’t until the following December that the old man added note to the end of their daily routine.
“You know,” added the old man. Today you’ve visited me 365 times. I think to make the calculation easier, I’ll call that “1.” Maybe we should do this again sometime?”
As the girl opened her lungs to release enough air to respond with “Yes, we should!” for the first time in the presence of another, a tiny dragon emerged from her nose. It’s tiny body, painted with red and gold, flew to perch on the old counting man’s right ear. A beat of uncertainty punched her in the stomach, and she was both surprised and terrified of exposing her deepest vulnerability. “Such a small spirit,” he responded calmly. “but within it is accrued such vibrancy and hope.” It was then that the girl again found control over the air to expel the message curled in her neck.
“Yes, I’ve never seen one like that before. And I of course will continue to visit. But I do not wish to count, because I will be dancing.”
Neither needed to say more. The old man stretched out his pinky, an offering to the tiny dragon to sit on, and he streamed the dragon from his ear toward a tree where he might enjoy watching the leaves grow. Both he and she knew that it wasn’t about the counting at all. The girl first went to visit the old man in hopes that it might alleviate her loneliness, a hidden desire behind searching for the secrets of the bakery. She visited him again because the dancing gave her a parcel of meaning. She continued to visit because she had found herself in the movements of her feet.
“My dear friend,” the girl said to the counting man one day. “The sun rises and falls, and someone, somewhere, is apologizing to their selves of the past, feeling loss for the dances not done, and destroying the present with rumination about a future that is never truly reached.” She paused, anticipating some sign that he knew that this insight could only come from personal experience. “Is this an optimal way to live one’s life?”
“It might be, for some,” he responded. “But for you, you just keep dancing.”
It is only when the girl stopped counting did she realize that she could count on the things that gave her meaning, and old man time would manage the rest. And little did she know, he had come to count on her too.
· -
Containers for Academic Products
Why do we do research? Arguably, the products of academia are discoveries and ideas that further the human condition. We want to learn things about the world to satisfy human curiosity and need for innovation, but we also want to learn how to be happier, healthier, and generally maximize the goodness of life experience. For this reason, we give a parcel of our world’s resources to people with the sole purpose of producing research in a particular domain. We might call this work the academic product.
The Lifecycle of the Academic Product
Academic products typically turn into manuscripts. The manuscripts are published in journals, ideally the article has a few nice figures, and once in a while the author takes it upon him or herself to include a web portal with additional tools, or a code repository to reproduce the work. For most academic products, they aren’t so great, and they get a few reads and then join the pile of syntactical garbage that is a large portion of the internet. For another subset, however, the work is important. If it’s important and impressive, people might take notice. If it’s important but not so impressive, there is the terrible reality that these products go to the same infinite dumpster, but they don’t belong there. This is definitely an inefficiency, and let’s step back a second here and think about how we can do better. First, let’s break down these academic product things, and start with some basic questions:
- What is the core of an academic product?
- What does the ideal academic product look like?
- Why aren’t we achieving that?
What is the core of an academic product?
This is going to vary a bit, but for most of the work I’ve encountered, there is some substantial analysis that leads to a bunch of data files that should be synthesized. For example, you may run different processing steps for images on a cluster, or permutations of a statistical test, and then output some compiled thing to do drumroll your final test. Or maybe your final thing isn’t a test, but a model that you have shown can work with new data. And then you share that result. It probably can be simplified to this:
[A|data] --> [B|preprocessing and analysis] --> [C|model or result] --> [D|synthesize/visualize] --> [E|distribute]We are moving
Adata (the behavior we have measured, the metrics we have collected, the images we have taken) throughBpreprocessing and analysis (some tube to handle noise, use statistical techniques to say intelligent things about it) to generateC(results or a model) that we must intelligently synthesize, meaning visualization or explanation (D) by way of story (ahem, manuscript) and this leads toE, some new knowledge that improves the human condition. This is the core of an academic product.What does the ideal academic product look like?
In an ideal world, the above would be a freely flowing pipe. New data would enter the pipe that matches some criteria, and flow through preprocessing, analysis, a result, and then an updated understanding of our world. In the same way that we subscribe to social media feeds, academics and people alike could subscribe to hypothesis, and get an update when the status of the world changes. Now we move into idealistic thought that this (someday) could be a reality if we improve the way that we do science. The ideal academic product is a living thing. The scientist is both the technician and artist to come up with this pipeline, make a definition of what the input data looks like, and then provide it to the world.
The entirety of this pipeline can be modular, meaning running in containers that include all of the software and files necessary for the component of the analysis. For example, steps
A(data) andB(preprocessing and analysis) are likely to happen in a high performance computing (HPC) environment, and you would want your data and analysis containers run at scale there. There is a lot of discussion going on about using local versus “cloud” resources, and I’ll just say that it doesn’t matter. Whether we are using a local cluster (e.g., SLURM) or in Google Cloud, these containers can run in both. Other scientists can also use these containers to reproduce your steps. I’ll point you to Singularity and follow us along at researchapps for a growing example of using containers for scientific compute, along with other things.For the scope of this post, we are going to be talking about how to use containers for the middle to tail end of this pipeline. We’ve completed the part that needs to be run at scale, and now we have a model that we want to perhaps publish in a paper, and provide for others to run on their computer.
Web Servers in Singularity Containers
Given that we can readily digest things that are interactive or visual, and given that containers are well suited for including much more than a web server (e.g., software dependencies like Python or R to run an analysis or model that generates a web-based result) I realized that sometimes my beloved Github pages or a static web server aren’t enough for reproducibility. So this morning I had a rather silly idea. Why not run a webserver from inside of a Singularity container? Given the seamless nature of these things, it should work. It did work. I’ve started up a little repository https://github.com/vsoch/singularity-web of examples to get you started, just what I had time to do this afternoon. I’ll also go through the basics here.
How does it work?
The only pre-requisite is that you should install Singularity. Singularity is already available on just over 40 supercomputer centers all over the place. How is this working? We basically follow these steps:
- create a container
- add files and software to it
- tell it what to run
In our example here, at the end of the analysis pipeline we are interested in containing things that produce a web-based output. You could equally imagine using a container to run and produce something for a step before that. You could go old school and do this on a command by command basis, but I (personally) find it easiest to create a little build file to preserve my work, and this is why I’ve pushed this development for Singularity, and specifically for it to look a little bit “Dockery,” because that’s what people are used to. I’m also a big fan of bootstrapping Docker images, since there are ample around. If you want to bootstrap something else, please look at our folder of examples.
The Singularity Build file
The containers are built from a specification file called
Singularity, which is just a stupid text file with different sections that you can throw around your computer. It has two parts: a header, and then sections (%runscript,%post). Actually there are a few more, mostly for more advanced usage that I don’t need here. Generally, it looks something like this:Bootstrap: docker From: ubuntu:16.04 %runscript exec /usr/bin/python "$@" %post apt-get update apt-get -y install pythonLet’s talk about what the above means.
The Header
The First line
bootstrapsays that we are going to bootstrap adockerimage, specifically using the (Fromfield)ubuntu:16.04. What the heck is bootstrapping? It means that I’m too lazy to start from scratch, so I’m going to start with something else as a template. Ubuntu is an operating system, instead of starting with nothing, we are going to dump that into the container and then add stuff to it. You could choose another distribution that you like, I just happen to like Debian.%post
Post is the section where you put commands you want to run once to create your image. This includes:
- installation of software
- creation of files or folders
- moving data, files into the container image
- analysis things
The list is pretty obvious, but what about the last one, analysis things? Yes, let’s say that we had a script thing that we wanted to run just once to produce a result that would live in the container. In this case, we would have that thing run in
%post, and then give some interactive access to the result via the%runscript. In the case that you want your image to be more like a function and run the analysis (for example, if you want your container to take input arguments, run something, and deliver a result), then this command should go in the%runscript.%runscript
The
%runscriptis the thing executed when we run our container. For this example, we are having the container execute python, with whatever input arguments the user has provided (that’s what the weird$@means). And note that the commandexecbasically hands the current running process to this python call.But you said WEB servers in containers
Ah, yes! Let’s look at what a
Singularityfile would look like that runs a webserver, here is the first one I put together this afternoon:Bootstrap: docker From: ubuntu:16.04 %runscript cd /data exec python3 -m http.server 9999 %post mkdir /data echo "<h2>Hello World!</h2>" >> /data/index.html apt-get update apt-get -y install python3It’s very similar, except instead of exposing python, we are using python to run a local webserver, for whatever is in the
/datafolder inside of the container. For full details, see the nginx-basic example. We change directories to data, and then use python to start up a little server on port 9999 to serve that folder. Anything in that folder will then be available to our local machine on port 9999, meaning the addresslocalhost:9999or127.0.0.1:9999.Examples
nginx-basic
The nginx-basic example will walk you through what we just talked about, creating a container that serves static files, either within the container (files generated at time of build and served) or outside the container (files in a folder bound to the container at run time). What is crazy cool about this example is that I can serve files from inside of the container, perhaps produced at container generation or runtime (in this example, my container image is called
nginx-basic.img, and by default it’s going to show me theindex.htmlthat I produced with theechocommand in the%postsection:./nginx-basic.img Serving HTTP on 0.0.0.0 port 9999 ...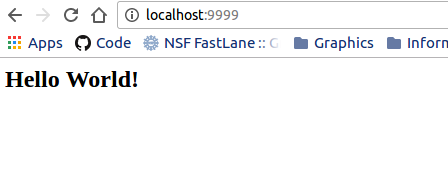
or I can bind a folder on my local computer with static web files (the
.refers to the present working directory, and-Bor--bindare the Singularity bind parameters) to my container and serve them the same!singularity run -B .:/data nginx-basic.imgThe general format is either:
singularity [run/shell] -B <src>:<dest> nginx-basic.img
singularity [run/shell] --bind <src>:<dest> nginx-basic.img
where
<src>refers to the local directory, and<dest>is inside the container.nginx-expfactory
The nginx-expfactory example takes a software that I published in graduate school and shows an example of how to wrap a bunch of dependencies in a container, and then allow the user to use it like a function with input arguments. This is a super common use case for science publication type things - you want to let someone run a model / analysis with custom inputs (whether data or parameters), meaning that the container needs to accept input arguments and optionally run / download / do something before presenting the result. This example shows how to build a container to serve the Experiment Factory software, and let the user execute the container to run a web-based experiment:
./expfactory stroop
No battery folder specified. Will pull latest battery from expfactory-battery repo
No experiments, games, or surveys folder specified. Will pull latest from expfactory-experiments repo
Generating custom battery selecting from experiments for maximum of 99999 minutes, please wait...
Found 57 valid experiments
Found 9 valid games
Preview experiment at localhost:9684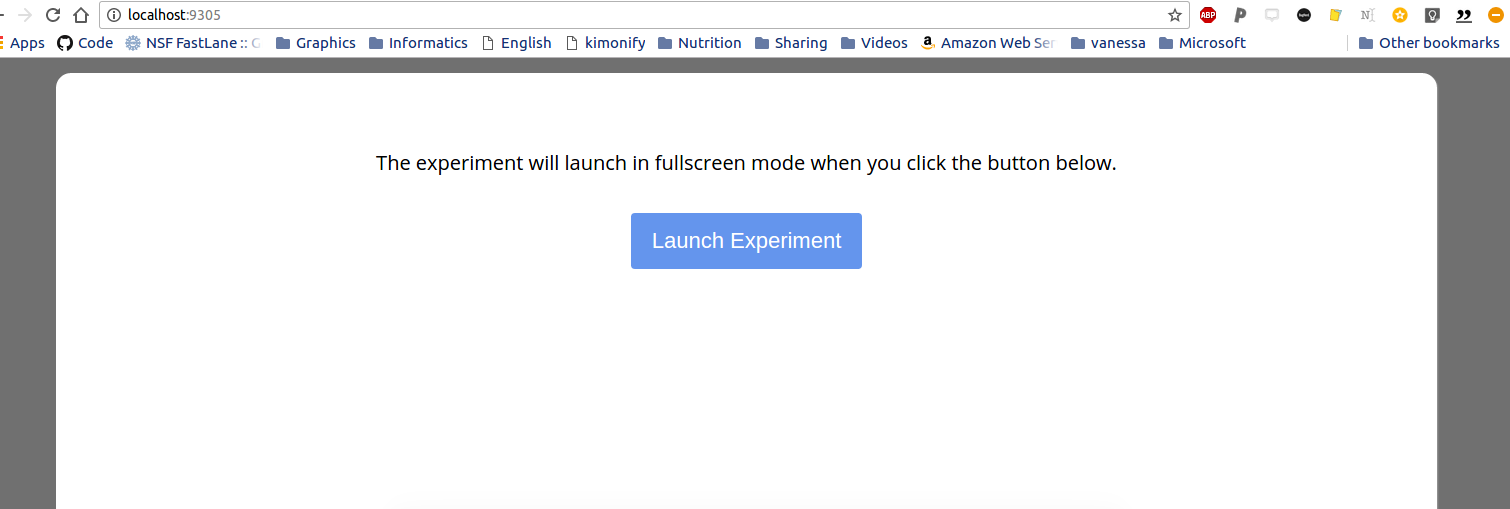
nginx-jupyter
Finally, nginx-jupyter fits nicely with the daily life of most academics and scientists that like to use Jupyter Notebooks. This example will show you how to put the entire Jupyter stuffs and python in a container, and then run it to start an interactive notebook in your browser:

The ridiculously cool thing in this example is that when you shut down the notebook, the notebook files are saved inside the container. If you want to share it? Just send over the entire thing! The other cool thing? If we run it this way:
sudo singularity run --writable jupyter.imgThen the notebooks are stored in the container at
/opt/notebooks(or a location of your choice, if you edit theSingularityfile). For example, here we are shelling into the container after shutting it down, and peeking. Are they there?singularity shell jupyter.img Singularity: Invoking an interactive shell within container... Singularity.jupyter.img> ls /opt/notebooks Untitled.ipynbYes! And if we run it this way:
sudo singularity run -B $PWD:/opt/notebooks --writable jupyter.imgWe get the same interactive notebook, but the files are plopping down into our present working directory
$PWD, which you now have learned is mapped to/opt/notebooksvia the bind command.How do I share them?
Speaking of sharing these containers, how do you do it? You have a few options!
Share the image
If you want absolute reproducibility, meaning that the container that you built is set in stone, never to be changed, and you want to hand it to someone, have them install Singularity and send them your container. This means that you just build the container and give it to them. It might look something like this:
      sudo singularity create theultimate.img
      sudo singularity bootstrap theultimate.img Singularity
In the example above I am creating an image called
theultimate.imgand then building it from a specification file,Singularity. I would then give someone the image itself, and they would run it like an executable, which you can do in many ways:singularity run theultimate.img ./theultimate.imgThey could also shell into it to look around, with or without sudo to make changes (breaks reproducibility, your call, bro).
      singularity shell theultimate.img
      sudo singularity shell --writable theultimate.img
Share the build file Singularity
In the case that the image is too big to attach to an email, you can send the user the build file
Singularityand he/she can run the same steps to build and run the image. Yeah, it’s not the exact same thing, but it’s captured most dependencies, and granted that you are using versioned packages and inputs, you should be pretty ok.Singularity Hub
Also under development is a Singularity Hub that will automatically build images from the
Singularityfiles upon pushes to connected Github repos. This will hopefully be offered to the larger community in the coming year, 2017.Why aren’t we achieving this?
I’ll close with a few thoughts on our current situation. A lot of harshness has come down in the past few years on the scientific community, especially Psychology, for not practicing reproducible science. Having been a technical person and a researcher, my opinion is that it’s asking too much. I’m not saying that scientists should not be accountable for good practices. I’m saying that without good tools and software, doing these practices isn’t just hard, it’s really hard. Imagine if a doctor wasn’t just required to understand his specialty, but had to show up to the clinic and build his tools and exam room. Imagine if he also had to cook his lunch for the day. It’s funny to think about this, but this is sort of what we are asking of modern day scientists. They must not only be domain experts, manage labs and people, write papers, plead for money, but they also must learn how to code, make websites and interactive things, and be linux experts to run their analyses. And if they don’t? They probably won’t have a successful career. If they do? They probably still will have a hard time finding a job. So if you see a researcher or scientist this holiday season? Give him or her a hug. He or she has a challenging job, and is probably making a lot of sacrifices for the pursuit of knowledge and discovery.
I had a major epiphany during the final years of my graduate school that the domain of my research wasn’t terribly interesting, but rather, the problems wrapped around doing it were. This exact problem that I’ve articulated above - the fact that researchers are spread thin and not able to maximally focus on the problem at hand, is a problem that I find interesting, and I’ve decided to work on. The larger problem, that tools for researchers, because it’s not a domain that makes money, or that there is an entire layer of research software engineers missing from campuses across the globe, is also something that I care a lot about. Scientists would have a much easier time giving us data pipes if they were provided with infrastructure to generate them.
How to help?
If you use Singularity in your work, please comment here, contact me directly, or to researchapps@googlegroups.com so I can showcase your work! Please follow along with the open source community to develop Singularity, and if you are a scientist, please reach out to me if you need applications support.
· -
Tweezers
It was around my 13th birthday when my mom gave me the gift of self-scrutiny. It was an electronic makeup mirror, a clone of her own, that lit up and magnified my face from both sides with an array of daylight themes. Did I want an evening tone? There was soft blue for that. Morning? A yellow, fresh hue. With this mirror came my very own pair of tweezers - the most important tool to commence the morning ritual of plucking away hairs and insecurities. I had watched her do it for my entire childhood, and it was calming in a way. She would be fresh from bath or shower, sometimes in a kerchief, sometimes with hair tied back, and sit down in a tiny chair in front of a mirror parked front and center at a little table with an opening for her legs and a three paneled mirror behind that. If it were a painting, it could be called a triptych. She would first embark on the arduous task of removing any deviant hairs. I remember my hopes for an equivalently flawless and hairfree nose line were shattered when she told me that if I plucked for 20 or more years, they just wouldn’t grow back. That’s a long time when you are 13. At some point she would apply a palm’s dabble of an Estee Lauder white cream - a smooth, sweet smelling cream that I watched in my lifetime go from $40 to $44 a bottle, and likely is now higher. It was, she told me, the secret to her flawless skin. I’m now more convinced it’s some Puerto Rican gene, but it’s a moot point. This cream had a shiny, rounded gold screw top that accented the rectangular, glassy white bottle. The version made years ago had a subtle cream tint to it, and the more modern one is a silkier white. I stopped using it in favor of a non-scented $3.99 bottle of face cream from Trader Joe’s at the onset of graduate school when my allergic-ness kicked in, and the fancy stuff started to give me rashes.
But back to that memory. The smell of the cream and removal of hairs from nose, brow, and (later in her life, chin) was followed by the opening of the makeup drawer. What treasures lay inside! She had brow pencils, an entire section of lipsticks, terrifying black wands that I learned to be mascara, and lip liners. She would first apply a fine line of some kind of “under eye” concealer, to hide any appearance of bags from stress or tiredness. My Mom had (and still has) amazing nails. They were long and clean, and she could jab a nail into the creamy beige stick, and then swipe it under each eye to get a perfect line. A quick rub then would dissolve the line into her skin. The eyes were then complete with a swipe of a dark liner and shadow. The process of applying lipstick was my favorite to watch, because it was like a coloring book on your face, and I could always smell the weird scent of the stuff. She would draw a line cleanly around the lip, sometimes too far over the top, and then color it in like a master painter. It was a brave commitment, because it meant that the lipstick would likely wear off toward the end of the day, leaving only the liner. Never to fear! This is why a lipstick was never far away in a purse, and a husband or child close by to ask about the appearance of the liner. She told me many times growing up that her mother never wore lipstick, and told her it (in more proper words) made her too becoming to men. When I refused to touch it, she told me that it was one of those things that skips generations. I’ll never have a daughter so I don’t have to find out, but I can imagine there is a strong propensity to not do some of the things that you observe your Mom to do. When the face and makeup were complete, the hair would fall out of the kerchief, and my Mom was flawless. Me on the other hand, well here I was in all my unibrow glory:
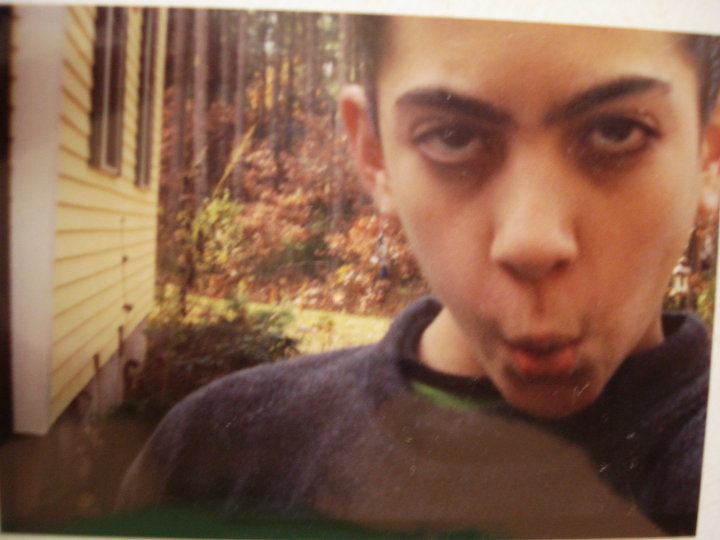
And there I was. I put my little setup on the floor of my childhood room, and plugged the mirror into the wall and directly under my bulletin board scattered with childhood photos and Hello Kitty lights. I would finish my two Eggo waffles, cut into perfect squares with just the right amount of syrup in the crevices, and go straight up the stairs to start my own ritual. Coming armed with the contribution of my Dad’s gene pool, I had much thicker and darker lashes and eyebrows, and so my uni-brow was extra Frida like. It’s funny how before adolescence, I had never really noticed it, and then it was immediately a marker of some kind of gross, ethnic hair. I painstakingly removed it, many times plucking out too many hairs. The damn caterpillar always grew back in full force, and the voice of my mom… “20 years…” repeated in my head. As for makeup, it never clicked with me. I went through an eye shadow phase in 8th grade, and went nuts with colors, dusts, and creams, and this was also when eye glitter from the store “The Icing” was the rage. The silly little screw-top bottles had this strange goo inside that would completely dry up when left even the slightest bit open. The nicer ones I had were “roll on” style, usually the “Smackers” brand. I still have some of those chapsticks and various teenager “makeup” - they are sitting in my apartment organized in a plastic bin from college one room over. It’s really the texture and scent that I kept them for - it’s an immediate warp back into the past. As for eye mascara, my first (and last) experience was with some sort of waterproof version, which I tried from my friend Kara at a sports club called Hampshire Hills in middle school. I didn’t know about makeup remover, and in sheer horror when I couldn’t get it off and resorted to using fingers to pull out my eyelashes, I never touched it again. I still won’t.
When I entered college, I didn’t bring that mirror, and was long over any kind of makeup beyond chapstick and tinted pimple cream. “Pimples” I’ve come to learn are actually pretty unlikely for many, but brought on by anxiety and some maladaptive desire to pick at imperfections. It’s a constant struggle, but I’m getting better! I brought those tweezers along, and every few years my Mom would buy me a new pair - always a really nice pair - because the ones in the drug store weren’t suitable for the task. Did I stick to my duty? Sort of, kind of. A combination of laziness and lacking setup for my ritual led to the abolishment of the daily plucking in exchange for a weekly or bi-weekly grooming. I went through phases of forgetting, and finally, not really caring, and only doing some touch up if there was a formal event like a graduation or wedding.
I just turned 30. It’s now been (almost) those 20 years (and well, I haven’t been true to my duty), but the hairs always came back. At some point in graduate school, I just stopped caring. The higher level awareness of this entire experience is the realization that this focus, this kind of ritual that derives self-worth from obtaining a particular appearance and going to extremes to achieve it, is just ridiculous. Nobody has to do this crap. It took me years to stumble on this, matter of fact I only derived this insight when I found my groove, and I found my meaning, both personally and in the things I am passionate about doing. Maybe it is some kind of “growing up” milestone, but if we had to put eggs in baskets to correspond with how we evaluate ourselves, I just don’t care to put any eggs in the “how do my eyebrows look right now?” and “should I gussy up a bit?” baskets. It’s much more fun to be silly, express your ideas and personality with intensity, and it doesn’t matter if the hairs on your face are groomed are not. When I’m tired because I’ve worked hard in a day, you are going to see that, and it’s just going to be that. As I age, you are going to know and see me, and not some mask that I hide over me to meet some idealistic plastic version of myself. Everyone else is too busy with their own insecurity and heavy self-awareness to care. This self-realization that sort of happened, but came to awareness after the fact, has been empowering on many levels. I can look at the tweezer in my bathroom, have awareness of a fast fading ritualistic memory, and then just walk away. And now I want the opposite - I am rooting for every hair on my face to grow back in all its little glory!
This post is dedicated to my Mom. As a grown up now myself, I wish, in retrospect, that she would have seen and appreciated her beauty without the makeup on - because it seems too easy to get used to a red lip, or a shadowed eye, and feel lacking without them. Mom - the times when you didn’t want to be seen outside with your Pajamas on, when you checked your lipstick in the car mirror just to be safe, or when you put on makeup in the middle of the night because you felt vulnerable, you didn’t need to do that. Radiating your inner energy and joy would have been the light that blinded people from any imperfection in your skin that was possible to see. I know that I will be loved, and I will be the same, irrespective of these things. It is not the look of a face that gives inner beauty, and so to close this post, I do not wish to validate the societal standard of evaluating women based on looks by saying something about looks. Mom - with and without your makeup, with and without your insecurities, you are beautiful. As your hair gets white, and your face more aged, I hope you can really feel that. I know that I do.
· -
Python Environments, A User Guide
Do you want to run Python? I can help you out! This documentation is specific to the
farmshare2cluster at Stanford, on which there are several versions on python available. The python convention is that python v2 is called ‘python’, and python v3 is called ‘python3’. They are not directly compatible, and in fact can be thought of as entirely different software.How do I know which python I’m calling?
Like most Linux software, when you issue a command to execute some software, you have a variable called
$PATHthat loads the first executable it finds with that name. The same is true forpythonandpython3. Let’s take a look at some of the defaults:# What python executable is found first? rice05:~> which python /usr/bin/python # What version of python is this? rice05:~> python --version Python 2.7.12 # And what about python3? rice05:~> which python3 /usr/bin/python3 # And python3 version rice05:~> python3 --version Python 3.5.2This is great, but what if you want to use a different version? As a reminder, most clusters like Farmshare2 come with packages, modules, and can also be installed with your custom software (here’s a refresher if you need it). Let’s talk about the different options for extending the provided environments, or creating your own environment. First, remember that for all of your scripts, the first line instructs what executable to use. So make sure to have this at the top of your script:
#!/usr/bin/env pythonNow, what to do when the default python doesn’t fit your needs? You have many choices:
- Install to a User Library if you want to continue using a provided python, but add a module of your choice to a personal library
- Install a conda environment if you need standard scientific software modules, and don’t want the hassle of compiling and installing them.
- Create a virtual environment if you want more control over the version and modules
1. Install to a User Library
The reason that you can’t install to the shared
pythonorpython3is because you don’t have access to thesite-packagesfolder, which is where the modules are looked for automatically by python. But don’t despair! You can install to your (very own)site-packagesby simply appending the--userargument to the install command. For example:# Install the pokemon-ascii package pip install pokemon --user # Where did it install to? rice05:~> python Python 2.7.12 (default, Jul 1 2016, 15:12:24) [GCC 5.4.0 20160609] on linux2 Type "help", "copyright", "credits" or "license" for more information. >>> import pokemon >>> pokemon.__file__ '/home/vsochat/.local/lib/python2.7/site-packages/pokemon/__init__.pyc'As you can see above, your
--userpackages install to a site packages folder for the python version under.local/lib. You can always peek into this folder to see what you have installed.rice05:~> ls $HOME/.local/lib/python2.7/site-packages/ nibabel pokemon virtualenv.py nibabel-2.1.0.dist-info pokemon-0.32.dist-info virtualenv.pyc nisext virtualenv-15.0.3.dist-info virtualenv_supportYou probably now have two questions.
- How does python know to look here, and
- How do I check what other folders are being checked?
How does Python find modules?
You can look at the
sys.pathvariable, a list of paths on your machine, to see where Python is going to look for modules:rice05:~> python Python 2.7.12 (default, Jul 1 2016, 15:12:24) [GCC 5.4.0 20160609] on linux2 Type "help", "copyright", "credits" or "license" for more information. >>> import sys >>> sys.path ['', '/usr/lib/python2.7', '/usr/lib/python2.7/plat-x86_64-linux-gnu', '/usr/lib/python2.7/lib-tk', '/usr/lib/python2.7/lib-old', '/usr/lib/python2.7/lib-dynload', '/home/vsochat/.local/lib/python2.7/site-packages', '/usr/local/lib/python2.7/dist-packages', '/usr/lib/python2.7/dist-packages']Above we can see that the system libraries are loaded before local, so if you install a module to your user folder, it’s going to be loaded after. Did you notice that the first entry is an empty string? This means that your present working directory will be searched first. If you have a file called
pokemon.pyin this directory and then you doimport pokemon, it’s going to use the file in the present working directory.How can I dynamically change the paths?
The fact that these paths are stored in a variable means that you can dynamically add / tweak paths in your scripts. For example, when I fire up
python3and load numpy, it uses the first path found insys.path:>>> import numpy >>> numpy.__path__ ['/usr/lib/python3/dist-packages/numpy']And I can change this behavior by removing or appending paths to this list before importing. Additionally, you can add paths to the environmental variable
$PYTHONPATHto add folders with modules (read about PYTHONPATH here). First you add the variable to the path:# Here is setting an environment variable with csh rice05:~> setenv PYTHONPATH /home/vsochat:$PYTHONPATH # And here with bash rice05:~> export PYTHONPATH=/home/vsochat:$PYTHONPATH # Did it work? rice05:~> echo $PYTHONPATH /home/vsochatNow when we run python, we see the path has been appended to the beginning of
sys.path:rice05:~> python Python 2.7.12 (default, Jul 1 2016, 15:12:24) [GCC 5.4.0 20160609] on linux2 Type "help", "copyright", "credits" or "license" for more information. >>> import sys >>> sys.path ['', '/home/vsochat', '/usr/lib/python2.7', '/usr/lib/python2.7/plat-x86_64-linux-gnu', '/usr/lib/python2.7/lib-tk', '/usr/lib/python2.7/lib-old', '/usr/lib/python2.7/lib-dynload', '/home/vsochat/.local/lib/python2.7/site-packages', '/usr/local/lib/python2.7/dist-packages', '/usr/lib/python2.7/dist-packages']Awesome!
How do I see more information about my modules?
You can look to see if a module has a
__version__, a__path__, or a__file__, each of which will tell you details that you might need for debugging. Keep in mind that not every module has a version defined.rice05:~> python Python 2.7.12 (default, Jul 1 2016, 15:12:24) [GCC 5.4.0 20160609] on linux2 Type "help", "copyright", "credits" or "license" for more information. >>> import numpy >>> numpy.__version__ '1.11.0' >>> numpy.__file__ '/usr/lib/python2.7/dist-packages/numpy/__init__.pyc' >>> numpy.__path__ ['/usr/lib/python2.7/dist-packages/numpy'] >>> numpy.__dict__If you are really desperate for seeing what functions the module has available, take a look at (for example, for numpy)
numpy.__dict__.keys(). While this doesn’t work on the cluster, if you load a module in iPython you can press TAB to autocomplete for available options, and add a single or double_to see the hidden ones like__path__.How do I ensure that my package manager is up to date?
We’ve hit a conundrum! How does one “pip install pip”? And further, how do we ensure we are using the pip version associated with the currently active python? The same way that you would upgrade any other module, using the
--upgradeflag:rice05:~> python -m pip install --user --upgrade pip rice05:~> python -m pip install --user --upgrade virtualenvAnd note that you can do this for virtual environments (
virtualenv) as well.2. Install a conda environment
There are a core set of scientific software modules that are quite annoying to install, and this is where anaconda and miniconda come in. These are packaged virtual environments that you can easily install with pre-compiled versions of all your favorite modules (numpy, scikit-learn, pandas, matplotlib, etc.). We are going to be following instructions from the miniconda installation documentation. Generally we are going to do the following:
- Download the installer
- Run it to install, and install to our home folder
- (optional) add it to our path
- Install additional modules with conda
First get the installer from here, and you can use
wgetto download the file to your home folder:rice05:~> cd $HOME rice05:~> wget https://repo.continuum.io/miniconda/Miniconda3-latest-Linux-x86_64.sh # Make it executable rice05:~> chmod u+x Miniconda3-latest-Linux-x86_64.shThen run it! If you do it without any command line arguments, it’s going to ask you to agree to the license, and then interactively specify installation parameters. The easiest thing to do is skip this, using the
-bparameter will automatically agree and install tominiconda3in your home directory:rice05:~> ./Miniconda3-latest-Linux-x86_64.sh -b PREFIX=/home/vsochat/miniconda3 ... (installation continues here)If you want to add the miniconda to your path, meaning that it will be loaded in preference to all other pythons, then you can add it to your .profile:
echo "export PATH=$HOME/miniconda3/bin:$PATH >> $HOME/.profile"Then source your profile to make the python path active, or log in and out of the terminal to do the same:
source /home/vsochat/.profileFinally, to install additional modules to your miniconda environment, you can use either conda (for pre-compiled binaries) or the pip that comes installed with the miniconda environment (in the case that the conda package managed doesn’t include it).
# Scikit learn is included in the conda package manager
/home/vsochat/miniconda3/bin/conda install -y scikit-learn

# Pokemon ascii is not
/home/vsochat/miniconda3/bin/pip install pokemon
3. Install a virtual environment
If you don’t want the bells and whistles that come with anaconda or miniconda, then you probably should go for a virtual environment. The Hitchhiker’s Guide to Python has a great introduction, and we will go through the steps here as well. First, let’s make sure we have the most up to date version for our current python:
rice05:~> python -m pip install --user --upgrade virtualenvSince we are installing this to our user (
.local) folder, we need to make sure the bin (with executables for the install) is on our path, because it usually won’t be:# Ruhroh! rice05:~/myproject> which virtualenv virtualenv: Command not found. # That's ok, we know where it is! rice05:~/myproject> export PATH=/home/vsochat/.local/bin:$PATH # (and for csh) rice05:~/myproject> setenv PATH /home/vsochat/.local/bin:$PATH # Did we add it? rice05:~/myproject> which virtualenv /home/vsochat/.local/bin/virtualenvYou can also add this to your
$HOME/.profileif you want it sourced each time.Now we can make and use virtual environments! It is as simple as creating it, and activating it:
rice05:~>mkdir myproject
rice05:~>cd myproject
rice05:~/myproject> virtualenv venv
New python executable in /home/vsochat/myproject/venv/bin/python
Installing setuptools, pip, wheel...done.
rice05:~/myproject> ls
venv
To activate our environment, we use the executable
activatein the bin provided. If you take a look at the files inbin, there is an activate file for each kind of shell, and there is also the executables forpythonand the package managerpip:rice05:~/myproject> ls venv/bin/ activate activate_this.py pip python python-config activate.csh easy_install pip2 python2 wheel activate.fish easy_install-2.7 pip2.7 python2.7Here is how we would active for csh:
rice05:~/myproject> source venv/bin/activate.csh
[venv] rice05:~/myproject>
Notice any changes? The name of the active virutal environment is added to the terminal prompt! Now if we look at the python and pip versions running, we see we are in our virtual environment:
[venv] rice05:~/myproject> which python
/home/vsochat/myproject/venv/bin/python
[venv] rice05:~/myproject> which pip
/home/vsochat/myproject/venv/bin/pip
Again, you can add the source command to your
$HOME/.profileif you want it to be loaded automatically on login. From here you can move forward with usingpython setup.py install(for local module files) andpip install MODULEto install software to your virtual environment.To exit from your environment, just type
deactivate:[venv] rice05:~/myproject> deactivate rice05:~/myproject>PROTIP You can specify commands to your virtualenv creation to include the system site packages in your environment. This is useful for modules like numpy that require compilation (lib/blas, anyone?) that you don’t want to deal with:
rice05:~/myproject> virtualenv venv --system-site-packagesReproducible Practices
Whether you are a researcher or a software engineer, you are going to run into the issue of wanting to share your code, and someone on a different cluster running it. The best solution is to container-ize everything, and for this we recommend using Singularity. However, let’s say that you’ve been a bit disorganized, and you want to quickly capture your current python environment either for a requirements.txt file, or for a container configuration? If you just want to glance and get a “human readable” version, then you can do:
rice05:~> pip list
biopython (1.66)
decorator (4.0.6)
gbp (0.7.2)
nibabel (2.1.0)
numpy (1.11.0)
pip (8.1.2)
pokemon (0.32)
Pyste (0.9.10)
python-dateutil (2.4.2)
reportlab (3.3.0)
scipy (0.18.1)
setuptools (28.0.0)
six (1.10.0)
virtualenv (15.0.1)
wheel (0.29.0)
If you want your software printed in the format that will populate the
requirement.txtfile, then you want:rice05:~> pip freeze biopython==1.66 decorator==4.0.6 gbp==0.7.2 nibabel==2.1.0 numpy==1.11.0 pokemon==0.32 Pyste==0.9.10 python-dateutil==2.4.2 reportlab==3.3.0 scipy==0.18.1 six==1.10.0 virtualenv==15.0.1And you can print this right to file:
·# Write to new file rice05:~> pip freeze > requirements.txt # Append to file rice05:~> pip freeze >> requirements.txt -
The Constant Struggle
· -
Contained Environments for Software for HPC
I was recently interested in doing what most research groups do, setting up a computational environment that would contain version controlled software, and easy ways for users in a group to load it. There are several strategies you can take. Let’s first talk about those.
Strategies for running software on HCP
Use the system default
Yes, your home folder is located on some kind of server with an OS, and whether RHEL, CentOS, Ubuntu, or something else, it likely comes with, for example, standard python. However, you probably don’t have any kind of root access, so a standard install (let’s say we are installing the module
pokemon) like any of the following won’t work:# If you have the module source code, with a setup.py python setup.py install # Install from package manager, pip pip install pokemon # use easy_install easy_install pokemonEach of the commands above would attempt to install to the system python (something like
/usr/local/lib/pythonX.X/site-packages/) and then you would get a permission denied error.OSError: [Errno 13] Permission denied: '/usr/local/lib/python2.7/dist-packages/pokemon-0.1-py2.7.egg/EGG-INFO/entry_points.txt'Yes, each of the commands above needs a sudo, and you aren’t sudo, so you can go home and cry about it. Or you can install to a local library with something like this:
# Install from package manager, pip, but specify as user
pip install pokemon --user
I won’t go into details, but you could also specify a –prefix to be some folder you can write to, and then add that folder to your
PYTHONPATH. This works, but it’s not ideal for a few reasons:- if you need to capture or package your environment for sharing, you would have a hard time.
- on your
$HOMEfolder, it’s likely not accessible by your labmates. This is redundant, and you can’t be sure that if they run something, they will be using the same versions of software.
Thus, what are some other options?
Use a virtual environment
Python has a fantastic thing called virtual environments, or more commonly seen as
venv. It’s actually a package that you install, create an environment for your project, and activate it:# Install the package pip install virtualenv --user virtualenv myvenvThere are also ones that come prepackaged with scientific software that (normally) are quite annoying to compile like anaconda and miniconda (he’s a MINI conda! :D). And then you would install and do stuff, and your dependencies would be captured in that environment. More details and instructions can be found here. What are problems with this approach?
- It’s still REALLY redundant for each user to maintain different virtual environments
- Personally, I just forget which one is active, and then do stupid things.
For all of the above, you could use
pip freezeto generate a list of packages and versions for some requirements.txt file, or to save with your analysis for documentation sake:pip freeze >> requirements.txt # Inside looks like this adium-theme-ubuntu==0.3.4 altgraph==0.12 amqp==1.4.7 aniso8601==1.1.0 anyjson==0.3.3 apptools==4.4.0 apt-xapian-index==0.45 arrow==0.7.0 artbrain==1.0.0 ... xtermcolor==1.3 zonemap==0.0.5 zope.interface==4.0.5Use a module
Most clusters now use modules to manage versions of software and environments. What it comes down to is running a command like this:
# What versions of python are available?
module spider python

Rebuilding cache, please wait ... (written to file) done.

----------------------------------------------------------------------------
  python:
----------------------------------------------------------------------------
     Versions:
        python/2.7.5
        python/3.3.2

----------------------------------------------------------------------------
  For detailed information about a specific "python" module (including how to load the modules) use the module's full name.
  For example:

     $ module spider python/3.3.2
----------------------------------------------------------------------------
Nice! Let’s load 2.7.5. I’m old school.
module load python/2.7.5What basically happens, behind the scenes, is that there is a file written in a language called lua that adds folders to the beginning of your path with the particular path to the software, and possibly maps the locations as well. We can use the module software to show us this code:
# Show me the lua!
module show python/2.7.5

----------------------------------------------------------------------------
   /share/sw/modules/Core/python/2.7.5:
----------------------------------------------------------------------------
conflict("python")
whatis("Provides Python 2.7.5 ")
prepend_path("version","2.7.5")
prepend_path("MANPATH","/opt/rh/python27/root/usr/share/man")
prepend_path("X_SCLS","python27")
prepend_path("LD_LIBRARY_PATH","/opt/rh/python27/root/usr/lib64")
prepend_path("LIBRARY_PATH","/opt/rh/python27/root/usr/lib64")
prepend_path("PATH","/opt/rh/python27/root/usr/bin")
prepend_path("XDG_DATA_DIRS","/opt/rh/python27/root/usr/share")
prepend_path("PKG_CONFIG_PATH","/opt/rh/python27/root/usr/lib64/pkgconfig")
prepend_path("PYTHON_INCLUDE_PATH","/opt/rh/python27/root/usr/include/python2.7")
prepend_path("CPATH","/opt/rh/python27/root/usr/include/python2.7/")
prepend_path("CPATH","/opt/rh/python27/root/usr/lib64/python2.7/site-packages/numpy/core/include/")
help([[ This module provides support for the
        Python 2.7.5 via Redhat Software Collections.
]])
I won’t get into the hairy details, but this basically shows that we are adding paths (managed by an administrator) to give us access to a different version of python. This helps with versioning, but what problems do we run into?
- We still have to install additional packages using –user
- We don’t have control over any of the software configuration, we have to ask the admin
- This is specific to one research cluster, who knows if the python/2.7.5 is the same on another one. Or if it exists at all.
Again, it would work, but it’s not great. What else can we do? Well, we could try to use some kind of virtual machine… oh wait we are on a login node with no root access, nevermind. Let’s think through what we would want.
An ideal software environment
Ideally, I want all my group members to have access to it. My pokemon module version should be the same as yours. I also want total control of it. I want to be able to install whatever packages I want, and configure however I want. The first logical thing we know is that whatever we come up with, it probably is going to live in a group shared space. It also then might be handy to have equivalent lua files to load our environments, although I’ll tell you off the bat I haven’t done this yet. When I was contemplating this for my lab, I decided to try something new.
Singularity for contained software environments
A little about Singularity
We will be using Singularity containers that don’t require root priviledges to run on the cluster for our environments. Further, we are going to “bootstrap” Docker images so we don’t have to start from nothing! You can think of this like packaging an entire software suite (for example, python) into a container that you can then run as an executable:
  $ ./python3
  Python 3.5.2 (default, Aug 31 2016, 03:01:41)
  [GCC 4.9.2] on linux
  Type "help", "copyright", "credits" or "license" for more information.
  >>>
Even the environment gets carried through! Try this:
  import os
  os.environ["HOME"]
We are soon to release a new version of Singularity, and one of the simple features that I’ve been developing is an ability to immediately convert a Docker image into a Singularity image. The first iteration relied upon using the Docker Engine, but the new bootstrap does not. Because… I (finally) figured out the Docker API after many struggles, and the bootstrapping (basically starting with a Docker image as base for a Singularity image) is done using the API, sans need for the Docker engine.
As I was thinking about making a miniconda environment in a shared space for my lab, I realized - why am I not using Singularity? This is one of the main use cases, but no one seems to be doing it yet (at least as determined by the Google Group and Slack). This was my goal - to make contained environments for software (like Python) that my lab can add to their path, and use the image as an executable equivalently to calling python. The software itself, and all of the dependencies and installed modules are included inside, so if I want a truly reproducible analysis, I can just share the image. If I can’t handle about ~1GB to share, I can minimally share the file to create it, called the definition file. Let’s walk through the steps to do this. Or if you want, skip this entirely and just look at the example repo.
Singularity Environments
The basic idea is that we can generate “base” software environments for labs to use on research clusters. The general workflow is as follows:
- On your local machine (or an environment with sudo) build the contained environment
- Transfer the contained environment to your cluster
- Add the executable to your path, or create an alias.
We will first be reviewing the basic steps for building and deploying the environments.
Step 0. Setup and customize one or more environments
You will first want to clone the repository, or if you want to modify and save your definitions, fork and then clone the fork first. Here is the basic clone:
      git clone https://www.github.com/radinformatics/singularity-environments
      cd singularity-environments
You can then move right into building one or more containers, or optionally customize environments first.
Step 1. Build the Contained Environment
First, you should use the provided build script to generate an executable for your environment:
./build.sh python3.defThe build script is really simple - it just grabs the size (if provided), checks the number of arguments, and then creates and image and runs bootstrap (note in the future this operation will likely be one step):
#!/bin/bash

# Check that the user has supplied at least one argument
if (( "$#" < 1 )); then
    echo "Usage: build.sh [image].def [options]\n"
    echo "Example:\n"
    echo "       build.sh python.def --size 786"
    exit 1
fi

def=$1

# Pop off the image name
shift

# If there are more args
if [ "$#" -eq 0 ]; then
    args="--size 1024*1024B"
else
    args="$@"
fi

# Continue if the image is found
if [ -f "$def" ]; then

    # The name of the image is the definition file minus extension
    imagefile=`echo "${def%%.*}"`
    echo "Creating $imagefile using $def..."
    sudo singularity create $args $imagefile
    sudo singularity bootstrap $imagefile $def
fi
Note that the only two commands you really need are:
sudo singularity create $args $imagefile
sudo singularity bootstrap $imagefile $def
I mostly made the build script because I was lazy. This will generate a python3 executable in the present working directory. If you want to change the size of the container, or add any custom arguments to the Singularity bootstrap command, you can add them after your image name:
./build.sh python3.def --size 786Note that the maximum size, if not specified, is 1024*1024BMiB. The python3.def file will need the default size to work, otherwise you run out of room and get an error. This is also true for R (r-base), which I used
--size 4096to work. That R, it’s a honkin’ package!Step 2. Transfer the contained environment to your cluster
You are likely familiar with FTP, or hopefully your cluster uses a secure file transfer (sFTP). You can also use a command line tool scp. For the Sherlock cluster at Stanford, since I use Linux (Ubuntu), my preference is for gftp.
Step 3. Add the executable to your path
Let’s say we are working with a
python3image, and we want this executable to be called before thepython3that is installed on our cluster. We need to either add thispython3to our path (BEFORE the old one) or create an alias.Add to your path
You likely want to add this to your
.bash_profile,.profile, or.bashrc:mkdir $HOME/env cd $HOME/env # (and you would transfer or move your python3 here)Now add to your .bashrc:
echo "PATH=$HOME/env:$PATH; export PATH;" >> $HOME/.bashrcCreate an alias
This will vary for different kinds of shells, but for bash you can typically do:
      alias aliasname='commands'

      # Here is for our python3 image
      alias python3='/home/vsochat/env/python3'
For both of the above, you should test to make sure you are getting the right one when you type
python3:which python3 /home/vsochat/env/python3The definition files in this base directory are for base (not hugey modified) environments. But wait, what if you want to customize your environments?
I want to customize my environments (before build)!
The definition files can be modified before you create the environments! First, let’s talk a little about this Singularity definition file that we use to bootstrap.
A little about the definition file
Okay, so this folder is filled with *.def files, and they are used to create these “executable environments.” What gives? Let’s take a look quickly at a definition file:
      Bootstrap: docker
      From: python:3.5

      %runscript

          /usr/local/bin/python


      %post

          apt-get update
          apt-get install -y vim
          mkdir -p /scratch
          mkdir -p /local-scratch
The first two lines might look (sort of) familiar, because “From” is a Dockerfile spec. Let’s talk about each:
- Bootstrap: is telling Singularity what kind of Build it wants to use. You could actually put some other kind of operating system here, and then you would need to provide a Mirror URL to download it. The “docker” argument tells Singularity we want to use the guts of a particular Docker image. Which one?
- From: is the argument that tells Singularity bootstrap “from this image.”
- runscript: is the one (or more) commands that are run when someone uses the container as an executable. In this case, since we want to use the python 3.5 that is installed in the Docker container, we have the executable call that path.
- post: is a bunch of commands that you want run once (“post” bootstrap), and thus this is where we do things like install additional software or packages.
Making changes
It follows logically that if you want to install additional software, do it in post! For example, you could add a
pip install [something], and since the container is already bootstrapped from the Docker image, pip should be on the path. For example, here is how I would look around the container via python:./python3 Python 3.5.2 (default, Aug 31 2016, 03:01:41) [GCC 4.9.2] on linux Type "help", "copyright", "credits" or "license" for more information. >>> import os >>> os.system('pip --version') pip 8.1.2 from /usr/local/lib/python3.5/site-packages (python 3.5) 0 >>>or using the Singularity shell command to bypass the runscript (/usr/local/bin/python) and just poke around the guts of the container:
      $ singularity shell python3
      Singularity: Invoking an interactive shell within container...

      Singularity.python3> which pip
      /usr/local/bin/pip
If you would like any additional docs on how to do things, please post an issue or just comment on this post. I’m still in the process of thinking about how to best build and leverage these environments.
I want to customize my environments! (after build)
Let’s say you have an environment (node6, for example), and you want to install a package with npm (which is localed at /usr/local/bin/npm), but then when you run the image:
./node6it takes you right into the node terminal. What gives? How do you do it? You use the Singularity shell, with write mode, and we first want to move the image back to our local machine, because we don’t have sudo on our cluster. We then want to use the writable option:
      sudo singularity shell --writable node6
      Singularity: Invoking an interactive shell within container...

      Singularity.node6>
Then we can make our changes, and move the image back onto the cluster.
A Cool Example
The coolest example I’ve gotten working so far is using Google’s TensorFlow (the basic version without GPU - testing that next!) via a container. Here is the basic workflow:
./build tensorflow.def --size 4096

....

# building... building...

./tensorflow
Python 2.7.6 (default, Jun 22 2015, 17:58:13)
[GCC 4.8.2] on linux2
Type "help", "copyright", "credits" or "license" for more information.
>>> import tensorflow
>>>
Ok, cool! That takes us into the python installed in the image (with tensorflow), and I could run stuff interactively here. What I first tried was the “test” example, to see if it worked:
singularity shell tensorflow
python -m tensorflow.models.image.mnist.convolutional
Note that you can achieve this functionality without shelling into the image if you specify that the image should take command line arguments, something like this in the definition file:
exec /usr/local/bin/python "$@"and then run like this!
./tensorflow -m tensorflow.models.image.mnist.convolutional
Extracting data/train-images-idx3-ubyte.gz
Extracting data/train-labels-idx1-ubyte.gz
Extracting data/t10k-images-idx3-ubyte.gz
Extracting data/t10k-labels-idx1-ubyte.gz
Initialized!
Step 0 (epoch 0.00), 6.6 ms
Minibatch loss: 12.054, learning rate: 0.010000
Minibatch error: 90.6%
Validation error: 84.6%
...
Another added feature, done specifically when I realized that there are different Docker registries, is an ability to specify the Registry and to use a Token (or not):
Bootstrap: docker
From: tensorflow/tensorflow:latest
IncludeCmd: yes
Registry: gcr.io
Token: no
Final Words
Note that this software is under development, I think the trendy way to say that is “bleeding edge,” and heck, I came up with this idea and wrote all this code most of yesterday, and so this is just an initial example to encourage others to give this a try. We don’t (yet) have a hub to store all these images, so in the meantime if you make environments, or learn something interesting, please share! I’ll definitely be adding more soon, and customizing the ones I’ve started for my lab.
· -
Thirty Days Hath September
Thirty days hath September
for as long as I remember
until next year, at thirty one,
What things may duly come?My preponderance prodded at the Dish,
why Vanessasaur, what do you wish?
Thoughts climbing slopes, far up and down
from the foothills side, back toward town.First came hopes, lithe and fun!
Always starting and never done
Always gaining and never won
Should I quicker jump, or faster run?Followed by fears, meek and shy
Sometimes cunning, never spry
Religiously truthful, will not lie
Can I evade darkness before I die?Quick in tow was love and heart
Forever caring, emotionally smart
Always defeated yet finding start
Might I surpass ego to play my part?Last came dream, fickle and sweet,
Traversing muddy forest, stinky feet!
Falling constantly, never to defeat
Will I traverse mountains, promises keep?I thought long and hard
about what I might expect
I imagined every card,
that fate keeps in her deckThirty years this September
that’s as long as I remember
For future passed and what may come
Ask me when I’m thirty one :)
· -
The Docker APIs in Bash
Docker seems to have a few different APIs, highly under development, and this state almost guarantees that mass confusion will ensue. The documentation isn’t sparse (but it’s confusing) so I want to take some time to talk through some recent learning, in the case it is helpful. Some warnings - this reflects what I was able to figure out, over about 24 hours of working on things, and optimizing my solutions for time and efficiency. Some of this is likely wrong, or missing information, and I hope that others comment to discuss things that I missed! While Python makes things really easy, for the work that I was doing, I decided to make it more challenging (fun?) by trying to accomplish everything using bash. First, I’ll briefly mention the different APIs that I stumbled upon:
- The Docker Remote API: This seems to be an API for the client to issue commands via the Docker Daemon. I have no idea why it’s called “remote.” Maybe the user is considered “remote” ? This might be where you would operate to develop some kind of desktop application that piggy backs on a user’s local Docker. Please correct me if I am messing this up.
- The Docker Hub API: A REST API for Docker Hub. This is where (I think) a developer could build something to work with “the images out in the internet land.” I (think) I’ve also seen this referred to as the “Docker HUB registry API” (different from the next one…)
- Docker Registry API: Is this an interface between some official Docker registry and a Docker engine? I have no idea what’s going on at this point.
I found the most helpful (more than the docs above) to be the comments on this Github issue. Specifically,
@baconglobber. You’re the man. Or thebaconglobber, whichever you prefer. Regardless, I’ll do my best to talk through some details of API calls that I found useful for the purpose of getting image layers without needing to use the Docker engine. If that task is interesting to you, read on.The Docker Remote API
Docker seems to work by way of an API, meaning a protocol that the engine can use under the hood to send commands to the Hub to push and pull images, along with do all the other commands you’ve learned to appreciate. If you look at docs for the remote API, what seems to be happening is that the user sends commands to his or her Docker Daemon, and then they can interact with this API. I started to test this, but didn’t read carefully that my curl version needs to (not) be less than 7.40. Here (was) my version:
      curl -V
      curl 7.35.0 (x86_64-pc-linux-gnu) libcurl/7.35.0 OpenSSL/1.0.1f zlib/1.2.8 libidn/1.28 librtmp/2.3
      Protocols: dict file ftp ftps gopher http https imap imaps ldap ldaps pop3 pop3s rtmp rtsp smtp smtps telnet tftp
      Features: AsynchDNS GSS-Negotiate IDN IPv6 Largefile NTLM NTLM_WB SSL libz TLS-SRP
Oups. To upgrade curl on Ubuntu 14.04 you can’t use standard package repos, so here is a solution that worked for me (basically install from source). Note that you need to open a new terminal for the changes to take effect. But more specifically, I wanted a solution that didn’t need to use the Docker daemon, and I’m pretty sure this isn’t what I wanted. However, anyone wanting to create an application that works with Docker on a user’s machine, this is probably where you should look. There are a LOT of versions:
and you will probably get confused as I did and click “learn by example” expecting the left sidebar to be specific to the API (I got there via a Google search) and then wonder why you are seeing tutorials for standard Docker:
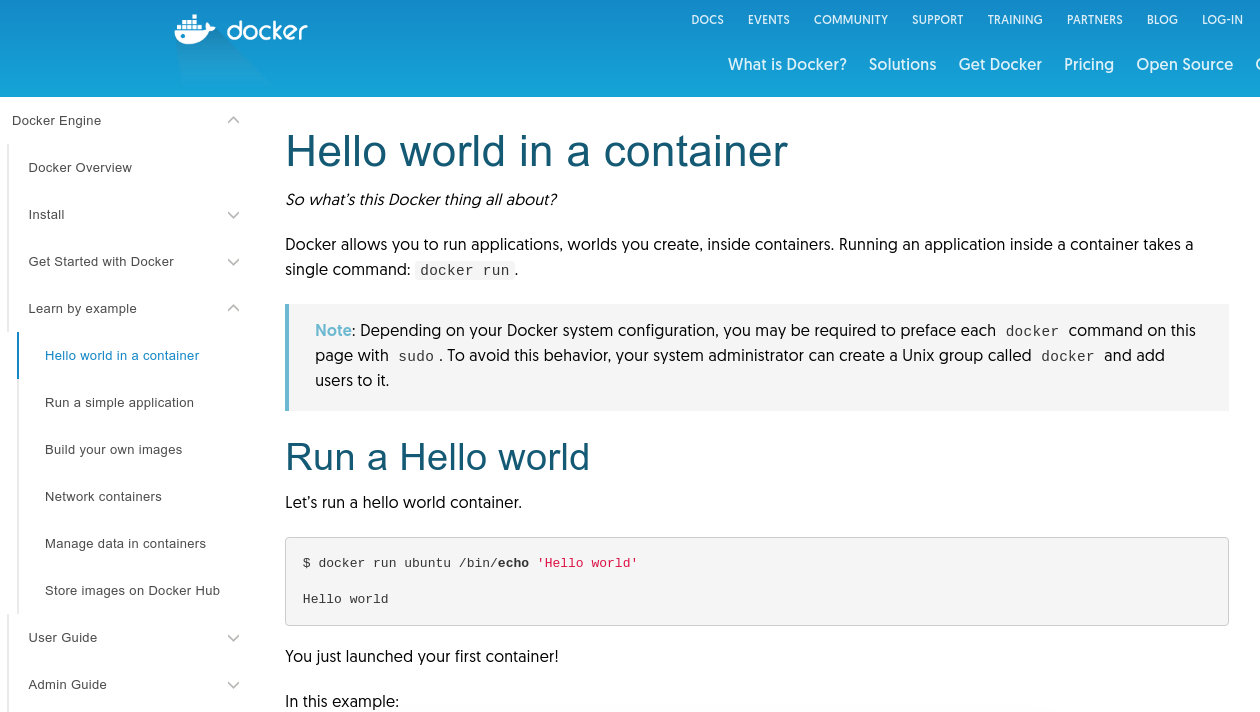
What’s going on?! Rest assured, probably everyone is having similar confusions, because the organization of the documentation feels like being lost in wikiland. At least that’s how I felt. I will point you to the client API libraries because likely you will be most diabolical digging directly into Python, Java, or your language of choice (they even have web components?! cool!) For my specific interest, I then found the Docker Hub API.
Docker Hub API
This is great! This seems to be the place where I can interact with Docker Hub, meaning getting lists of images, tags, image ids, and all the lovely things that would make it possible to work with (and download) the images (possibly without needing to have the Docker engine running). The first confusion that I ran into was a simple question - what is the base url for this API? I was constantly confused about what endpoint I should be using at pretty much every call I tried, and only “found something that worked” by way of trying every one. Here are a handful of the ones that returned responses sometimes, sometimes not:
- https://registry.hub.docker.com/v1/
- https://registry.hub.docker.com/v2/
- https://registry-1.docker.io/v1/
- https://registry-1.docker.io/v2/
- https://cdn-registry-1.docker.io/v1/
The only thing that is (more intuitive) is that if you know what a
cdnis, you would intuit that thecdnis where images, or some filey things, might be located.So we continue in the usual state of things, when it comes to programming and web development. We have a general problem we want to solve, or goal we want to achieve, we are marginally OK at the scripting language (I’m not great at bash, which is why I chose to use it), and the definition of our inputs and resources needs to be figured out as we go. But… we have the entire internet to help us! And we can try whatever we like! This, in my opinion, is exactly the kind of environment that is most fun to operate in.
The organization of images
Before we jump into different commands, I want to review what the parameters are, meaning the terms that Docker uses to describe images. When I first started using Docker, I would see something like this in the Dockerfile:
FROM ubuntu:latestand I’m pretty sure it’s taken me unexpectedly long to have a firm understanding of all the possible versions and variables that go into that syntax (and this might make some of the examples in the API docs more confusing if a user doesn’t completely get it). For example, I intuited that if a “namespace” isn’t specified, the default is “library?” For example, this:
library/ubuntu:14.04is equivalent to:
ubuntu:14.04where “library” is considered the namespace, “ubuntu” is the repo name, and “14.04” is considered the “tag.” Since Docker images are basically combinations of layers, each of which is some tar-guzzed up group of files (does anyone else say that in their head?), I’m guessing that a tag basically points to a specific group of layers, that when combined, complete the image. The tag that I’m most used to is called “latest”, so the second thing I intuited is that if a user doesn’t specify a tag:
library/ubuntuthat would imply we want the latest, e.g.,
library/ubuntu:latestGetting repo images
My first task was to find a list of images associated with a repo. Let’s pretend that I’m interested in ubuntu, version 14.04.
namespace=library
repo_name=ubuntu
repo_images=$(curl -si https://registry.hub.docker.com/v1/repositories/$namespace/$repo_name/images)
It returns this page, a list of things that looks like this:
{"checksum": "tarsum+sha256:aa74ef4a657880d495e3527a3edf961da797d8757bd352a99680667373ddf393", "id": "9cc9ea5ea540116b89e41898dd30858107c1175260fb7ff50322b34704092232"}If you aren’t familiar, a
checksumis a string of numbers (more) you can generate on your local machine using a tool, and “check” against to ensure that you, for example, downloaded a file in it’s entirety. Also note that I found the (old?) registry endpoint (verison 1.0) to work. What I was interested in were the “id” variables. What we’ve found here is a list of image layer ids that are associated with the ubuntu repo, in the library namespace (think of a namespace like a collection of images). However, what this doesn’t give me is which layers I’m interested in - some are probably for 14.04.1, and some not. What I need now is some kind of mapping from a tag (e.g.,14.04.1) to the layers that I want.Which layers for my tag?
Out of all the image layers belonging to “ubuntu,” which ones do I need for my image of interest, 14.04.1? For this, I found a slight modification of the url would provide better details about this, and I’m including an if statement that will fire if the image manifest is not found (a.k.a, the text returned by the call is just “Tag not found”.) I’m not sure why, but this call always took a long time, at least given the amount of information it returns (approximately ~22 seconds):
# Again use Ubuntu... but this time define a tag!
namespace=library
repo_name=ubuntu
repo_tag=14.04.1

layers=$(curl -k https://registry.hub.docker.com/v1/repositories/$namespace/$repo_name/tags/$repo_tag)

# Were any layers found?
if [ "$layers" = "Tag not found" ]; then
    echo "Ahhhhh!"
    exit 1
fi
When it works, you see:
echo $layers
[
 {"pk": 20355486, "id": "5ba9dab4"},
 {"pk": 20355485, "id": "51a9c7c1"},
 {"pk": 20355484, "id": "5f92234d"},
 {"pk": 20355483, "id": "27d47432"},
 {"pk": 20355482, "id": "511136ea"}
]
If the image tag isn’t found:
Tag not foundThere is a big problem with this call, and that has to do with the tag “latest,” and actually versioning of tags as well. If I define my tag to be “latest,” or even a common Ubuntu version (14.04) I get the “Tag not found” error. You can get all of the tag names of the image like so:
namespace=library
repo_name=ubuntu
tags=$(curl -k https://registry.hub.docker.com/v1/repositories/$namespace/$repo_name/tags)

# Iterate through them, print to screen
echo $tags | grep -Po '"name": "(.*?)"' | while read a; do

    tag_name=`echo ${a/\"name\":/}`
    tag_name=`echo ${tag_name//\"/}`
    echo $tag_name

done
There isn’t one called latest, and there isn’t even one called 14.04 (but there is 14.04.1, 14.04.2, and 14.04.3). Likely I need to dig a bit deeper and find out exactly how a “latest” tag is asserted to belong to the (latest) version of a repo, but arguably as a user I expect this tag to be included when I retrieve a list for the repo. It was confusing. If anyone has insight, please comment and share!
Completing an image ID
The final (potentially) confusing detail is the fact that the whole image ids have about 32 characters, eg
5807ff652fea345a7c4141736c7e0f5a0401b30dfe16284a1fceb24faac0a951but have you ever noticed when you dodocker psto list your images you see 12 numbers, or if you look at the ids referenced in the manifest above, we only have 8?{"pk": 20355486, "id": "5ba9dab4"}The reason (I would guess) is because, given that we are looking at layer ids for a single tag within a namespace, it’s unlikely we need that many characters to distinguish the images, so reporting (and having the user reference just 8) is ok. However, given that I can look ahead and see that the API command to download and get meta-data for an image needs the whole thing, I now need a way to compare the whole list for the namespace to the layers (smaller list with shorter ids) above.
Matching a shorter to a longer string in bash
I wrote a simple loop to accomplish this, given the json object of layers I showed above (
$layers) and the result of the images call ($repo_images):echo $layers | grep -Po '"id": "(.*?)"' | while read a; do # remove "id": and extra "'s image_id=`echo ${a/\"id\":/}` image_id=`echo ${image_id//\"/}` # Find the full image id for each tag, meaning everything up to the quote image_id=$(echo $repo_images | grep -o -P $image_id'.+?(?=\")') # If the image_id isn't empty, get the layer if [ ! -z $image_id ]; then echo "WE FOUND IT! DO STUFF!" fi doneObtaining a Token
Ok, at this point we have our (longer) image ids associated with some tag (inside the loop above), and we want to download them. For these API calls, we need a token. What I mean is that we need to have a curl command that asks the Docker remote API for permission to do something, and then if this is OK, it will send us back some nasty string of letters and numbers that, if we include in the header of a second command, it will validate and say “oh yeah, I remember you! I gave you permission to read/pull/push to that image repo. In this case, I found two ways to get a token. The first (which produced a token that worked in a second call for me) was making a request to get images (as we did before), but then adding content to the header to ask for a token. The token is then returned in the response header. In bash, that looks like this:
namespace=library
repo_name=ubuntu
token=$(curl -si https://registry.hub.docker.com/v1/repositories/$namespace/$repo_name/images -H 'X-Docker-Token: true' | grep X-Docker-Token)
token=$(echo ${token/X-Docker-Token:/})
token=$(echo Authorization\: Token $token)
The token thing looks like this:
echo $token
Authorization: Token signature=d041fcf64c26f526ac5db0fa6acccdf42e1f01e6,repository="library/ubuntu",access=read
Note that depending on how you do this in bash, you might see some nasty newline (^M) characters. This was actually for the second version of the token I tried to retrieve, but I saw similar ones for the call above:
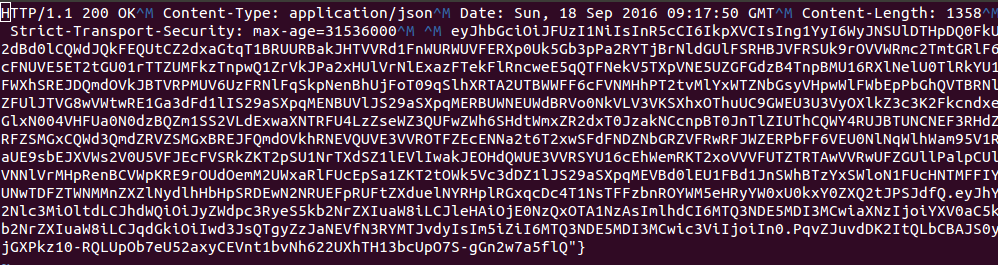
The solution I found to remove them was:
token=$(echo "$token"| tr -d '\r') # get rid of ^M, ewwI thought that it might be because I generated the variable with an echo without
-n(which indicates to not make a newline), however even with this argument I saw the newline trash appear. In retrospect I should have tried-neand alsoprintf, but oh well, will save this for another day. I then had trouble with double quotes with curl, so my hacky solution was to write the cleaned call to file, and then use cat to pipe it into curl, as follows:echo $token > somefile.url response=$(cat somefile.url | xargs curl) # For some url that has a streaming response, you can also pipe directly into a file cat somefile.url | xargs curl -L >> somefile.tar.gz # Note the use of -L, this will ensure if there is a redirect, we follow it!If you do this in Python, you would likely use the requests module and make a requests.get to GET the url, add the additional header, and then get the token from the response header:
import requests

repo_name="ubuntu"
namespace="library"

header = {"X-Docker-Token": True}
url = "https://registry.hub.docker.com/v1/repositories/%s/%s/images" %(namespace,repo_name)
response = requests.get(url,headers=header)
Then we see the response status is 200 (success!) and can peep into the headers to find the token:
response.status_code
# 200

response.headers
# {'x-docker-token': 'signature=5f6f83e19dfac68591ad94e72f123694ad4ba0ca,repository="library/ubuntu",access=read', 'transfer-encoding': 'chunked', 'strict-transport-security': 'max-age=31536000', 'vary': 'Cookie', 'server': 'nginx/1.6.2', 'x-docker-endpoints': 'registry-1.docker.io', 'date': 'Mon, 19 Sep 2016 00:19:28 GMT', 'x-frame-options': 'SAMEORIGIN', 'content-type': 'application/json'}

token = response.headers["x-docker-token"]
# 'signature=5f6f83e19dfac68591ad94e72f123694ad4ba0ca,repository="library/ubuntu",access=read'

# Then the header token is just a dictionary with this format
header_token = {"Authorization":"Token %s" %(token)}

header_token
# {'Authorization': 'Token signature=5f6f83e19dfac68591ad94e72f123694ad4ba0ca,repository="library/ubuntu",access=read'}
And here is the call that didn’t work for me using version 2.0 of the API. I should be more specific - this call to get the token did work, but I never figured out how to correctly pass it into the version 2.0 API. I read that the default token lasts for 60 seconds, and also the token should be formatted as
Authorization: Bearer: [token]but I got continually hit with'{"errors":[{"code":"UNAUTHORIZED","message":"authentication required","detail":[{"Type":"repository","Name":"ubuntu","Action":"pull"}]}]}\n'The interesting thing is that if we look at header info for the call to get images (which uses the “old” registry.hub.docker.com, e.g,
https://registry.hub.docker.com/v1/repositories/library/ubuntu/imageswe see that the response is coming fromregistry-1.docker.io:In [148]: response.headers Out[148]: {'x-docker-token': 'signature=f960e1e0e745965069169dbb78194bd3a4e8a10c,repository="library/ubuntu",access=read', 'transfer-encoding': 'chunked', 'strict-transport-security': 'max-age=31536000', 'vary': 'Cookie', 'server': 'nginx/1.6.2', 'x-docker-endpoints': 'registry-1.docker.io', 'date': 'Sun, 18 Sep 2016 21:26:51 GMT', 'x-frame-options': 'SAMEORIGIN', 'content-type': 'application/json'}When I saw this I said “Great! It must just be a redirect, and maybe I can use that (I think newer URL) to make the initial call.” But when I change
registry.hub.docker.comtoregistry-1.docker.io, it doesn’t work. Boo. I’d really like to get, for example, the callhttps://registry-1.docker.io/v2/ubuntu/manifests/latestto work, because it’s counterpart with the older endpoint (below) doesn’t seem to work (sadface). I bet with the right token, and a working call, the tag “latest” will be found here, and resolve the issues I was having using the first token and call. This call for “latest” really should work :/
Downloading a Layer
I thought this was the coolest part - the idea that I could use an API to return a data stream that I could pipe right into a .tar.gz file! I already shared most of this example, but I’ll do it quickly again to add some comment:
# Variables for the example
namespace=library
repo_name=ubuntu
image_id=511136ea3c5a64f264b78b5433614aec563103b4d4702f3ba7d4d2698e22c158 # I think this is empty, but ok for example

# Get the token again
token=$(curl -si https://registry.hub.docker.com/v1/repositories/$namespace/$repo_name/images -H 'X-Docker-Token: true' | grep X-Docker-Token)
token=$(echo ${token/X-Docker-Token:/})
token=$(echo Authorization\: Token $token)

# Put the entire URL into a variable, and echo it into a file removing the annoying newlines
url=$(echo https://cdn-registry-1.docker.io/v1/images/$image_id/layer -H \'$token\')
url=$(echo "$url"| tr -d '\r')
echo $url > $image_id"_layer.url"
echo "Downloading $image_id.tar.gz...\n"
cat $image_id"_layer.url" | xargs curl -L >> $image_id.tar.gz
I also tried this out in Python so I could look at the response header, interestingly they are using AWS CloudFront/S3. Seems like everyone does :)
{'content-length': '32', 'via': '1.1 a1aa00de8387e7235a256b2a5b73ede8.cloudfront.net (CloudFront)', 'x-cache': 'Hit from cloudfront', 'accept-ranges': 'bytes', 'server': 'AmazonS3', 'last-modified': 'Sat, 14 Nov 2015 09:09:44 GMT', 'connection': 'keep-alive', 'etag': '"54a01009f17bdb7ec1dd1cb427244304"', 'x-amz-cf-id': 'CHL-Z0HxjVG5JleqzUN8zVRv6ZVAuGo3mMpMB6A6Y97gz7CrMieJSg==', 'date': 'Mon, 22 Aug 2016 16:36:41 GMT', 'x-amz-version-id': 'mSZnulvkQ2rnXHxnyn7ciahEgq419bja', 'content-type': 'application/octet-stream', 'age': '3512'}Overall Comments
In the end, I got a working solution to do stuff with the tarballs for a specific docker image/tag, and my strategy was brute force - I tried everything until something worked, and if I couldn’t get something seemingly newer to work, I stuck with it. That said, it would be great to have more examples provided in the documentation. I don’t mean something that looks like this:
    PUT /v1/repositories/foo/bar/ HTTP/1.1
    Host: index.docker.io
    Accept: application/json
    Content-Type: application/json
    Authorization: Basic akmklmasadalkm==
    X-Docker-Token: true

    [{"id": "9e89cc6f0bc3c38722009fe6857087b486531f9a779a0c17e3ed29dae8f12c4f"}]
I mean a script written in some language, showing me the exact flow of commands to get that to work (because largely when I’m looking at something for the first time you can consider me as useful and sharp as cheddar cheese on holiday in the Bahamas). For example, if you do anything with a Google API, they will give you examples in any and every language you can dream of! But you know, Google is amazing and awesome, maybe everyone can’t be like that smile :)
I’ll finish by saying that, after all that work in bash, we decided to be smart about this and include a Python module, so I re-wrote the entire thing in Python. This let me better test the version 2.0 of the registry API, and unfortunately I still couldn’t get it to work. If anyone has a concrete example of what a header should look like with Authentication tokens and such, please pass along! Finally, Docker has been, is, and probably always will be, awesome. I have a fiendish inkling that very soon all of these notes will be rendered outdated, because they are going to finish up and release their updated API. I’m super looking forward to it.
· -
Promise me this...
Promise me this, promise me that. If you Promise inside of a JavaScript Object, your
thisis not going to be ‘dat!The desired functionality
Our goal is to update some Object variable using a Promise. This is a problem that other JavaScript developers are likely to face. Specifically, let’s say that we have an Object, and inside the Object is a function that uses a JavaScript Promise:
function someObject() {
    this.value = 1;
    this.setValue = function(filename) {
        this.readFile(filename).then(function(newValue){
            /* update this.value to be value */
        });
    }
}
In the example above, we define an Object called someObject, and then want to use a function
setValueto read in somefilenameand update the Object’svalue(this.value) to whatever is read in the file. The reading of the file is done by the functionreadFile, which does it’s magic and returns the new value in the variablenewValue. If you are familiar with JavaScript Promises, you will recognize the.then(**do something**)syntax, which means that the functionreadFilereturns a Promise. You will also know that inside of the.then()function we are in the JavaScript Promise space. First, let’s pretend that our data file is very stupid, and is a text file with a single value, 2:data.txt
2First we will create the Object, and see that the default value is set to 1:
var myObject = new someObject()
myObject.value

>> 1
Great! Now let’s define our file that has the updated value (
2), and call the functionsetValue:var filename = "data.txt" myObject.setValue(filename)We would then expect to see the following:
myObject.value >> 2The intuitive solution
My first attempt is likely what most people would try - referencing the Object variable as
this.valueto update it inside the Promise, which looks like this:function someObject() { this.value = 1; this.setValue = function(filename) { this.readFile(filename).then(function(newValue){ this.value = newValue; }); } }But when I ran the more complicated version of this toy example, I didn’t see the value update. In fact, since I hadn’t defined an intitial value, my Object variable was still undefined. For this example, we would see that the Object value isn’t updated at all:
var filename = "data.txt" myObject.setValue(filename) myObject.value >> 1Debugging the error
Crap, what is going on? Once I checked that I wasn’t referencing the Object variable anywhere else, I asked the internet, and didn’t find any reasonable solution that wouldn’t require making my code overly complicated or weird. I then decided to debug the issue properly myself. The first assumption I questioned was the idea that the
thisinside of my Promise probably wasn’t the same Objectthisthat I was trying to refer to. When I did aconsole.log(this), I saw the following:Window {external: Object, chrome: Object, document: document, wb: webGit, speechSynthesis: SpeechSynthesis…}uhh… what? My window object? I should have seen the someObject variable
myObject, which is what I’d have seen refencingthisanywhere within someObject (but clearly outside of a Promise):someObject {value: 1}This (no pun intended) means that I needed something like a pointer to carry into the function, and refer to the object. Does JavaScript do pointers?
Solution: a quasi pointer
JavaScript doesn’t actually have pointers in the way that a CS person would think of them, but you can pass Objects and they refer to the same thing in memory. So I came up with two solutions to the problem, and both should work. One is simple, and the second should be used if you need to be passing around the Object (
myObject) through your Promises.Solution 1: create a holder
We can create a
holderObject for thethisvariable, and reference it inside of the Promise:function someObject() { this.value = 1; this.setValue = function(filename) { var holder = this; this.readFile(filename).then(function(newValue){ holder.value = newValue; }); } }This will result in the functionality that we want, and we will actually be manipulating the
myObjectby way of referencingholder. Ultimately, we replace the value of1with2.Solution 2: pass the object into the promise
If we have some complicated chain of Promises, or for some reason if we can’t access the holder variable (I haven’t proven or asserted this to be an issue, but came up with this solution in case someone else finds it to be one) then we need to pass the Object into the Promise(s). In this case, our function might look like this:
function someObject() {
    this.value = 1;
    this.setValue = function(filename) {
        this.readFile(filename,this).then(function(response){

            // Here is the newValue
            response.newValue

            // Here is the passed myObject
            var myObject = response.args;

            // Set the value into my Object
            myObject.value = response.newValue;

        });
    }
}
and in order for this to work, the function
readFileneeds to know to add the input parameterthisasargsto the response data. For example, here it is done with a web worker:this.readFile = function (filename,args) { return new Promise((resolve, reject) => { const worker = new Worker("js/worker.js"); worker.onerror = (e) => { worker.terminate(); reject(e); }; worker.onmessage = (e) => { worker.terminate(); e.data.args = args; resolve(e.data); } worker.postMessage({args:filename,command:"getData"}); }); };In the above code, we are returning a Promise, and we create a Worker (
worker), and have a message sent to him with a command called “getData” and the argsfilename. For this example, all you need to know is that he returns an Object (e) that hasdata(e.data) that looks like this:e.data
{
  "newValue": 2
}
so we basically add an “args” field that contains the input args (
myObject), and return a variable that looks like this:{ "newValue": 2, "args": myObject }and then wha-la, in our returning function, since the
responsevariable holds the data structure above, we can then do this last little bit:// Here is the passed myObject var myObject = response.args; // Set the value into my Object myObject.value = response.newValue;Pretty simple! This of course would only work given that an object is returned as the response, because obviously you can’t add an object onto a string or number. In retrospect, I’m not sure this was deserving of an entire post, but I wanted to write about it because it’s weird and confusing until you look at the
·thisinside the Promise. I promise you, it’s just that simple :) -
Gil Eats
I have a fish, and his name is Gil, and he eats quite a bit. The question of what Gil eats (and where he gets it from) is interesting to me as a data science problem. Why? Our story starts with the unfortunate reality (for my fish) that I am allergic to being domestic: the extent that I will “cook” is cutting up vegetables and then microwaving them for a salad feast. This is problematic for someone who likes to eat many different things, and so the solution is that I have a lot of fun getting Gil food from many of the nice places to eat around town. Given that this trend will likely continue for many years, and given that we now live in the land of infinite culinary possibilities (Silicon Valley programmers are quite eclectic and hungry, it seems), I wanted a way to keep a proper log of this data. I wanted pictures, locations, and reviews or descriptions, because in 5, 10, or more years, I want to do some awesome image and NLP analyses with these data. Step
1of this, of course, is collecting the data to begin with. I knew I needed a simple database and web interface. But before any of that, I needed a graphical representation of my Gil fish:
Goals
My desire to make this application goes a little bit deeper than keeping a log of pictures and reviews. I think pretty often about the lovely gray area between data analysis, web-based tools, and visualization, and it seems problematic to me that a currently highly desired place to deploy these things (a web browser) is not well fit for things that are large OR computationally intensive. If I want to develop new technology to help with this, I need to first understand the underpinnings of the current technology. As a graduate student I’ve been able to mess around with the very basics, but largely I’m lacking the depth of understanding that I desire.
On what level are we thinking about this?
When most people think of developing a web application, their first questions usually revolve around “What should we put in the browser?” You’ll have an intimate discussion about the pros and cons of React vs. Angular, or perhaps some static website technology versus using a full fledged server (Jekyll? Django? ClojureScript? nodeJS?). What is completely glossed over is the standard that we start our problem solving from within the browser box, but I would argue that this unconscious assumption that the world of the internet is inside of a web browser must be questioned. When you think about it, we can take on this problem from several different angles:
From within the web browser (already discussed). I write some HTML/Javascript with or without a server for a web application. I hire some mobile brogrammers to develop an Android and iOS app and I’m pouring in the sheckles!
Customize the browser. Forget about rendering something within the constraints of your browser. Figure out how the browser works, and then change that technology to be more optimized. You might have to work with some standards committees for this one, which might take you decades, your entire life, or just never happen entirely.
Customize the server such as with an nginx (pronounced “engine-X”) module. Imagine, for example, you just write a module that tells the server to render or perform some other operation on a specific data type, and then serve the data “statically” or generate more of an API.
The Headless Internet. Get rid of the browser entirely, and harness the same web technologies to do things with streams of data, notifications, etc. This is how I think of the future - we will live in a world where all real world things and devices are connected to the internet, sending data back and forth from one another, and we don’t need this browser or a computer thing for that.
There are so many options!
How does a web browser work?
I’ve had ample experience with making dinky applications from within a browser (item
1) and already knew that was limited, and so my first thinking was that I might try to customize a browser itself. I stumbled around and found an amazing overview. The core or base technology seems simple - you generate a DOM from static sytax (HTML) files, link some styling to it based on a scoring algorithm, and then parse those things into a RenderTree. The complicated part comes when the browser has to do a million checks to walk up and down that tree to find things, and make sure that the user (the person who wrote the syntax) didn’t mess something up. This is why you can have some pretty gross HTML and it still renders nicely, because the browser is optimized to handle a lot of developer error before passing on the “I’m not loading this or working” error to the user. I was specifically very interested in the core technology to generate parsers, and wound up creating a small one of my own. This was also really good practice because knowing C/C++ (I don’t have formal CS training so I largely don’t) is something else important to do. Python is great, but it’s not “real” programming because you don’t compile anything. Google is also on to this, they’ve created Native Client to run C/C++ natively in a browser. I’m definitely going to check this out soon.I thought that it would be a reasonable goal to first try and create my own web browser, but reading around forums, this seemed like a big feat for a holiday weekend project. This chopped item
#2off of my list above. Another idea would be to create a custom nginx module (item#3) but even with a little C practice I wasn’t totally ready this past weekend (but this is definitely something I want to do). I realized, then, that the best way to understand how a web browser worked would be to start with getting better at current, somewhat modern technology. I decided that I wanted to build an application with a very specific set of goals.The Goals of Gil Eats
I approached this weekend fun with the following goals. Since this is for “Gil Eats” let’s call them
geats:- I want to learn about, understand, and implement an application that uses Javascript Promises, Web Workers (hello parallel processing!), and Service Workers (control over resources/caching).
- The entire application is served statically, and the goal achieved with simple technology available to everyone (a.k.a, no paying for an instance on AWS).
- Gil can take a picture of his dinner, and upload it with some comments or review.
- The data (images and comments) are stored in a web-accessible (and desktop-accessible, if desired) location, in an organized fashion, making them immediately available for further (future!) analysis.
This was a pretty hefty load for just a holiday weekend, but my excitement about these things (and continually waking up in the middle of the night to “just try one more thing!”) made it possible, and I was able to create Gil Eats.
Let’s get started!
My Workflow
I never start with much of a plan in mind, aside from a set of general application goals (listed above). The entire story of the application’s development would take a very long time to tell, so I’ll summarize. I started with a basic page that used the Dropbox API to list files in a folder. On top of that I added a very simple Google Map, and eventually I added the Places API to use as a discrete set of locations to link restaurant reviews and photos. The “database” itself is just a folder in Dropbox, and it has images, a json file of metadata associated with each image, and a master
db.jsonfile that gets rendered automatically when a user visits the page (sans authentication), and updated when a user is authenticated and fills out the form. I use Web Workers to retrieve all external requests for data, and use Service Workers to cache local files (probably not necessary, but it was important for me to learn this). The biggest development in my learning was with the Promises. With Promises you can get rid of “callback hell” that is (or was) definitive of JavaScript, and be assured that one event finishes before the next. You can create a single Promise that takes two handles to resolve (aka, woohoo it worked here’s the result!), or reject (nope, it didn’t work, here’s the error), or do things like chain promises or wrap them in calling functions. I encourage you to read about these Promises, and give them a try, because they are now native in most browsers, and (I think) are greatly improving the ease of developing web applications.Now let’s talk a bit about some of the details, and problems that I encountered, and how I dealt with them.
The Interface
The most appropriate visualization for this goal was a map. I chose a simple “the user is authenticated, show them a form to upload” or “don’t do that” interface, which appears directly below the map.
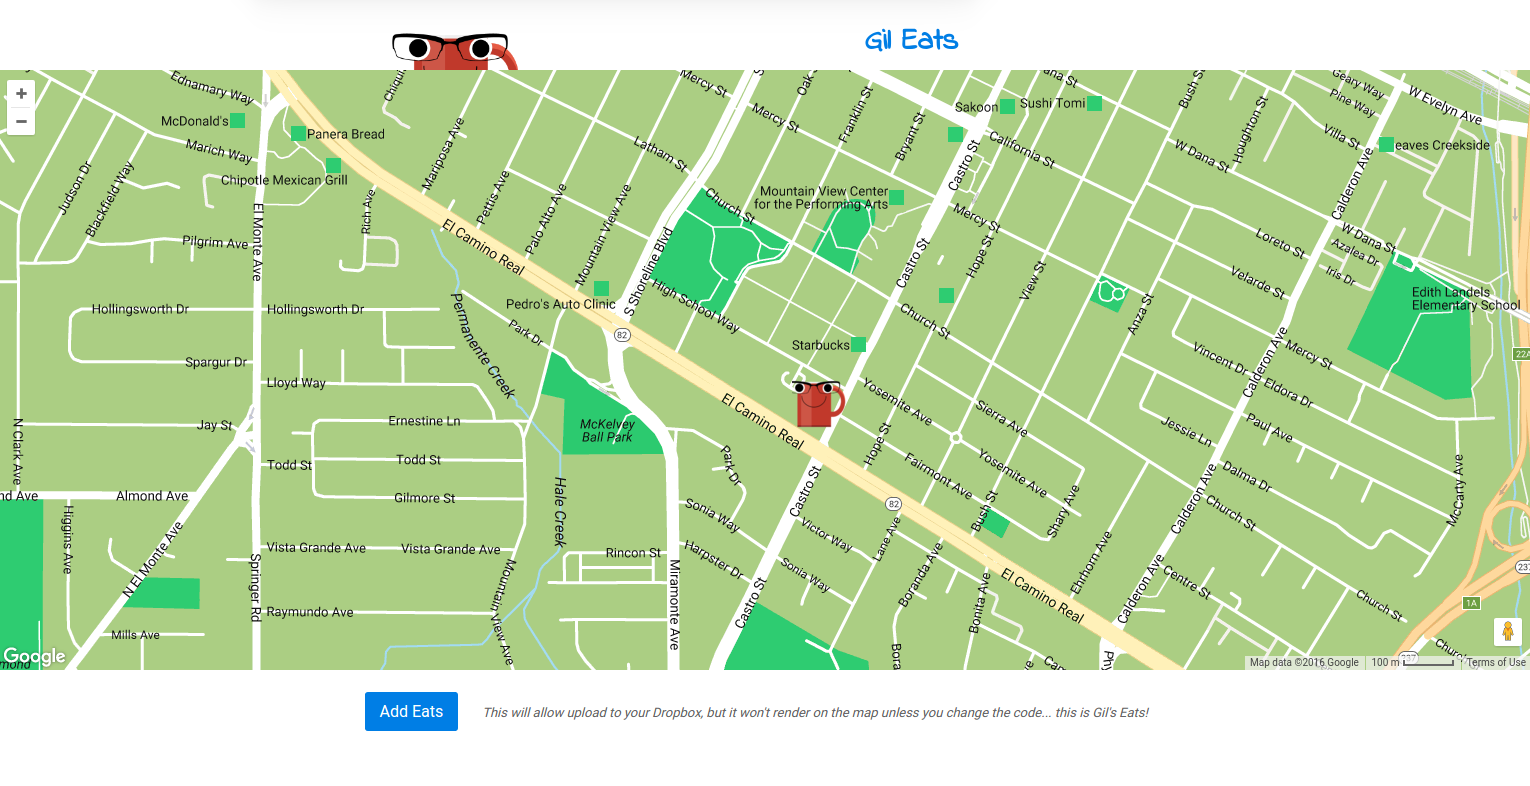
The form looks like this:
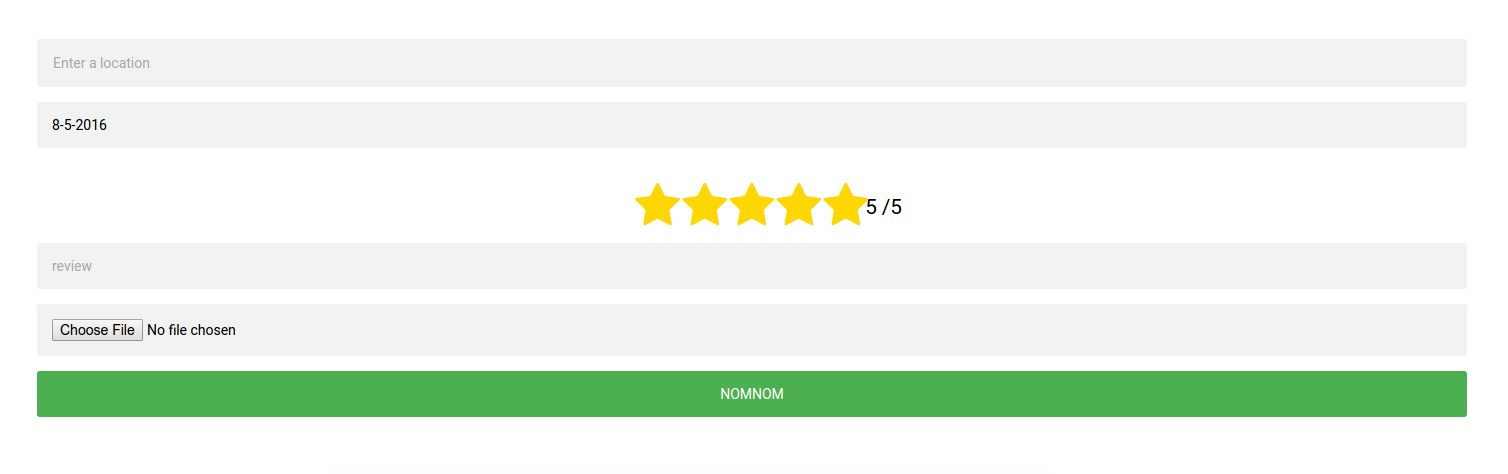
The first field in the form is linked with the Google Maps Places API, so when you select an address it jumps to it on the map. The date field is filled in automatically from the current date, and the format is controlled by way of a date picker:
You can then click on a place marker, and see the uploads that Gil has made:
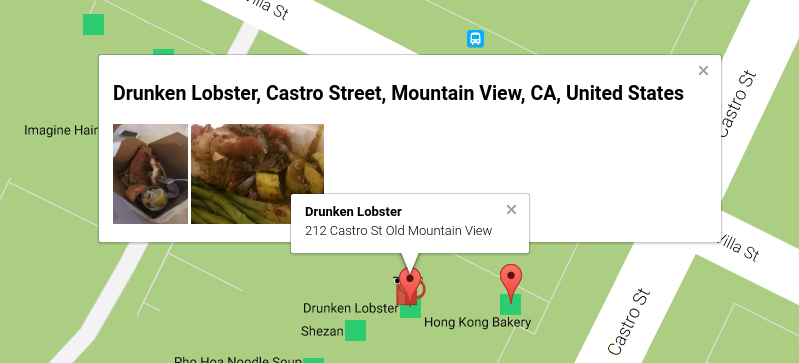
If you click on an image, of course it’s shown in all its glory, along with Gil’s review and the rating (in stars):
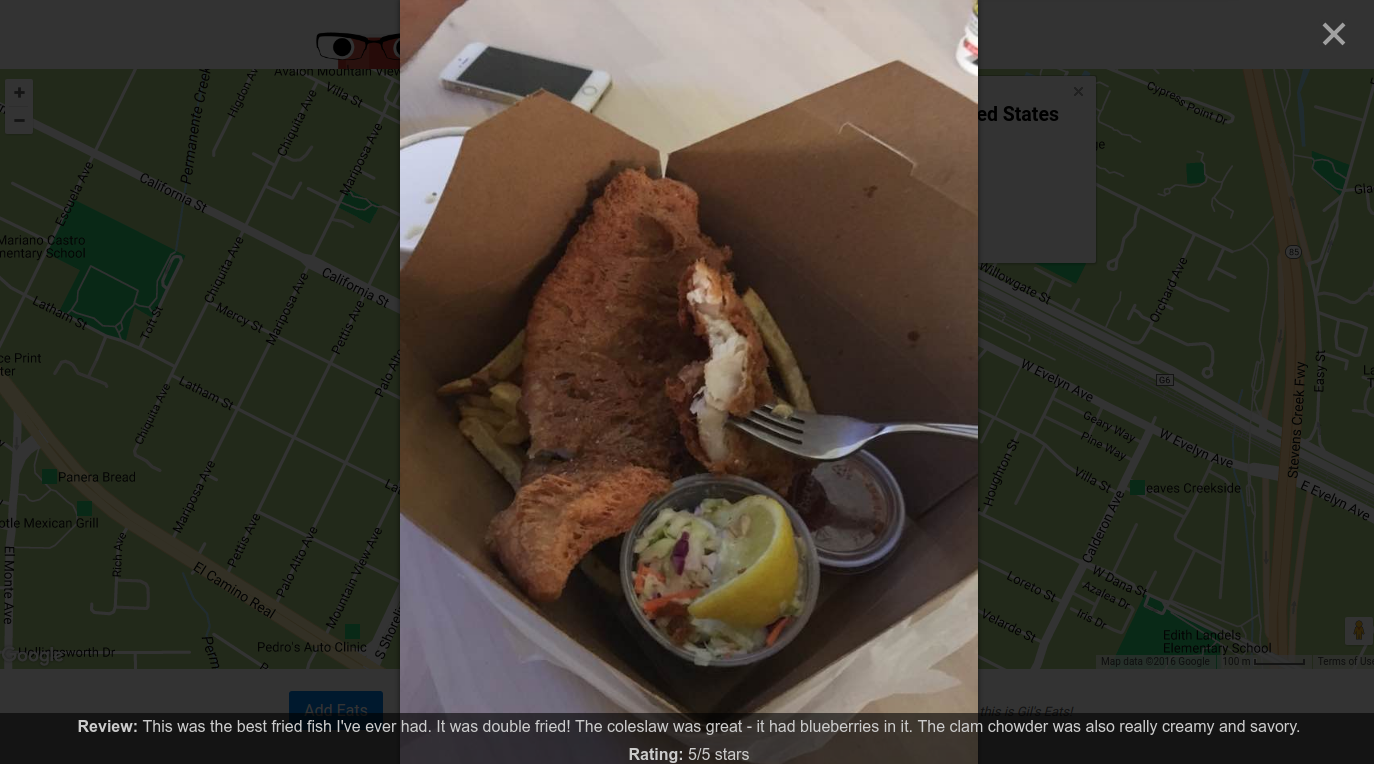
Speaking of stars, I changed the radio buttons and text input into a custom stars rating, which uses font awesome icons, as you can see in the form above. The other great thing about Google Maps is that you can easily add a Street View, so you might plop down onto the map and (really) see some of the places that Gil has frequented!

The “database”
Dropbox has a nice API that let me easily create an application, and then have (Gil) authenticate into his account in order to add a restaurant, which is done with the form shown above. The data (images and json with comments/review) are saved immediately to the application folder:
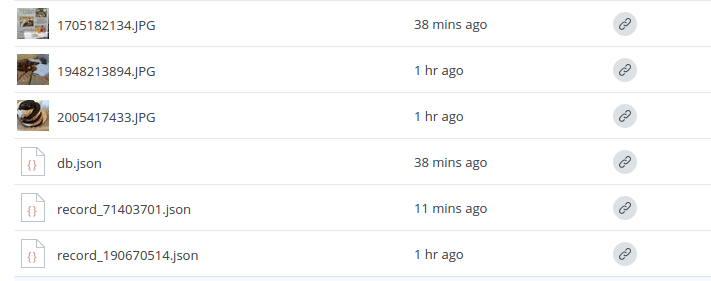
How is the data stored?
When Gil uploads a new image and review, it’s converted to a json file, a unique ID is generated based on the data and upload timestamp, and the data and image file are both uploaded to Dropbox with an API call. At the same time, the API is used to generate shared links for the image and data, and those are written into an updated master data file. The master data file knows which set of flat files belong together (images rendered together for the same location) because the location has a unique ID generated based on its latitude and longitude, which isn’t going to change because we are using the Places API. The entire interface is then updated with new data, down to closing the info window for a location given that the user has it open, so he or she can re-open it to see the newly uploaded image. If a user (that isn’t Gil) logs into the application, the url for his or her new database is saved to a cookie, so (hopefully) it will load the correct map the next time he or she visits. Yes, this means that theoretically other users can use Gil’s application for their data, although this needs further testing.A Flat File Database? Are you nuts?
Probably, yes, but for a small application for one user I thought it was reasonable. I know what you are thinking: flat file databases can be dangerous. A flat file database that has a master file for keeping a record of all of these public shared links (so a non authenticated person, and more importantly, anyone who isn’t Gil) can load them on his or her map means that if the file gets too big, it’s going to be slow to read, write, or just retrieve. I made this decision for several reasons, the first of which is that only one user (Gil) is likely to be writing to it at once, so we won’t have conflicts. The second is that it will take many years for Gil to eat enough to warrant thedb.jsonfile big enough to slow down the application (and I know he is reading this now and taking it as a personal challenge!). When this time comes, I’ll update the application to store and load data based on geographic zones. It’s very easy to get the “current view” of the box in the Google Map, and I already have hashes for the locations, so it should be fairly easy to generate “sub master” files that can be indexed based on where the user goes in the map, and then load smaller sets of data at once.Some application Logic
- The minimum required data to add a new record is an image file and an address.
- I had first wanted to have only individual files, and then load them dynamically based on knowing some Dropbox folder address. Dropbox doesn’t actually let you do this - each file has to have it’s own “shared” link. When I realized this, I came up with my “master database” file solution, but then I was worried about writing to that file and potentially losing data if there was an error in that operation. This is why I made the application so that the entire master database can be re-generated fairly easily. A record can be added or deleted in the user’s Dropbox, and the database will update to not have it.
- A common bug I encountered: when you have a worker running via a Promise, the Promise will only be resolved if you post a message back. I forgot to do this and was getting pending promise returned. This is the same case if you have chained or Promises inside of other promises - you have to return something or the (final) returned variable is undefined.
Things I Learned
Get rid of JQuery
It’s very common (and easy) to use JQuery for really simple operations like setting cookies, and easily selecting divs. I mean, why would I want to do this:var value = document.selectElementById("answer").value;When I can do this?
var value = $("#answer").val();However, I realized that, for my future learning and being a better developer, I should largely try to develop applications that are simple (and don’t use JQuery). Don’t get me wrong, I like it a lot, but it’s not always necessary, and it’s kind of honkin’.
Better Organize Code
The nice thing about Python, and most object-oriented programming languages, is that the organization of the code, along with dependencies and imports, is very intuitive to me. JavaScript is different because it feels like you are throwing everything into a big pot of soup, all at once, and it’s either floating around in the pot somewhere or just totally missing. This makes variable conflicts likely, and I’ve noticed makes it very easy to write poorly documented, error-prone, and messy code. I tried to keep things organized as I went, and at the end was overtaken with my code’s overall lack of simplicity. I’m going to get a lot better at this. I want to get intuition about how to best organize, and write better code. The overall goal seems like it should be to take a big, hairy function and split it into smaller, modular ones, and then reuse them a lot. I need to also learn how to write proper tests for JS.Think about the user
When Gil was testing it, he was getting errors in the console that a file couldn’t be created, because there was a conflict. This happened because he was entering an image and data in the form, and then changing just the image, and trying to upload again. This is a very likely use case (upload a picture of the clam chowder, AND the fried fish, Romeo!), but I didn’t even think of it when I was generating the function for a unique id (only based on the other fields in the form). I then added a variable that definitely would change, the current time stamp with seconds included. I might have used the image name, but then I was worried that a user would try to upload images with the same name, for the same restaurant and review. Anyway, the lesson is to think of how your user is going to use the application!Think about the platform
I didn’t think much about where Gil might be using this, other than his computer. Unfortunately I didn’t test on mobile, because the Places API needs a different key depending on the mobile platform. Oops. My solution was to do a check for the platform, and send the user to a “ruh roh” page if he or she is on mobile. In the future I will develop a proper mobile application, because this seems like the most probably place to want to upload a picture.Easter Eggs
I’m closing up shop for today (it’s getting late, I still need to get home, have dinner, and then wake up tomorrow for my first day of a new job!! :D) but I want to close with a few fun Easter Eggs! First, if you drag “Gil” around (the coffee cup you see when the application starts) he will write you a little message in the console:

The next thing is that if you click on “Gil” in
Gil's Eatsyou will turn the field into an editable one, and you can change the name!
…and your edits will be saved in localStorage so that the name is your custom one next time:
    function saveEdits() {
        var editElem = document.getElementById("username");
        var username = editElem.innerHTML.replaceAll('
','');
        localStorage.userEdits = username;
        editElem.innerHTML = username;
    }
    el = document.getElementById("username");
    el.addEventListener("contentchange", saveEdits, false);
and the element it operates on is all made possible with a
contenteditable="true" onkeyup="saveEdits()in the tag. You’ll also notice I remove any line breaks that you add. My instinct was to press enter when I finished, but actually you click out of the box.
Bugs and Mysteries, and Conclusions
I’m really excited about this, because it’s my first (almost completely working) web application that is completely static (notice the github pages hosting?) and works with several APIs and a (kind of) database. I’m excited to learn more about creating custom elements, and creating object oriented things in JavaScript. It’s also going to be pretty awesome in a few years to do some image processing and text analysis with Gil’s data! Where does he go? Can I predict the kind of food or some other variable from the review? Vice versa? Can the images be used to link his reviews with Yelp? Can I see changes in his likes and dislikes over time? Can I predict things about Gil based on his ratings? Can I filter the set to some subset, and generate a “mean” image of that meal type? I would expect as we collect more data, I’ll start to make some fun visualizations, or even simple filtering and plotting. Until then, time to go home! Later gator! Here is Gil Eats
· -
Poldracklab, and Informatics
Why, hello there! I hear you are a potentially interested graduate student, and perhaps you are interested in data structures, and or imaging methods? If so, why you’ve come to the right place! My PI Russ Poldrack recently wrote a nice post to advertise the Poldrack lab for graduate school. Since I’m the first (and so far, only) student out of BMI to make it through (and proudly graduate from the Poldracklab), I’d like to do the same and add on to some of his comments. Please feel free to reach out to me if you want more detail, or have specific questions.
Is graduate school for you?
Before we get into the details, you should be sure about this question. Graduate school is a long, challenging process, and if you don’t feel it in your heart that you want to pursue some niche passion or learning for that long, given the opportunity cost of making a lower income bracket “salary” for 5 years, look elsewhere. If you aren’t sure, I recommend taking a year or two to work as an RA (research assistant) in a lab doing something similar to what you want to do. If you aren’t sure what you want to study (my position when I graduated from college in 2009), then I recommend an RAship in a lab that will maximize your exposure to many interesting things. If you have already answered the harder questions about the kind of work that gives you meaning, and can say a resounding “YES!” to graduate school, then please continue.
What program should I apply to?
Russ laid out a very nice description of the choices, given that you are someone that is generally interested in psychology and/or informatics. You can study these things via Biomedical Informatics (my program), Neuroscience, or traditional Psychology. If you want to join Poldracklab (of which I highly recommend!) you probably would be best choosing one of these programs. I will try to break it down into categories as Russ did.
- Research: This question is very easy for me to answer. If you have burning questions about human brain function, cognitive processes, or the like, and are less interested in the data structures or methods to get you answers to those questions, don’t be in Biomedical Informatics. If you are more of an infrastructure or methods person, and your idea of fun is programming and building things, you might on the other hand consider BMI. That said, there is huge overlap between the three domains. You could likely pursue the exact same research in all three, and what it really comes down to is what you want to do after, and what kind of courses you want to take.
- Coursework: Psychology and neuroscience have a solid set of core requirements that will give you background and expertise in understanding neurons, (what we know) about how brains work, and (some) flavor of psychology or neuroscience. The hardest course (I think) in neuroscience is NBIO 206, a medical school course (I took as a domain knowledge course) that will have you studying spinal pathways, neurons, and all the different brain systems in detail. It was pretty neat, but I’m not sure it was so useful for my particular research. Psychology likely will have you take basic courses in Psychology (think Cognitive, Developmental, Social, etc.) and then move up to smaller seminar courses and research. BMI, on the other hand, has firm but less structured requirements. For example, you will be required to take core Stats and Computer Science courses, and core Informatics courses, along with some “domain of knowledge.” The domain of knowledge, however, can be everything from genomics to brains to clinical science. The general idea is that we learn to be experts in understanding systems and methods (namely machine learning) and then apply that expertise to solve “some” problem in biology or medicine. Hence the name “Bio-medical” Informatics.
- Challenge: As someone who took Psychology courses in College and then jumped into Computer Science / Stats in graduate school, I can assuredly say that the latter I found much more challenging. The Psychology and Neuroscience courses I’ve taken (a few at Stanford) tend to be project and writing intensive with tests that mainly require lots of memorization. In other words, you have a lot of control over your performance in the class, because working hard consistently will correlate with doing well. On the other hand, the CS and Stats courses tend to be problem set and exam intensive. This means that you can study hard and still take a soul crushing exam, work night and day on a problem set, get a 63% (and question your value as a human being), and then go sit on the roof for a while. TLDR: graduate courses, especially at Stanford, are challenging, and you should be prepared for it. You will learn to unattach your self-worth from some mark on a paper, and understand that you are building up an invaluable toolbelt to start to build the foundation of your future career. You will realize that classes are challenging for everyone, and if you work hard (go to problem sessions, do your best on exams, ask for help when you need it) people tend to notice these things, and you’re going to make it through. Matter of fact, once you make it through it really is sunshine and rainbows! You get to focus on your research and build things, which basically means having fun all the time :)
- Career: It’s hard to notice that most that graduate from BMI, if they don’t continue as a postdoc or professor in academia, get some pretty awesome jobs in industry or what I call “academic industry.” The reason is because the training is perfect for the trendy job of “data scientist,” and so coming out of Stanford with a PhD in this area, especially with some expertise in genomics, machine learning, or medicine, is a highly sought after skill set, and a sound choice given indifference. You probably would only do better with Statistics or Computer Science, or Engineering. If you are definitely wanting to stay in academia and/or Psychology, you would be fine in any three of the programs. However, if you are unsure about your future wants and desires (academia or industry?) you would have a slightly higher leg up with BMI, at least on paper.
- Uncertainty: We all change our minds sometime. If you are decided that you love solving problems using algorithms but unsure about imaging or brain science, then I again recommend BMI, because you have the opportunity to rotate in multiple labs, and choose the path that is most interesting to you. There is (supposed to be) no hard feelings, and no strings attached. You show up, bond (or not) with the lab, do some cool work (finish or not, publish or not) and then move on.
- Admission: Ah, admissions, what everyone really wants to know about! I think most admissions are a crapshoot - you have a lot of highly and equally qualified individuals, and the admissions committees apply some basic thresholding of the applications, and then go with gut feelings, offer interviews to 20-25 students (about 1/5 or 1/6 of the total maybe?) and then choose the most promising or interesting bunch. From a statistics point of view, BMI is a lot harder to be admitted to (I think). I don’t have complete numbers for Psychology or Neuroscience, but the programs tend to be bigger, and they admit about 2-3X the number of students. My year in BMI, the admissions rate was about 4-5% (along the lines of 6 accepted for about 140-150 applications) and the recently published statistics cite 6 accepted for 135 applications. This is probably around a 5% admissions rate, which is pretty low. So perhaps you might just apply to both, to maximize your chances for working with Poldracklab!
- Support: Support comes down to the timing of having people looking out for you during your first (and second) year experiences, and this is where BMI is very different from the other programs. You enter BMI and go through what are called “rotations” (three is about average) before officially joining a lab (usually by the end of year two), and this happens during the first two years. This period also happens to be the highest stress time of the graduate curriculum, and if a student is to feel in lack of support, overworked, or sad, it is most likely to happen during this time. I imagine this would be different in Psychology, because you are part of a lab from Day 1. In this case, the amount of support that you get is highly dependent on your lab. Another important component of making this decision is asking yourself if you are the kind of person that likes having a big group of people to be sharing the same space with, always available for feedback, or if you are more of a loner. I was an interesting case because I am strongly a loner, and so while the first part of graduate school felt a little bit like I was floating around in the clouds, it was really great to be grounded for the second part. That said, I didn’t fully take advantage of the strong support structure that Poldracklab had to offer. I am very elusive, and continued to float when it came to pursuing an optimal working environment (which for me wasn’t sitting at a desk in Jordan Hall). You would only find me in the lab for group meetings, and because of that I probably didn’t bond or collaborate with my lab to the maximum that I could. However, it’s notable to point out that despite my different working style, I was still made to feel valued and involved in many projects, another strong indication of a flexible and supportive lab.
How is Poldracklab different from other labs?
Given some combination of interest in brain imaging and methods, Poldracklab is definitely your top choice at Stanford, in my opinion. I had experience with several imaging labs during my time, and Poldracklab was by far the most supportive, resource providing, and rich in knowledge and usage of modern technology. Most other labs I visited were heavily weighed to one side - either far too focused on some aspect of informatics at a detriment to what was being studied, or too far into answering a specific question and relying heavily on plugging data into opaque, sometimes poorly understood processing pipelines. In Poldracklab, we wrote our own code, we constantly questioned if we could do it better, and the goal was always important. Russ was never controlling or limiting in his advising. He provided feedback whenever I asked for it, brought together the right people for a discussion when needed, and let me build things freely and happily. We were diabolical!
What does an advisor expect of me?
I think it’s easy to have an expectation that, akin to secondary school, Medical School, or Law School, you sign up for something, go through a set of requirements, pop out of the end of the conveyor belt of expectation, and then get a gold star. Your best strategy will be to throw away all expectation, and follow your interests and learning like a mysterious light through a hidden forest. If you get caught up in trying to please some individual, or some set of requirements, you are both selling yourself and your program short. The best learning and discoveries, in my opinion, come from the mind that is a bit of a drifter and explorer.
What kind of an advisor is Russ?
Russ was a great advisor. He is direct, he is resourceful, and he knows his stuff. He didn’t impose any kind of strict control over the things that I worked on, the papers that I wanted to publish, or even how frequently we met. It was very natural to meet when we needed to, and I always felt that I could speak clearly about anything and everything on my mind. When I first joined it didn’t seem to be a standard to do most of our talking on the white board (and I was still learning to do this myself to move away from the “talking head” style meeting), but I just went for it, and it made the meetings fun and interactive. He is the kind of advisor that is also spending his weekends playing with code, talking to the lab on Slack, and let’s be real, that’s just awesome. I continued to be amazed and wonder how in the world he did it all, still catching the Caltrain to make the ride all the way back to the city every single day! Lab meetings (unless it was a talk that I wasn’t super interested in) were looked forward to because people were generally happy. The worst feeling is having an advisor that doesn’t remember what you talked about from week to week, can’t keep up with you, or doesn’t know his or her stuff. It’s unfortunately more common than you think, because being a PI at Stanford, and keeping your head above the water with procuring grants, publishing, and maintaining your lab, is stressful and hard. Regardless, Russ is so far from the bad advisor phenotype. I’d say in a heartbeat he is the best advisor I’ve had at Stanford, on equal par with my academic advisor (who is also named Russ!), who is equally supportive and carries a magical, fun quality. I really was quite lucky when it came to advising! One might say, Russ to the power of two lucky!
Do I really need to go to Stanford?
All this said, if you know what you love to do, and you pursue it relentlessly, you are going to find happiness and fulfillment, and there is no single school that is required for that (remember this?). I felt unbelievably blessed when I was admitted, but there are so many instances when opportunities are presented by sheer chance, or because you decide that you want something and then take proactive steps to pursue it. Just do that, and you’ll be ok :)
In a nutshell
If you pursue what you love, maximize fun and learning, take some risk, and never give up, graduate school is just awesome. Poldracklab, for the win. You know what to do.
· -
Thesis Dump
I recently submit my completed thesis (cue albatross soaring, egg hatching, sunset roaring), but along the way I wanted a simple way to turn it into a website. I did this for fun, but it proved to be useful because my advisor wanted some of the text and didn’t want to deal with LaTeX. I used Overleaf because it had a nice Stanford template, and while it still pales in comparison to the commenting functionality that Google Docs offers, it seems to be the best currently available collaborative, template-based, online LaTeX editor. If you are familiar with it, you also know that you have a few options for exporting your documents. You can of course export code (meaning
.texfiles for text, and.bibfor something like a bibliography, and.styfor styles (and these files are zipped up), or you can have Overleaf compile it for you and download as PDF.Generating a site
The task at hand is to convert something in LaTeX to HTML. If you’ve used LaTeX before, you know that there are already tools for that (hdlatex and docs). The hard part in this process was really just installing dependencies, a task that Docker is well suited for. Thus, I generated a Docker image that extracts files from the Overleaf zip, runs an hdlatex command to generate a static version of the document with appropriate links, and then you can push the static files to your Github pages, and you’re done! I have complete instructions in the README, and you can see the final generated site. It’s nothing special, basically just white bread that could use some improving upon, but it meets it’s need for now. The one tiny feature is that you can specify the Google Font that you want by changing one line in generate.sh (default is Source Serif Pro):
docker exec $CONTAINER_ID python /code/generate.py "Space Mono"Note that “Source Mono” is provided as a command line argument, and nothing is specified in the current file to default to Source Serif Pro. Here is a look at the final output with Source Serif Pro:
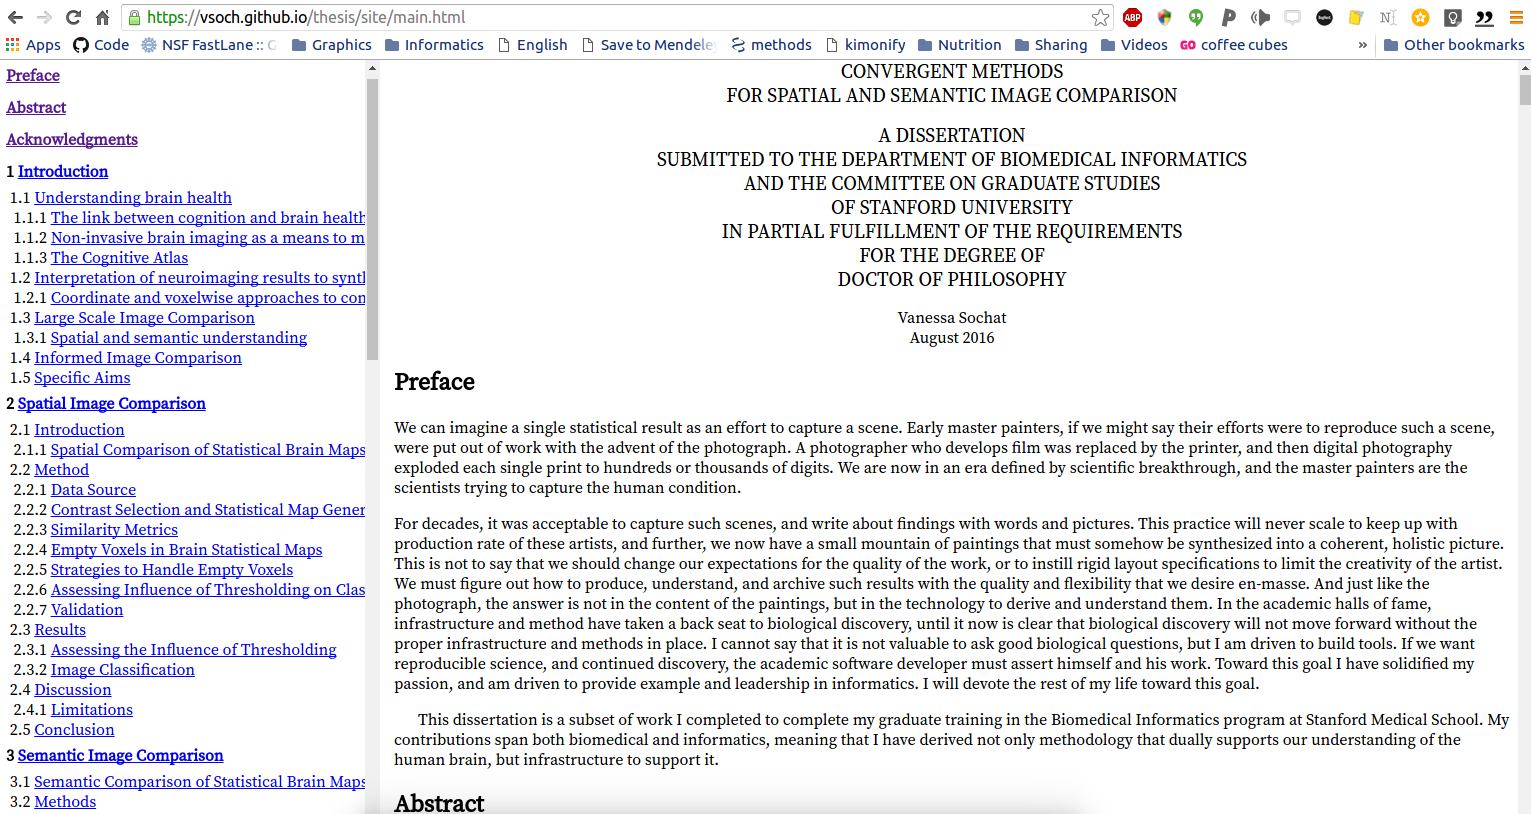
Advice for Future Students
The entire thesis process wasn’t really as bad as many people make it out to be. Here are some pointers, for those in the process of or not yet started writing their theses.
- Choose a simple, well-scoped project. Sure, you could start your dream work now, but it will be a lot easier to complete a well defined project, nail your PhD, and then save the world after. I didn’t even start the work that became my thesis until about a year and a half before the end of graduate school, so don’t panic if you feel like you are running out of time.
- Early in graduate school, focus on papers. The reason is that you literally can have a paper be an entire chapter, and boum there alone you’ve banged out 20-30 pages! Likely you will want to rewrite some of the content to have a different organization and style, but the meat is high quality. Having published work in a thesis is a +1 for the committee because it makes it easy for them to consider the work valid.
- Start with an outline, and write a story around it. The biggest “new writing” I had to do for mine was an introduction with sufficient background and meat to tie all the work that I had done together. Be prepared to change this story, depending on feedback from your committee. I had started with a theme of “reproducible science,” but ultimately finished with a more niche, focused project.
- For the love of all that is good, don’t put your thesis into LaTeX until AFTER it’s been edited, reviewed, and you’ve defended, made changes, and then have had your reading committee edit it again. I made the mistake of having everything ready to go for my defense, and going through another round of edits was a nightmare afterward. Whatever you do, there is going to be a big chunk of time that must be devoted for converting a Google Doc into LaTeX. I chose to do it earlier, but the cost of that is something that is harder to change later. If I did this again, I would have just done this final step when it was intended for, at the end!
- Most importantly, graduate school isn’t about a thesis. Have fun, take risks, and spend much more time doing those other things. The thesis I finished, to be completely honest, is pretty niche, dry, and might only be of interest to a few people in the world. The real richness in graduate school, for me, was everything but the thesis! I wrote a poem about this a few months ago for a talk, and it seems appropriate to share it here:
I don't mean to be facetious,
but graduate school is not about a thesis.
To be tenacious, tangible, and thoughtful,
for inspired idea you must be watchful.
The most interesting things you might miss
because they can come with a scent of risk.

In this talk I will tell a story,
of my thinking throughout this journey.
I will try to convince you, but perhaps not
that much more can be learned and sought
if in your work you are not complacent,
if you do not rely on others for incent.
When you steer away from expectation,
your little car might turn into innovation.

Graduate school between the lines,
has hidden neither equation nor citation.
It may come with a surprise -
it's not about the dissertation.
Uploading Warnings
A quick warning - the downloaded PDF wasn’t considered by the Stanford online Axess portal to be a “valid PDF”:
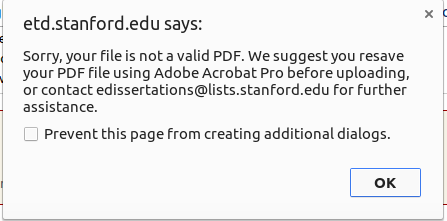
and before you lose your earlobes, know that if you open the PDF in any official Adobe Reader (I used an old version of Adobe Reader on a Windows machine) and save it again, the upload will work seamlessly! Also don’t panic when you first try to do this, period, and see this message:

As the message says, if you come back in 5-10 minutes the page will exist!
· -
Pokemon Ascii Avatar Generator
An avatar is a picture or icon that represents you. In massive online multiplayer role playing games (MMORPGs) your “avatar” refers directly to your character, and the computer gaming company Origin Systems took this symbol literally in its Ultima series of games by naming the lead character “The Avatar.”
Internet Avatars
If you are a user of this place called the Internet, you will notice in many places that an icon or picture “avatar” is assigned to your user. Most of this is thanks to a service called Gravatar that makes it easy to generate a profile that is shared across sites. For example, in developing Singularity Hub I found that there are many Django plugins that make adding a user avatar to a page as easy as adding an image with a source (src) like
https://secure.gravatar.com/avatar/hello.The final avatar might look something like this:
This is the “retro” design, and in fact we can choose from one of many:

Command Line Avatars?
I recently started making a command line application that would require user authentication. To make it more interesting, I thought it would be fun to give the user an identity, or minimally, something nice to look at at starting up the application. My mind immediately drifted to avatars, because an access token required for the application could equivalently be used as a kind of unique identifier, and a hash generated to produce an avatar. But how can we show any kind of graphic in a terminal window?
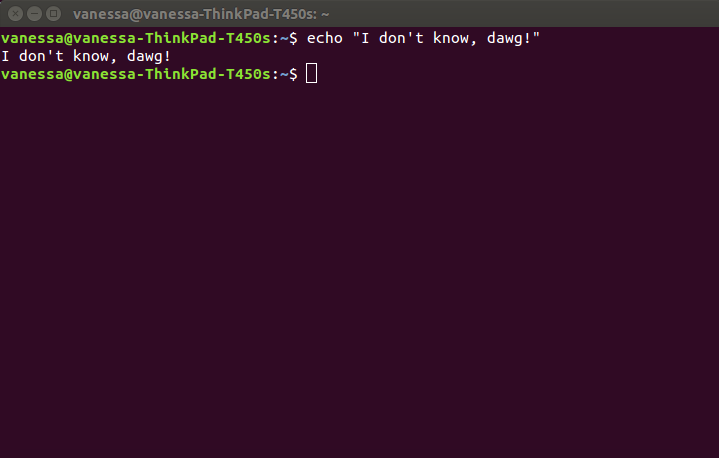
Ascii to the rescue!
Remember chain emails from the mid 1990s? There was usually some message compelling you to send the email to ten of your closest friends or face immediate consequences (cue diabolical flames and screams of terror). And on top of being littered with exploding balloons and kittens, ascii art was a common thing.
 __     __        _           _                     _
 \ \   / /       | |         | |                   | |
  \ \_/ /__  __ _| |__     __| | __ ___      ____ _| |
   \   / _ \/ _` | '_ \   / _` |/ _` \ \ /\ / / _` | |
    | |  __/ (_| | | | | | (_| | (_| |\ V  V / (_| |_|
    |_|\___|\__,_|_| |_|  \__,_|\__,_| \_/\_/ \__, (_)
                                               __/ |
                                              |___/
Pokemon Ascii Avatars!
I had a simple goal - to create a command line based avatar generator that I could use in my application. Could there be any cute, sometimes scheming characters that be helpful toward this goal? Pokemon!! Of course :) Thus, the idea for the pokemon ascii avatar generator was born. If you want to skip the fluff and description, here is pokemon-ascii.
Generate a pokemon database
Using the Pokemon Database I wrote a script that produces a data structure that is stored with the module, and makes it painless to retrieve meta data and the ascii for each pokemon. The user can optionally run the script again to re-generate/update the database. It’s quite fun to watch!

The Pokemon Database has a unique ID for each pokemon, and so those IDs are the keys for the dictionary (the json linked above). I also store the raw images, in case they are needed and not available, or (in the future) if we want to generate the ascii’s programatically (for example, to change the size or characters) we need these images. I chose this “pre-generate” strategy over creating the ascii from the images on the fly because it’s slightly faster, but there are definitely good arguments for doing the latter.
Method to convert image to ascii
I first started with my own intuition, and decided to read in an image using the Image class from PIL, converting the RGB values to integers, and then mapping the integers onto the space of ascii characters, so each integer is assigned an ascii. I had an idea to look at the number of pixels that were represented in each character (to get a metric of how dark/gray/intense) each one was, that way the integer with value 0 (no color) could be mapped to an empty space. I would be interested if anyone has insight for how to derive this information. The closest thing I came to was determining the number of bits that are needed for different data types:
# String
"s".__sizeof__()
38

# Integer
x=1
x.__sizeof__()
24

# Unicode
unicode("s").__sizeof__()
56

# Boolean
True.__sizeof__()
24

# Float
float(x).__sizeof__()
24
Interesting, a float is equivalent to an integer. What about if there are decimal places?
float(1.2222222222).__sizeof__()
24
Nuts! I should probably not get distracted here. I ultimately decided it would be most reasonable to just make this decision visually. For example, the
@character is a lot thicker than a., so it would be farther to the right in the list. My first efforts rendering a pokemon looked something like this:
I then was browsing around, and found a beautifully done implementation. The error in my approach was not normalizing the image first, and so I was getting a poor mapping between image values and characters. With the normalization, my second attempt looked much better:
I ultimately modified this code sightly to account for the fact that characters tend to be thinner than they are tall. This meant that, even though the proportion / size of the image was “correct” when rescaling it, the images always looked too tall. To adjust for this, I modified the functions to adjust the new height by a factor of 2:
def scale_image(image, new_width):
    """Resizes an image preserving the aspect ratio.
    """
    (original_width, original_height) = image.size
    aspect_ratio = original_height/float(original_width)
    new_height = int(aspect_ratio * new_width)

    # This scales it wider than tall, since characters are biased
    new_image = image.resize((new_width*2, new_height))
    return new_image
Huge thanks, and complete credit, goes to the author of the original code, and a huge thanks for sharing it! This is a great example of why people should share their code - new and awesome things can be built, and the world generally benefits!
Associate a pokemon with a unique ID
Now that we have ascii images, each associated with a number from 1 to 721, we would want to be able to take some unique identifier (like an email or name) and consistently return the same image. I thought about this, and likely the basis for all of these avatar generators is to use the ID to generate a HASH, and then have a function or algorithm that takes the hash and maps it onto an image (or cooler) selects from some range of features (e.g., nose mouth eyes) to generate a truly unique avatar. I came up with a simple algorithm to do something like this. I take the hash of a string, and then use modulus to get the remainder of that number divided by the number of pokemon in the database. This means that, given that the database doesn’t change, and given that the pokemon have unique IDs in the range of 1 to 721, you should always get the same remainder, and this number will correspond (consistently!) with a pokemon ascii. The function is pretty simple, it looks like this:
def get_avatar(string,pokemons=None,print_screen=True,include_name=True):
    '''get_avatar will return a unique pokemon for a specific avatar based on the hash
    :param string: the string to look up
    :param pokemons: an optional database of pokemon to use
    :param print_screen: if True, will print ascii to the screen (default True) and not return
    :param include_name: if True, will add name (minus end of address after @) to avatar
    '''
    if pokemons == None:
        pokemons = catch_em_all()

    # The IDs are numbers between 1 and the max
    number_pokemons = len(pokemons)
    pid = numpy.mod(hash(string),number_pokemons)
    pokemon = get_pokemon(pid=pid,pokemons=pokemons)
    avatar = pokemon[pid]["ascii"]
    if include_name == True:
        avatar = "%s\n\n%s" %(avatar,string.split("@")[0])
    if print_screen == True:
        print avatar
    else:
        return avatar
…and the function
get_pokemontakes care of retrieving the pokemon based on the id,pid.Why?
On the surface, this seems very silly, however there are many good reasons that I would make something like this. First, beautiful, or fun details in applications make them likable. I would want to use something that, when I fire it up, subtly reminds me that in my free time I am a Pokemon master. Second, a method like this could be useful for security checks. A user could learn some image associated with his or her access token, and if this ever changed, he/she would see a different image. Finally, a detail like this can be associated with different application states. For example, whenever there is a “missing” or “not found” error returned for some function, I could show Psyduck, and the user would learn quickly that seeing Psyduck means “uhoh.”

There are many more nice uses for simple things like this, what do you think?
Usage
The usage is quite simple, and this is taken straight from the README:
      usage: pokemon [-h] [--avatar AVATAR] [--pokemon POKEMON] [--message MESSAGE] [--catch]

      generate pokemon ascii art and avatars

      optional arguments:
        -h, --help         show this help message and exit
        --avatar AVATAR    generate a pokemon avatar for some unique id.
        --pokemon POKEMON  generate ascii for a particular pokemon (by name)
        --message MESSAGE  add a custom message to your ascii!
        --catch            catch a random pokemon!

      usage: pokemon [-h] [--avatar AVATAR] [--pokemon POKEMON] [--message MESSAGE] [--catch]
Installation
You can install directly from pip:
pip install pokemonor for the development version, clone the repo and install manually:
      git clone https://github.com/vsoch/pokemon-ascii
      cd pokemon-ascii
      sudo python setup.py sdist
      sudo python setup.py install
Produce an avatar
Just use the
--avatartag followed by your unique identifier:pokemon --avatar vsoch @@@@@@@@@@@@@*,@@@@@@@@@@@@@@@@@@@@@@@@@@@@@@@@@@@@@@@@@@@@@ @@@@@@@@@,:::::::::,@@@:,S+@@@@@@@#:::::::,:@@@@@@@@@@@@@@@@ @@@@@@@@:::::::::****@@**..@@@@@:::::::::::::S@@@@@@@@@@@@@@ @@@@@@@::::***********#..%.S@@#::::::::::*****S@@@@@@@@@:?@@ @@@@@@@*****?%%%%?***....SSSS#*****************#@@@@@@@@,::@ @@@@@@@%***S%%%%%.#*S.SSSSSS?.****?%%%%%#*******@@@@@#:::::. @@@@@@@@****%%%%#...#SSSS#%%%?***?%%%%%%%******%@@@@%::::*** @@@@@@@@@+****SSSSSS?SSS.%...%#SS#%....%.******@@@@@?******* @@@@@@@@@@@@#SSSSSSS#S#..%...%%.....%.%.******@@@@@@@#**.**@ @@@@@@@@@@@..SSSSS..?#.%..%.......%.%.******#@@@@@@@@@@S%,@@ @@@@@@@@@@#%........................%****%,@@@@@@@@@@@?%?@@@ @@@@@@@@@@.#*@@@%.................%%%......SSS.SSS%@#%%?@@@@ @@@@@@@@@%+*@@?,.%....%%.,@,@@,*%.%%%..%%%%.%....%...?#@@@@@ @@@@@@@@@:*.@#+?,%%%%%.%,@??#@@@**......%........%...%%*@@@@ @@@@@@@@@@.*.@##@...%%.+@##@?,@@****.....%...%....?...%%@@@@ @@@@@@@@@@@.**+**#++SS***,*#@@@*****%%.%.......%%........@@@ @@@@@@@@@@@@************************..........%%.%%...%%*@@@ @@@@@@@@@@@@@@,?**?+***************.%........#....%%%%%%@@@@ @@@@@@@@@@@@@@@@@%#*+....*******..%%..%%.....%%%%%%%%%%@@@@@ @@@@@@@@@@@@@@+%%%%%%??#%?%%%???.%%%%%...%%%.**.**#%%%@@@@@@ @@S#****.?......%%%%%%?%@@@@@:#........%?#*****.#***#@@@@@@@ @***%.*S****S**.%%%%%%@@@@@@@S....%%..%@@+*+..%**+%#.@@@@@@@ @%%..*..*%%+++++%%%%@@@@@@@...%.%%.%.%@@@,+#%%%%++++@@@@@@@@ @:+++#%?++++++++%%@@.**%**.****#..%%%,@@@@@S+.?++++@@@@@@@@@ @@@++?%%%?+++++#@@@**.********S**%%%@@@@@@@@@@@@@@@@@@@@@@@@ @@@@@@%++++?@@@@@@S%%*#%.**%%**..+%@@@@@@@@@@@@@@@@@@@@@@@@@ @@@@@@@@@@@@@@@@@@@++++++++.S++++#@@@@@@@@@@@@@@@@@@@@@@@@@@ @@@@@@@@@@@@@@@@@@@@++%%%%?+++++@@@@@@@@@@@@@@@@@@@@@@@@@@@@ @@@@@@@@@@@@@@@@@@@@@*+#%%%+++%@@@@@@@@@@@@@@@@@@@@@@@@@@@@@ vsochYou can also use the functions on command line (from within Python):
      from pokemon.skills import get_avatar

      # Just get the string!
      avatar = get_avatar("vsoch",print_screen=False)
      print avatar

      # Remove the name at the bottom, print to screen (default)
      avatar = get_avatar("vsoch",include_name=False)
Randomly select a Pokemon
You might want to just randomly get a pokemon! Do this with the
--catchcommand line argument!pokemon --catch @%,@@@@@@@@@@@@@@@@@@@@@@@@@@@@@@@@@@@@@@@@@@@@@@@@@@@@@@@@@ .????.@@@@@@@@@@@@@@@@@@@@@@@@@@@@@@@@@@@@@@@@@@@@@@@@@@@@@@ .???????S@@@@@@@@@@@@@@@@@@@@@@@@@@@@@@@@@@@@@@@@@@@@@@@@@@@ :?????????#@@@@@@@@@@@@@@@@@@@@@@@@@@@@@@@@@@@@@@@@@@@@@@@@@ *?????????????*@@@@@@@@@@@@@@@@@@@@@@@@@@@@@@@@@@@@@@@@@@@@@ @???????#?????###@@@@@@@@@@@@@@@@@@@@@@@@@@@@@@@@@@@@@,*.??# @?????,##,S???#####@@@@@@@@@@@@@@@@@@@@@@@@@@S##???????????? @?????*,,,,,,########@@@@@@@@@@@@@@@@@:###????????????????#@ @##????,,,,,,,,,#####@@@@@@@@@@@@@.######?????#?:#????????@@ @####?#,,,,,,,,,,,##@@@@@@@@@@@@@@#######*,,,,,*##+?????+@@@ @######,,,,,,,,,,,S@@@@@@@@@@@@@@#.,,,,,,,,,,,,,,:?####@@@@@ @######,,,,,,,,,,%@@,S.S.,@@@@@@@,,,,,,,,,,,,,,,######@@@@@@ @@#####,,,,,,,,.,,,,,,,,,,,,,,,*#,,,,,,,,,,,,,.#####:@@@@@@@ @@@@@@@@@@.#,,,,,,,,,,,,,,,,,,,,,,,,,,,,,,,,,######@@@@@@@@@ @@@@@@@@@,,,,,,,,,,,,,,,,,,,,,,,,,,,,,,,,,,+######@@@@@@@@@@ @@@@@@@@%,,,,,++:,,,,,,,,,,,,,,,,,,,,,@@:.######:@@@@@@@@@@@ @@@@@@@:,,,:##@@@#,,,,,,,,,,,,?@S#,,,,,,@@@@@@@@@@@@@@@@@@@@ @@@@@@@?,,,#######,,,,,,,,,,,#.@:##,,,:?@@@@@@@@@@@@@@@@@@@@ @@@@@@@.,,S,??%?*,,,,,,,,,,,,####?%+,::%@@@@@@@@@@@@@@@@@@@@ @@@@@@@@?..*+,,,,,,*,,,,,,,,,,,+#S,::::*@@@@@@@@@@@@@@@@@@@@ @@@@@@@@@%..*,,,,,,,,,,,,,,,,,,,:.*...%@@@@@@@@@@@@@@@@@@@@@ @@@@@@@@@@.**::*::::::,,:::::::+.....@@@@@@@@@@@@@@@@@@@@@@@ @@@@@@@@.@@@@?:**:::*::::::::::*...@@@@@@@@@@@@@@@@@@@@@@@@@ @@@@@?,,,,,,,,,:,##S::::**:::S#@@@@@@@@@@@@@@@@@@@@@@@@@@@@@ @@@@@@@.,,,,,,:S#?##?########:#****#,@@@@@@@@@@@@@@@@@@@@@@@ @@@@@@@@@@,%:*%,??#,,,,:*S##**:..****:,.*@@@@@@@@@@@@@@@@@@@ @@@@@@@@@@@@@+,,,,,,,,,,,,,,,,,,*...*:,.,@@@@@@@@@@@@@@@@@@@ @@@@@@@@@@@@@+,,,,,,,,,,,,,,,,,,?@@@@@*#?@@@@@@@@@@@@@@@@@@@ @@@@@@@@@@@@@*,,,,,,,,,,,,,,,,,,.@#########?@@@@@@@@@@@@@@@@ @@@@@@@@@@@@@.*:,,,,,,,,,,,,,,:.##%,?#####????:@@@@@@@@@@@@@ @@@@@@@@@@@@@@?.....*******....S@@@@@@:##?????@@@@@@@@@@@@@@ @@@@@@@@@@@@@@S.+..********...#%@@@@@@@@@##,@@@@@@@@@@@@@@@@ @@@@@@@@@@@#*,,,,*.#@@@@@@@..*:,,*S@@@@@@@@@@@@@@@@@@@@@@@@@ @@@@@@@@@@+@,%,,,#@@@@@@@@@@,S,,,%,,:@@@@@@@@@@@@@@@@@@@@@@@ PichuYou can equivalently use the
--messageargument to add a custom message to your catch!pokemon --catch --message "You got me!" @@@@@@@@@*.@@@@@@@@@@@@@@@@@@@@@@@@@@@@@@@@@@@@@@@@@@@@@@@@@ @@@@@@@@...+@@@@@@@@@@@@@@@@@@@@@@@@@@@@@@@@@@@@@@@@@@@@@@@@ @@@@@@@@++++@@@@@@@@@@@@@@@@@@@@@@@@@@@@@@@@@@@@@@@@@@@@@@@@ :..+,@@+.+++%@@@@@@@@@@@@@@@@@@@@@@@@@@@@@@@@@@@@@@@@@@@@@@@ @..++++S++++++.?...@@@@@@@@@@@@@@@@@@@@@@@@@@@@@@@@@@@@@@@@@ @@@:S.S+SSS.S%++.+++@@@@@@@@@@+.%.@@@@@@@@@@@@@@@@@@@@@@@@@@ @@@@:SSSSSSSSSS,@@@@@@@,:,:.SS+.....+.@@@@@@@@@@@@@@@@@@@@@@ @@@@,:%SS++SS.,.%,:,S,,,,+..%.........S.@@@@@@@@@@@@@@@@@@@@ @@@@@,:*...:,,+,.,,,,,,,*%%%++++..+++SSS+@@@@@@@@@@@@@@@@@@@ @@@@@@,,.....%:,,,:.:.,:.%%.SSSS++SS+%+S%,+@@@@@@@@@@@@@@@@@ @@@@@@@*.....S...***+,,,%..%++,?SSS.%.%%%:,.,@@@@@@@@@@@@@@@ @@@@@@@@,+**........,,,,....++S@,+%..#..%,,S..@@@@@@@@@@@@@@ @@@@@@@@@@@@@@@@*..:,,,,,%..%++S%%.%%.S%%,,*+.+@@@@@@@@@@@@@ @@@@@@@@@@@@@@@@S,,,,,,,,,%%%..SS..%?%%%,,,S+...@@@@@@@@@@@@ @@@@@@@@@@@@@@@@S.:::::::::%.%%S...%%%%:::*.....**@@@@@@@@@@ @@@@@@@@@@@@@@@@.%%..:::::::S%%.?%%%%%:::....**,S,,:@@@@@@@@ @@@@@@@@@@@@@@:::*%%%%?..*:::,.%%%%.,:*.%@@.*:,,,:,,S@....@@ @@@@@@@@@@@@@:,:,::*.?%%%%%%?+*%%?.?%%%%%+@@,,,,,,,.++%++@@@ @@@@@@@@@@@@@@*,,,,,**...*%%%%%%%%%%?++++++.@,,,,,SS+SS++@@@ @@@@@@@@@@@@@,,.,S,,,,:....***%%?%++++++++++.@.,,+SSSSS.S+@@ @@@@@@@@@@@@,,SSSS..:.%,:*..?%%??%%++++++.+S+@@@.S..%S.%.S++ @@@@@@@@@@@,,S.....S::*.@@@%%%%@?%%#+++++%%%?S@@@@@.%.,@@... @@@@@@@@@@@:,,?.%%%::::@@@...%.@?.%.++++.+%%%%.@@@@..++@@@@@ @@@@@@@@@@S,.%%.:,,,,,S@@@@@.?@@+SS,S..........@@@@@,@@@@@@@ @@@@@@@@@@@+S...++.,,:@@@@@@@@@@@@@@@%....SSS+SS@@@@@@@@@@@@ You got me!You can also catch pokemon in your python applications. If you are going to be generating many, it is recommended to load the database once and provide it to the function, otherwise it will be loaded each time.
      from pokemon.master import catch_em_all, get_pokemon

      pokemons = catch_em_all()
      catch = get_pokemon(pokemons=pokemons)
I hope that you enjoy pokemon-ascii as much as I did making it!
· -
How similar are my operating systems?
How similar are my operating systems?
A question that has spun out of one of my projects that I suspect would be useful in many applications but hasn’t been fully explored is comparison of operating systems. If you think about it, for the last few decades we’ve generated many methods for comparing differences between files. We have md5 sums to make sure our downloads didn’t poop out, and command line tools to quickly look for differences. We now have to take this up a level, because our new level of operation isn’t on a single “file”, it’s on an entire operating system. It’s not just your Mom’s computer, it’s a container-based thing (e.g., Docker or Singularity for non sudo environments) that contains a base OS plus additional libraries and packages. And then there is the special sauce, the application or analysis that the container was birthed into existence to carry out. It’s not good enough to have “storagey places” to dump these containers, we need simple and consistent methods to computationally compare them, organize them, and let us explore them.
Similarity of images means comparing software
An entire understanding of an “image” (or more generally, a computer or operating system) comes down to the programs installed, and files included. Yes, there might be various environmental variables, but I would hypothesize that the environmental variables found in an image have a rather strong correlation with the software installed, and we would do pretty well to understand the guts of an image from the body without the electricity flowing through it. This would need to be tested, but not quite yet.
Thus, since we are working in Linux land, our problem is simplified to comparing file and folder paths. Using some software that I’ve been developing I am able to derive quickly lists of both of those things (for example, see here), and matter of fact, it’s not very hard to do the same thing with Docker (and I plan to do this en-masse soon).
Two levels of comparisons: within and between images
To start my thinking, I simplified this idea into two different comparisons. We can think of each file path like a list of sorted words. Comparing two images comes down to comparing these lists. The two comparisons we are interested in are:
- Comparing a single file path to a second path, within the same image, or from another image.
- Comparing an entire set of file paths (one image) to a (?different) set (a second image).
I see each of these mapping nicely to a different goal and level of detail. Comparing a single path is a finer operation that is going to be useful to have detailed understanding about differences between two images, and within one image it is going to let me optimize the comparison algorithm by first removing redundant paths. For example, take a look at the paths below:
      ./usr/include/moar/6model',
      ./usr/include/moar/6model/reprs'
We don’t really need the first one because it’s represented in the second one. However, if some Image 1 has the first but not the second (and we are doing a direct comparison of things) we would miss this overlap. Thus, since I’m early in developing these ideas, I’m just going to choose the slower, less efficient method of not filtering anything yet. So how are we comparing images anyway?
Three frameworks to start our thinking
Given that we are comparing lists of files and/or folders, we can approach this problem in three interesting ways:
- Each path is a feature thing. I’m just comparing sets of feature things.
- Each path is list of parent –> child relationships, and thus each set of paths is a graph. We are comparing graphs.
- Each path is a document, and the components of the path (folders to files) are words. The set of paths is a corpus, and I’m comparing different corpus.
Comparison of two images
I would argue that this is the first level of comparison, meaning the rougher, higher level comparison that asks “how similar are these two things, broadly?” In this framework, I want to think about the image paths like features, and so a similarity calculation can come down to comparing two sets of things, and I’ve made a function to do this. It comes down to a ratio between the things they have in common (intersect) over the entire set of things:
score = 2.0*len(`intersect`) / (len(`pkg1`)+len(`pkg2`))I wasn’t sure if “the entire set of things” should include just folder paths, just files paths, or both, and so I decided to try all three approaches. As I mentioned previously, it also would need to be determined if we can further streamline this approach by filtering down the paths first. I started running this on my local machine, but then realized how slow and lame that was. I then put together some cluster scripts in a giffy, and the entire thing finished before I had finished the script to parse the result. Diabolical!
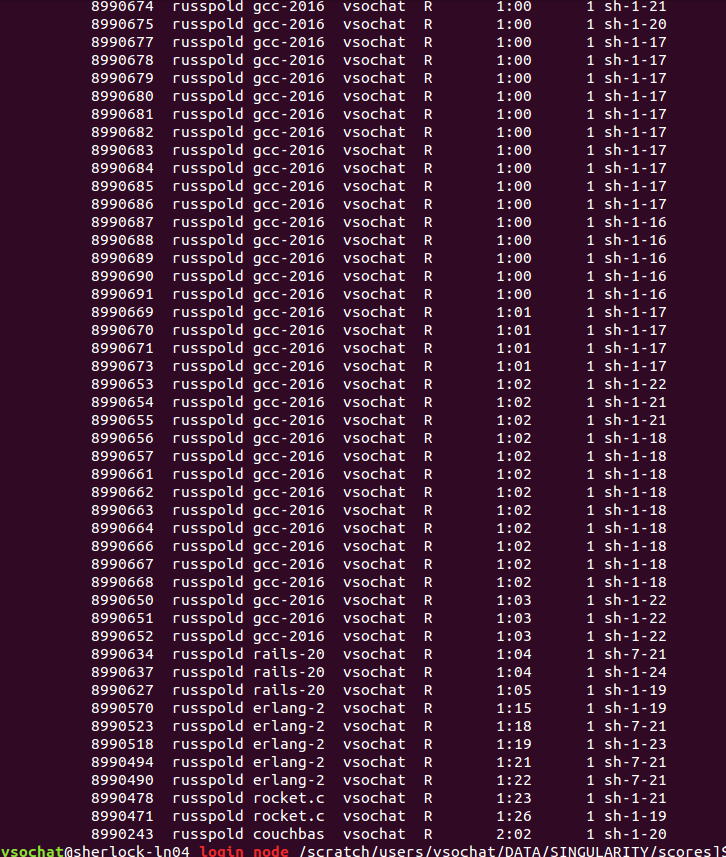
I haven’t had a chance to explore these comparisons in detail yet, but I’m really excited, because there is nice structure in the data. For example, here is the metric comparing images using both files and folders:
A shout out to plotly for the amazingly easy to use python API! Today was the first time I tried it, and I was very impressed how it just worked! I’m used to coding my own interactive visualizations from scratch, and this was really nice. :) I’m worried there is a hard limit on the number of free graphs I’m allowed to have, or maybe the number of views, and I feel a little squirmy about having it hosted on their server… :O
Why do we want to compare images?
Most “container storage” places don’t do a very good job of understanding the guts inside. If I think about Docker Hub, or Github, there are a ton of objects (scripts, containers, etc.) but the organization is largely manual with some search feature that is (programatically) limited to the queries you can do. What we need is a totally automated, unsupervised way of categorizing and organizing these containers. I want to know if the image I just created is really similar to others, or if I could have chosen a better base image. This is why we need a graph, or a mapping of the landscape of images - first to understand what is out there, and then to help people find what they are looking for, and map what they are working on into the space. I just started this pretty recently, but here is the direction I’m going to stumble in.
Generating a rough graph of images
The first goal is to get an even bigger crapton of images, and try to do an estimate of the space. Graphs are easy to work with and visualize, so instead of sets (as we used above) let’s now talk about this in a graph framework. I’m going to try the following:
- Start with a big list of (likely) base containers (e.g., Docker library images)
- Derive similarity scores based on the rough approach above. We can determine likely parents / children based on one image containing all the paths of another plus more (a child), or a subset of the paths of the other (a parent). This will give us a bunch of tiny graphs, and pairwise similarity scores for all images.
- Within the tiny graphs, define potential parent nodes (images) as those that have not been found to be children of any other images.
- For all neighbors / children within a tiny graph, do the equivalent comparison, but now on the level of files to get a finer detail score.
- Find a strategy to connect the tiny graphs. The similarity scores can do well to generate a graph of all nodes, but we would want a directional graph with nice detail about software installed, etc.
The last few points are kind of rough, because I’m not ready yet to think about how to fine tune the graph given that I need to build it first. I know a lot of researchers think everything through really carefully before writing any code or trying things, but I don’t have patience for planing and not doing, and like jumping in, starting building, and adjusting as I go. On second thought, I might even want to err away from Singularity to give this a first try. If I use Docker files that have a clear statement about the “parent” image, that means that I have a gold standard, and I can see how well the approach does to find those relationships based on the paths alone.
Classifying a new image into this space
Generating a rough heatmap of image similarity (and you could make a graph from this) isn’t too wild an idea, as we’ve seen above. The more challenging, and the reason that this functionality is useful, is quickly classifying a new image into this space. Why? I’d want to, on the command line, get either a list or open a web interface to immediately see the differences between two images. I’d want to know if the image that I made is similar to something already out there, or if there is a base image that removes some of the redundancy for the image that I made. What I’m leading into is the idea that I want visualizations, and I want tools. Our current understanding of an operating system looks like this:
Yep, that’s my command line. Everything that I do, notably in Linux, I ssh, open a terminal, and I’ll probably type “ls.” If I have two Linuxy things like containers, do we even have developed methods for comparing them? Do they have the same version of Python? Is one created from the other? I want tools and visualization to help me understand these things.
We don’t need pairwise comparisons - we need bases
It would be terrible if, to classify a new image into this space, we had to compare it to every image in our database. We don’t need to, because we can compare it to some set of base images (the highest level of parent nodes that don’t have parents), and then classify it into the graph by walking down the tree, following the most similar path(s). These “base” images we might determine easily based on something like Dockerfiles, but I’d bet we can find them with an algorithm. To be clear, a base image is a kind of special case, for example, those “official” Docker library images like Ubuntu, or Nginx, or postgres that many others are likely to build off of. They are likely to have few to no parent images themselves. It is likely the case that people will add on to base images, and it is less likely they will subtract from them (when is the last time you deleted stuff from your VM when you were extending another image?). Thus, a base image can likely be found by doing the following:
- Parse a crapton of Docker files, and find the images that are most frequently used
- Logically, an image that extends some other image is a child of that image. We can build a graph/tree based on this
- We can cut the tree at some low branch to define a core set of bases.
Questions and work in progress!
I was working on something entirely different when I stumbled on this interesting problem. Specifically, I want a programmatic way to automatically label the software in an image. In order to do this, I need to derive interesting “tags.” An interesting tag is basically some software that is installed on top of the base OS. You see how this developed - I needed to derive a set of base OS, and I needed a way to compare things to them. I’ll get back to that, along with the other fun project that I’ve started to go with this - developing visualizations for comparing operating systems! This is for another day! If you are interested in the original work, I am developing a workflow interface using Singularity containers called Singularity Hub Hubba, hubba!.
· -
Service Worker Resource Saver
If you are like me, you probably peruse a million websites in a day. Yes, you’re an internet cat! If you are a “tabby” then you might find links of interest and leave open a million tabs, most definitely to investigate later (really, I know you will)! If you are an “Octocat” then “View Source” is probably your right click of choice, and you are probably leaving open a bunch of raw “.js” or “.css” files to look at something later. If you are an American cat, you probably have a hodge-podge of random links and images. If you are a perfectionist cat (siamese?), you might spend an entire afternoon searching for the perfect image of a donut (or other thing), and have some sub-optimal method for saving them. Not that I’ve ever done that…
TLDR: I made a temporary stuff saver using service workers. Read on to learn more.
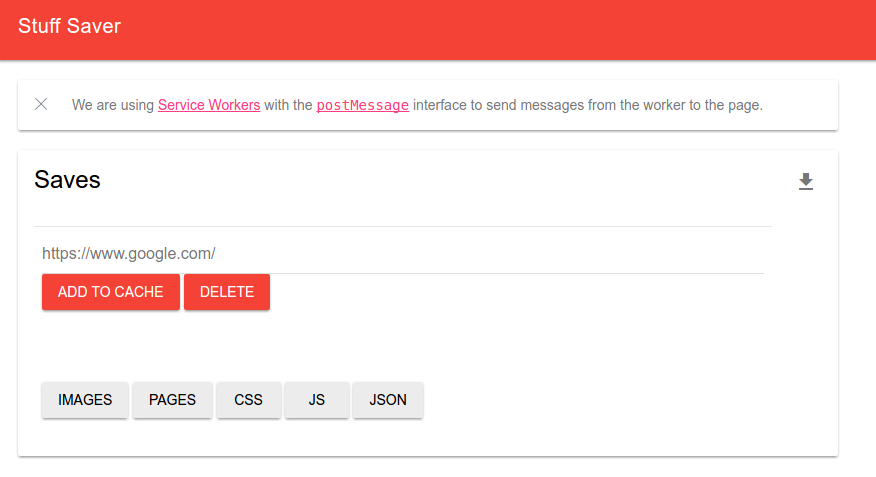
How do we save things?
There are an ungodly number of ways to keep lists of things, specifically Google Docs and Google Drive are my go-to places, and many times I like to just open up a new email and send myself a message with said lists. For more permanent things I’m a big fan of Google Keep and Google Save, but this morning I found a use case that wouldn’t quite be satisfied by any of these things. I had a need to keep things temporarily somewhere. I wanted to copy paste links to images and be able to see them all quickly (and save my favorites), but not clutter my well organized and longer term Google Save or Keep with these temporary lists of resources.
Service Workers, to the rescue!
This is a static URL that uses a service worker with the postMessage interface to send messages back and forth between a service worker and a static website. This means that you can save and retrieve links, images, and script URLS across windows and sessions! This is pretty awesome, because perhaps when you have a user save stuff you rely on the cache, but what happens if they clear it? You could use some kind of server, but what happens when you have to host things statically (Github pages, I’m looking at you!). There are so many simple problems where you have some kind of data in a web interface that you want to save, update, and work with across pages, and service workers are perfect for that. Since this was my first go, I decided to do something simple and make a resource saver. This demo is intended for Chrome, and I haven’t tested in other browsers. To modify, stop, or remove workers, visit chrome://serviceworker-internals.
How does it work?
I wanted a simple interface where I could copy paste a link, and save it to the cache, and then come back later and click on a resource type to filter my resources:
I chose material design (lite) because I’ve been a big fan of it’s flat simplicity, and clean elements. I didn’t spend too much time on this interface design. It’s pretty much some buttons and an input box!
The gist of how it works is this: you check if the browser can support service workers:
if ('serviceWorker' in navigator) {
  Stuff.setStatus('Ruh roh!');
} else {
  Stuff.setStatus('This browser does not support service workers.');
}
Note that the “Stuff” object is simply a controller for adding / updating content on the page. Given that we have browser support, we then register a particular javascript file, our service controller commands, to the worker:
  navigator.serviceWorker.register('service-worker.js')
    // Wait until the service worker is active.
    .then(function() {
      return navigator.serviceWorker.ready;
    })
    // ...and then show the interface for the commands once it's ready.
    .then(showCommands)
    .catch(function(error) {
      // Something went wrong during registration. The service-worker.js file
      // might be unavailable or contain a syntax error.
      Stuff.setStatus(error);
    });
The magic of what the worker does, then, is encompassed in the “service-worker.js” file, which I borrowed from Google’s example application. This is important to take a look over and understand, because it defines different event listeners (for example, “activate” and “message”) that describe how our service worker will handle different events. If you look through this file, you are going to see a lot of the function “postMessage”, and actually, this is the service worker API way of getting some kind of event from the browser to the worker. It makes sense, then, if you look in our javascript file that has different functions fire off when the user interacts with buttons on the page, you are going to see a ton of a function saveMessage that opens up a Message Channel and sends our data to the worker. It’s like browser ping pong, with data instead of ping pong balls. You can view in the console of the demo and type in any of “MessageChannel”, “sendMessage” or “postMessage” to see the functions in the browser:
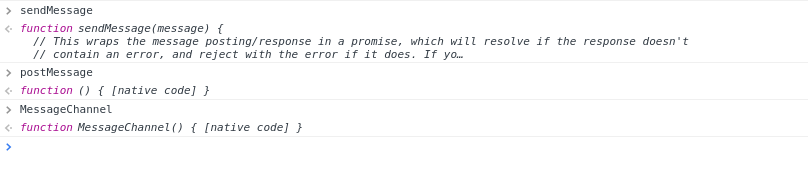
If we look closer at the sendMessage function, it starts to make sense what is going on. What is being passed and forth are Promises, which help developers (a bit) with the callback hell that is definitive of Javascript. I haven’t had huge experience with using Promises (or service workers), but I can tell you this is something to start learning and trying out if you plan to do any kind of web development:
function sendMessage(message) {
  // This wraps the message posting/response in a promise, which will resolve if the response doesn't
  // contain an error, and reject with the error if it does. If you'd prefer, it's possible to call
  // controller.postMessage() and set up the onmessage handler independently of a promise, but this is
  // a convenient wrapper.
  return new Promise(function(resolve, reject) {
    var messageChannel = new MessageChannel();
    messageChannel.port1.onmessage = function(event) {
      if (event.data.error) {
        reject(event.data.error);
      } else {
        resolve(event.data);
      }
    };

    // This sends the message data as well as transferring messageChannel.port2 to the service worker.
    // The service worker can then use the transferred port to reply via postMessage(), which
    // will in turn trigger the onmessage handler on messageChannel.port1.
    // See https://html.spec.whatwg.org/multipage/workers.html#dom-worker-postmessage
    navigator.serviceWorker.controller.postMessage(message,
      [messageChannel.port2]);
  });
}
The documentation is provided from the original example, and it’s beautiful! The simple functionality I added is to parse the saved content into different types (images, script/style and other content)
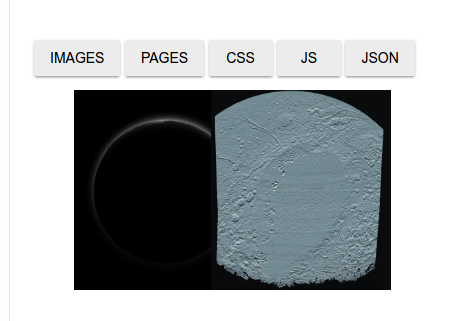
…as well as download a static list of all of your resources (for quick saving).

More content-specific link rendering
I’m wrapping up for playing around today, but wanted to leave a final note. As usual, after an initial bout of learning I’m unhappy with what I’ve come up with, and want to minimally comment on the ways it should be improved. I’m just thinking of this now, but it would be much better to have one of the parsers detect video links (from youtube or what not) and then them rendered in a nice player. It would also make sense to have a share button for one or more links, and parsing into a data structure to be immediately shared, or sent to something like a Github gist. I’m definitely excited about the potential for this technology in web applications that I’ve been developing. For example, in some kind of workflow manager, a user would be able to add functions (or containers, in this case) to a kind of “workflow cart” and then when he/she is satisfied, click an equivalent “check out” button that renders the view to dynamically link them together. I also imagine this could be used in some way for collaboration on documents or web content, although I need to think more about this one.
· -
Neo4J and Django Integration
What happens when a graph database car crashes into a relational database car? You get neo4-django, of course! TLDR: you can export cool things like this from a Django application:
I’ve been working on the start of version 2.0 of the Cognitive Atlas, and the process has been a little bit like stripping a car, and installing a completely new engine while maintaining the brand and look of the site. I started with pages that looked like this:
meaning that fixing up this site comes down to inferring the back end functionality from this mix of Javascript / HTML and styling, and turning them into Django templates working with views that have equivalent functionality.
Neo For What?
Neo4J is a trendy graph database that emerged in 2007, but I didn’t really hear about it until 2014 or 2015 when I played around with it to visualize the nidm data model, a view of the Cognitive Atlas and of the NIF ontology (which seems like it was too big to render in a gist). It’s implemented in Java, and what makes it a “graph” database is the fact that it stores nodes and relationships. This is a much different model than traditional relational databases, which work with things in tables. There are pros and cons of each, however for a relatively small graph that warrants basic similarity metrics, graph visualizations, and need for an API, I thought Neo4j was a good use case. Now let’s talk about how I got it to work with Django.
Django Relational Models
Django is based on the idea of models. A model is a class of objects directly linked to objects in the relational database, so if I want to keep track of my pet marshmallows, I might make a django application called “marshdb” and I can do something like the following:
from django.db import models

class Marshmallow(models.Model):
    is_toasted = models.BooleanField(default=True)
    name = models.CharField(max_length=30)
and then I can search, query, and interact with my marshmallow database with very intuitive functionality:
from marshdb.models import Marshmallow

# All the marshmallows!
nomnom = Marshmallow.objects.all()

# Find me the toasted ones
toasted_mallows = Marshmallow.objects.filter(is_toasted=True)

# How many pet marshmallows do I have?
marshmallow_count = Marshmallow.objects.count()

# Find Larry
larry = Marshmallow.objects.get(name="Larry")
Neo4Django?
Django is fantastic - it makes it possible to create an entire site and database backend, along with whatever plugins you might want, in even the span of a weekend! My first task was how to integrate a completely different kind of database into a relational infrastructure. Django provides ample detail on how to instantiate your own models, but it’s not a trivial thing to integrate a completely different kind of database. I found neo4django, but it wasn’t updated for newer versions of Django, and it didn’t seem to be taking a clean and simple approach to integrating Neo4j. Instead, I decided to come up with my own solution.
Step 1: Dockerize!
Deployment and development is much easier with Docker, period. Need neo4j run via Docker? Kenny Bastani (holy cow he’s just in San Mateo! I could throw a rock at him!) has a solution for that! Basically, I bring in the neo4j container:
graphdb:
  image: kbastani/docker-neo4j:latest
  ports:
   - "7474:7474"
   - "1337:1337"
  links:
   - mazerunner
   - hdfs
and then link it to a docker image that is running the Django application:
uwsgi:
    image: vanessa/cogat-docker
    command: /code/uwsgi.sh
    restart: always
    volumes:
        - .:/code
        - /var/www/static
    links:
        - postgres
        - graphdb
You can look at the complete docker-compose file, and Kenny’s post on the mazerunner integration for integrating graph analytics with Apache Spark.
This isn’t actually the interesting part, however. The fun and interesting bit is getting something that looks like a Django model for the user to interact with that entirely isn’t :).
Step 2: The Query Module
As I said previously, I wanted this to be really simple. I created a Node class that includes the same basic functions as a traditional Django model (get, all, filter, etc.), and added a few new ones:
    def link(self,uid,endnode_id,relation_type,endnode_type=None,properties=None):
        '''link will create a new link (relation) from a uid to a relation, first confirming
        that the relation is valid for the node
        :param uid: the unique identifier for the source node
        :param endnode_id: the unique identifier for the end node
        :param relation_type: the relation type
        :param endnode_type: the type of the second node. If not specified, assumed to be same as startnode
        :param properties: properties to add to the relation
        '''
… blarg blarg blarg
 def cypher(self,uid,lookup=None,return_lookup=False):
        '''cypher returns a data structure with nodes and relations for an object to generate a gist with cypher
        :param uid: the node unique id to look up
        :param lookup: an optional lookup dictionary to append to
        :param return_lookup: if true, returns a lookup with nodes and relations that are added to the graph
        '''
        base = self.get(uid)[0]
and then I might instantiate it like this for the “Concept” node:
class Concept(Node):

    def __init__(self):
        self.name = "concept"
        self.fields = ["id","name","definition"]
        self.relations = ["PARTOF","KINDOF","MEASUREDBY"]
        self.color = "#3C7263" # sea green
and you can see that generally, I just need to define the fields, relations, and name of the node in the graph database to get it working. Advanced functionality that might be needed for specific node types can be implemented for those particular classes.
Functionality for any node in the graph can be added to the “Node” class. The function “link” for example, will generate a relationship between an object and some other node, and “cypher” will produce node and link objects that can be rendered immediately into a neo4j gist. This is where I see the intersection of Django and Neo4j - adding graph functions to their standard model. Now how to visualize the graph? I like developing my own visualizations, and made a general, searchable graph run by the application across all node types:
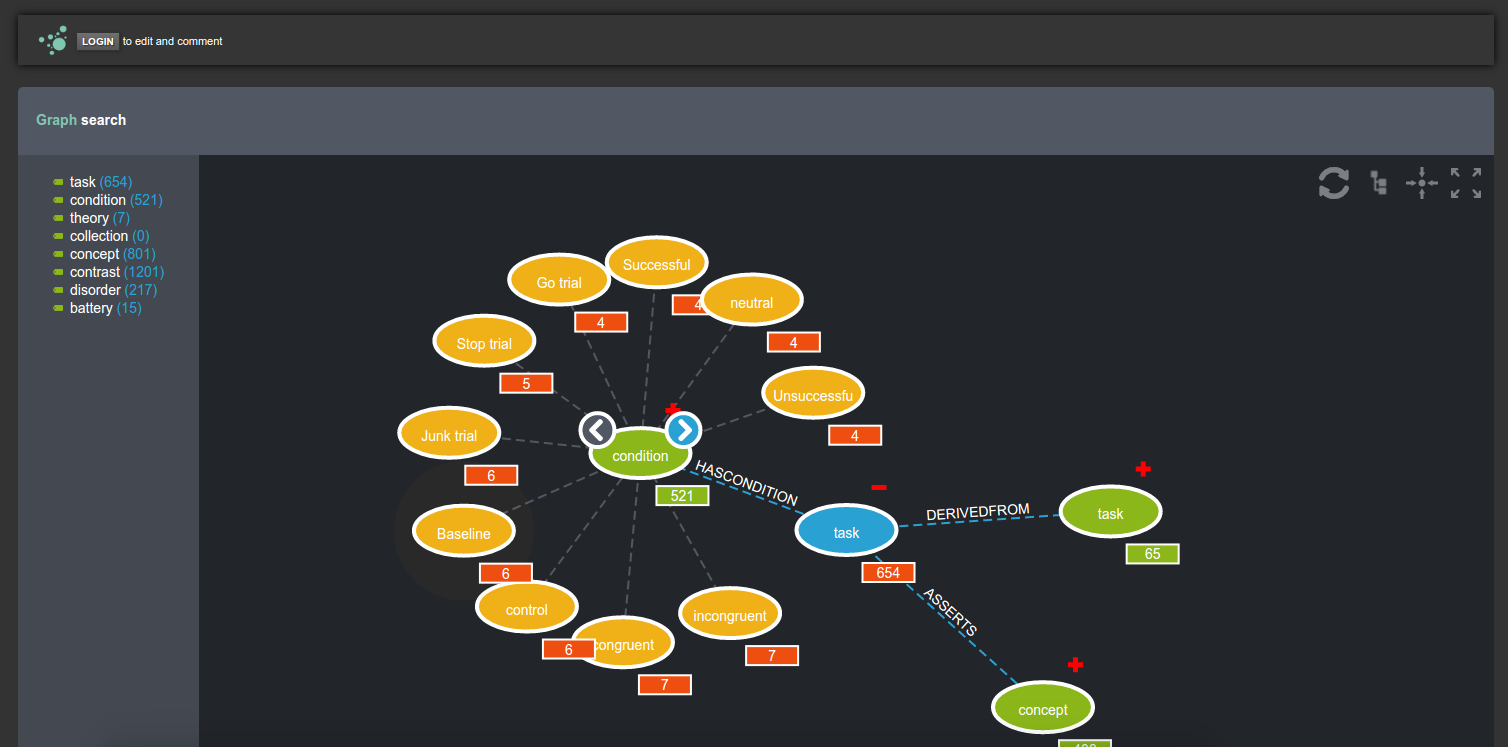
However I realized that a user is going to want more power than that to query, make custom views, and further, share them. The makers of Neo4j were smart, and realized that people might want to share snippets of code as github gists to make what they call a graph gist. I figured why not generate a URL to render this cypher code that can then immediately be rendered into a preview, and then optionally exported and saved by the user? The awesome part of this is that it sends the computing of the graph part off of the Cognitive Atlas server, and you can save views of the graph. For example, here is a gist that shows a view of the working memory fMRI task paradigm. If you’re a visual learner, you can learn from looking at the graph itself:
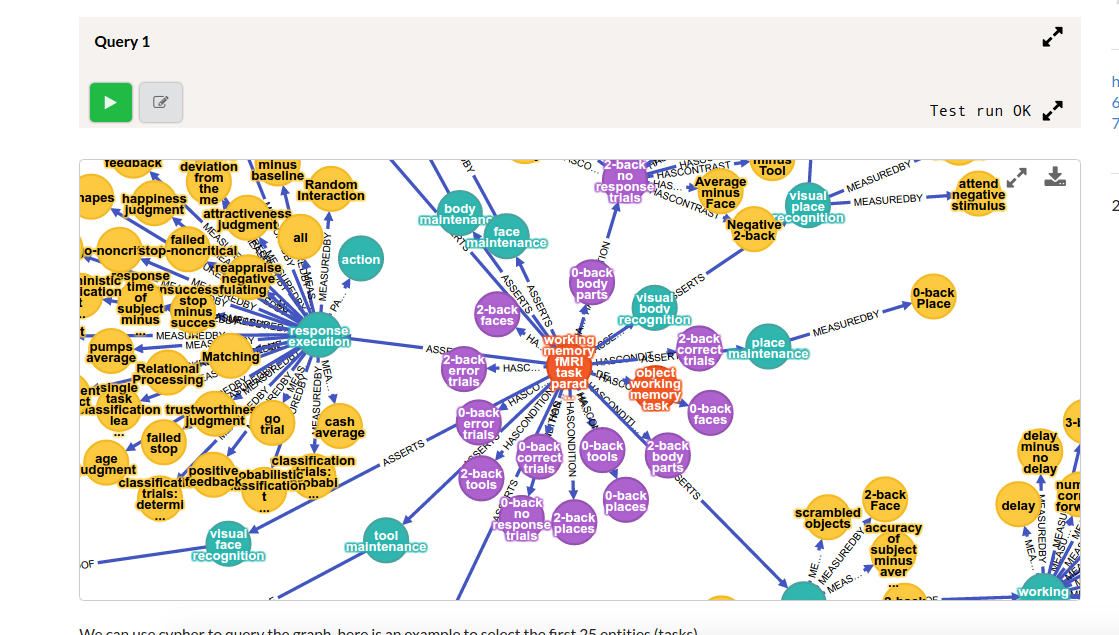
You can see example cypher queries, with results rendered into clean tables:
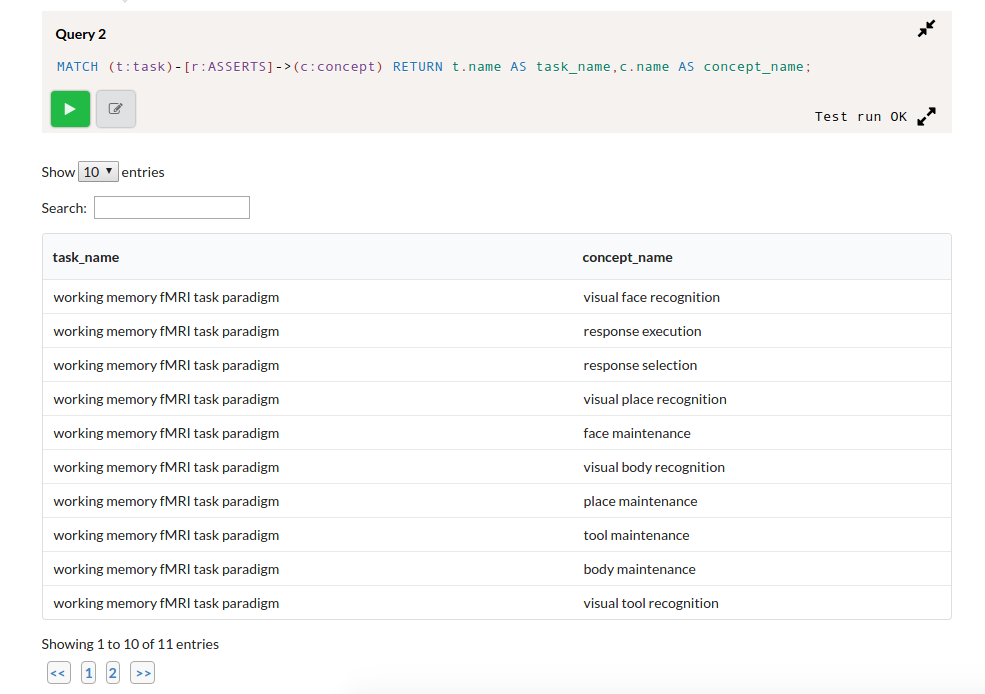
and hey, you can write your own queries against the graph!
This is a work in progress and it’s not perfect, but I’m optimistic about the direction it’s going in. If more ontologies / graph representations of knowledge were readily explorable, and sharable in this way, the semantic web would be a lot easiest to understand and navigate.
Relational Database Help
Why then should we bother to use a relational database via Django? I chose this strategy because it keeps the model of the Cognitive Atlas separate from any applications deploying or using it. It provides a solid infrastructure for serving a RESTful API:
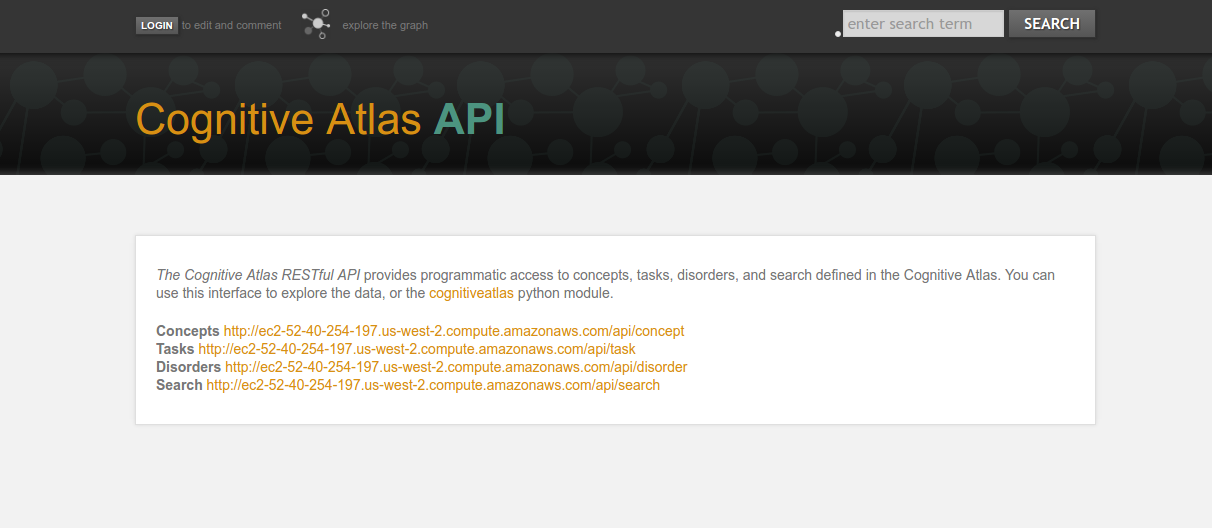
and basic functionalities like storing information about users, and any (potential) future links to automated methods to populate it, etc.
General Thinking about Visualization and Services
This example gets at a general strategy that is useful to consider when building applications, and that is the idea of “outsourcing” some of your analysis or visualization to third parties. In the case of things that just need a web server, you might store code (or text) in a third party service like Github or Dropbox, and use something like Github Pages or another third party to render a site. In the case of things that require computation, you can take advantage of Continuous Integration to do much more than run tests. In this example, we outsourced a bit of computation and visualization. In the case of developing things that are useful for people, I sometimes think it is more useful to build a generic “thing” that can turn some standard data object (eg, some analysis result, data, or text file) and render it into some more programmatic data structure that can plug into (some other tool) that makes it relatable to other individual’s general “things.” I will spend some time in another post to more properly articulate this idea, but the general take away is that as a user you should be clever when you are looking for a certain functionality, and as a developer you should aim to provide general functions that have wide applicability.
Cognitive Atlas 2.0
The new version of the Cognitive Atlas has so far been a fun project I’ve worked on in free time, and I would say you can expect to see cool things develop in the next year or two, even if I’m not the one to push the final changes. In the meantime, I encourage all researchers working with behavioral or cognitive paradigms, perhaps using the Experiment Factory or making an assertion about a brain map capturing a cognitive paradigm in the NeuroVault database, to do this properly by defining paradigms, cognitive concepts in the current version of the Cognitive Atlas. If you have feedback or want to contribute to developing this working example of integrating Neo4j and Django, please jump in. Even a cool idea would be a fantastic contribution. Time to get back to work! Well, let’s just call this “work,” I can’t say I’m doing much more than walking around and smiling like an idiot in this final lap of graduate school. :)

· -
The Elusive Donut
Elusive Donut
A swirl of frosting and pink
·
really does make you think
Take my hunger away, won’t ‘ut?
Unless you’ve browsed an elusive donut! -
Interactive Components for Visualizations
If you look at most interactive visualizations that involve something like D3, you tend to see lots of circles, bars, and lines. There are several reasons for this. First, presenting information simply and cleanly is optimal to communicate an idea. If you show me a box plot that uses different tellitubbies as misshapen bars, I am likely going to be confused, a little angry, and miss the data lost in all the tubby. Second, basic shapes are the default available kind of icon built into these technologies, and any variability from that takes extra work.
Could there be value in custom components?
This begs the question - if we were able to, would the world of data science specific to generating interactive visuaizations be improved with custom components? I imagine the answer to this question is (as usual), “It depends.” The other kind of common feature you see in something like D3 is a map. The simple existence of a map, and an ability to plot information on it, adds substantially to our ability to communicate something meaningful about a pattern across geographical regions. The human mind is more quick to understand something with geographic salience overlayed on a map than the same information provided in some kind of chart with labels corresponding to geographic regions. Thus, I see no reason that we cannot have other simple components for visualizations that take advantage of our familiarity that brings some intuitive understanding of a domain or space.
A Bodymap
My first idea (still under development) was to develop a simple map for the human body. I can think of so many domains crossing medicine, social media, and general science that have a bodygraphic salience. I was in a meeting with radiologists many weeks ago, and I found it surprising that there weren’t standard templates for an entire body (we have them for brain imaging). A standard template for a body in the context of radiology is a much different goal than one for a visualization, but the same reality rings true. I decided that a simple approach would be to take a simple representation, transform it into a bunch of tiny points, and then annotate different sets of points with different labels (classes). The labels can then be selected dynamically with any kind of web technology (d3, javascript, jquery, etc.) to support an interactive visualization. For example, we could parse a set of documents, extract mentions of body parts, and then use the Bodymap like a heatmap to show the prevalance of the different terms.
Generating an svg pointilism from any png image
My first task was to be able to take any png image and turn it into a set of points. I first stupidly opened up Inkscape and figured out how to use the clone tool to generate a bunch of points. Thankfully I realized quickly that before I made my BodyMap tool, I needed general functions for working with images and svg. I am in the process of creating svgtools for this exact goal! For example, with this package you can transform a png image into an svg (pointilism thing) with one function:
from svgtools.generate import create_pointilism_svg # Select your png image! png_image = "data/body.png" # uid_base will be the id of the svg # sample rate determines the space between points (larger --> more space) create_pointilism_svg(png_image,uid_base="bodymap", sample_rate=8,width=330,height=800, output_file="data/bodymap.svg")I expect to be adding a lot of different (both manual and automated) methods here for making components, so keep watch of the package if interested.
This allowed me to transform this png image:

into a “pointilism svg” (this is for a sampling rate of 8, meaning that I add more space between the points)

Great! Now I need some way to label the paths with body regions, so I can build stuff. How to do that?
Terms and relationships embedded in components
We want to be able to (manually and automatically) annotate svg components with terms. This is related to a general idea that I like to think about - how can we embed data structures in visualizations themselves? An svg object (a support vector graphic) is in fact just an XML document, which is also a data structure for holding (you guessed it, data!). Thus, if we take a set of standard terms and relationships between them (i.e., an ontology), we can represent the terms as labels in an image, and the relationships by the relationship between the objects (eg, “eye” is “part of” the “head” is represented by way of the eye literally being a part of the head!). My first task, then, was to take terms from the Foundation Model of Anatomy (FMA) and use them as tags for my BodyMap.
A little note about ontologies - they are usually intended for a very specific purpose. For example, the FMA needs to be detailed enough for use in science and medicine. However, if I’m extracting “body terms” from places like Twitter or general prose, I can tell you with almost certainty that you might find a term like “calf” but probably not “gastrocnemius.” My first task was to come up with a (very simple) list of terms from the FMA that I thought would be likely to be seen in general conversation or places like the Twitterverse. It’s not an all-encompassing set, but it’s a reasonable start.
Annotation of the BodyMap
I then had my svg for annotation, and I had my terms, how to do the annotation? I built myself a small interface for this goal exactly. You load your svg images and labels, and then draw circles around points you want to select, for example here I have selected the head:
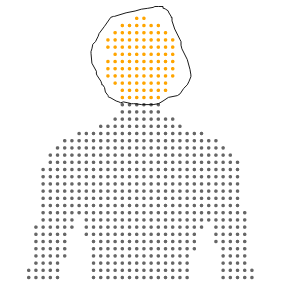
and then you can select terms from your vocabulary:

and click annotate! The selection changes to indicate that the annotation has been done.

Selecting a term and clicking “view” will highlight the annotation, in case you want to see it again. When you are finished, you can save the svg, and see that the annotation is present for the selected paths via an added class attribute:
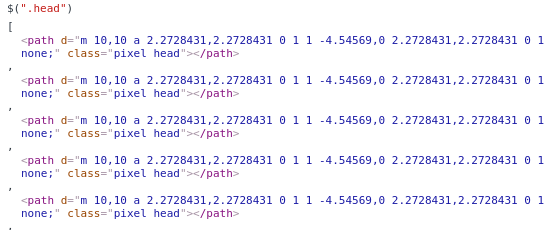
This is the simple functionality that I desired for this first round, and I imagine I’ll add other things as I need them. And again, ideally we will have automated methods to achieve these things in the long run, and we would also want to be able to take common data structures and images, convert them seamlessly into interactive components, and maybe even have a database for users to choose from. Imagine if we had a database of standard components for use, we could use them as features to describe visualizations, and get a sense of what the visualization is representing by looking at it statically. We could use methods from image processing and computer vision to generate annotated components automatically, and blur the line between what is data and what is visual. Since this is under development and my first go, I’ll just start by doing this annotation myself. I just created the svgtools package and this interface today, so stay tuned for more updates!
·
