1. SLURM Job Manager, smanage
Slurm Manage, for submitting and reporting on job arrays run on slurm
Practices for Reproducible Research
Today we are going to use the forward tool to set up a Jupyter notebook with an R kernel and port forwarding to our local machine. Today we are going to:
Since we want to harness the local module installation of R and jupyter, this will be run via environment modules and not containers. The use case for this is if you want to explore large datasets, but not necessary run the notebook at scale or share your steps. You just want to mess around and are okay to be working non-reproducibly. If you want to do either of these things, you are strongly recommended to build a container that can more reliably reproduce and thus share your environment.
The repository contains a set of scripts for setting up automatic port forwarding on sherlock with jupyter notebooks. There are a set of commands you will need to run just once to configure the tool, and then general “start”, “end” and “resume” operations for interacting with notebook jobs. The repository README has instructions for setup and usage, and we will also walk through them here.
Make sure you put the folder somewhere meaningful. A subfolder of $HOME is a suggestion. This will be your working location for future use of the tool, as it holds scripts and a parameter file, params.sh
git clone https://github.com/vsoch/forward
cd forward
Let’s take a look at what we have here!
├── end.sh    (-- end a session
├── resume.sh (-- resume a started session
├── sbatches  (-- batch scripts you can run to forward a port to!
  ├── sherlock
  └── farmshare
├── setup.sh  (-- run once to set up the tool
└── start.sh  (-- how you start a connection
This is a one time generation script that will create a parameter text file with a port, username, and cluster resource. You can generate it by running the script setup.sh:
$ bash setup.sh

Sherlock username > tacocat

Next, pick a port to use.  If someone else is port forwarding using that
port already, this script will not work.  If you pick a random number in the
range 49152-65335, you should be good.

Port to use > 56143

Next, pick the sherlock partition on which you will be running your
notebooks.  If your PI has purchased dedicated hardware on sherlock, you can use
that partition.  Otherwise, leave blank to use the default partition (normal).

Sherlock partition (default: normal) >
Notice that I’ve changed the default browser (Safari on a Mac) to firefox on Ubuntu. Also note that I pressed enter to use the default queue. The resulting file is a simple text file:
$ cat params.sh
USERNAME="tacocat"
PORT="56143"
PARTITION="normal"
RESOURCE="sherlock"
MEM="20G"
TIME="8:00:00"
CONTAINERSHARE="/scratch/users/vsochat/share"
It wouldn’t be so great if anyone with your username and a port could access your notebook! For this reason we need to create ssh credentials. You might have this already set up if you’ve followed the instructions here for Sherlock. You
can see what you have by looking at your ~/.ssh/config:
cat ~/.ssh/config
What we want to do is have this configuration. Add this to your ~/.ssh/config. The repository also has a quick way to generate your ssh config, and print it to the screen. See the hosts folder? In there are small helper scripts to print the configurations to the screen! We have one for Sherlock:
ls hosts/
  sherlock_ssh.sh
  farmshare_ssh.sh
Running the script will print the configuration to the screen:
$ bash hosts/sherlock_ssh.sh

Sherlock username > tacocat
Host sherlock
    User tacocat
    Hostname sh-ln03.stanford.edu
    GSSAPIDelegateCredentials yes
    GSSAPIAuthentication yes
    ControlMaster auto
    ControlPersist yes
    ControlPath ~/.ssh/%l%r@%h:%p
If you don’t have a file existing at ~/.ssh/config then you will need to create it, and you
can do the entire step above programatically:
bash hosts/sherlock_ssh.sh >> ~/.ssh/config
Remember that this is a suggested configuration. The login node is generated randomly above, so you could
change it to be a different node (e.g., sh-ln03.sherlock.stanford.edu) or select from all of them (login.sherlock.stanford.edu)`. Your computer is ready to go! Let’s move onto Sherlock. We will come back here when it’s time to start a notebook.
The script will run this for you, but since devtools takes a while to compile, I recommend that you log into sherlock, grab a development node with sdev, and install these first to verify it works okay. First, grab the node and load the modules that have jupyter and R.
sdev
module load py-jupyter/1.0.0_py36
module load R/3.5.1
Next, install devtools and IRKernel from Github. These commands must end in success!”
# Install devtools and IRkernel
Rscript -e "install.packages('devtools', repos='http://cran.us.r-project.org');"
Rscript -e "library('devtools'); devtools::install_github('IRkernel/IRkernel')"

# register the kernel in the current R installation
Rscript -e "IRkernel::installspec()"
That’s it! Now let’s make sure we set up the jupyter notebook to have a headless password. This is important so that if your port is discovered, a malicious user can’t delete or mess with your files.
We will want to set up a password for our Jupyter notebook, and we can do this programatically before starting it. First, let’s load the module for Python, and install jupyter notebook! The version of Python that you choose is up to you.
As a reminder, we’ve already loaded jupyter
module load py-jupyter/1.0.0_py36

$ which jupyter
/share/software/user/open/py-jupyter/1.0.0_py36/bin/jupyter
We will need to secure our notebooks with a password. Pick a strong one!
jupyter notebook password
It will be associated with your username, saved to a local file:
Enter password:
Verify password:
[NotebookPasswordApp] Wrote hashed password to /home/users/vsochat/.jupyter/jupyter_notebook_config.json
The above might pause or hang a little bit, at least it did when I did.
We have just set up a password on Sherlock, and are now back on our local machine. Here are the general commands to start and stop sessions. In the tutorial below, we will walk through using Jupyter notebook.
From the directory where we cloned, we can start a session using the start.sh script. This is a general script to start any kind of session, and here we will show how to start a jupyter notebook in a specific directory:
bash start.sh <host>/<software> <path>
bash start.sh sherlock/r-jupyter /path/to/dir
or in a nutshell, you can do this and use defaults:
bash start.sh sherlock/r-jupyter
What’s going on? It will look in the folder of sbatch scripts and find one named correpondingly to the command we issued, a script named r-jupyter.sbatch in the sbatches folder in a subfolder named “sherlock”. At this point, you should see expected output, and a brief set
of steps to do the same install we already did.
$ bash start.sh sherlock/r-jupyter
== Finding Script ==
Looking for sbatches/sherlock/sherlock/r-jupyter.sbatch
Looking for sbatches/sherlock/r-jupyter.sbatch
Script      sbatches/sherlock/r-jupyter.sbatch

== Checking for previous notebook ==
No existing sherlock/r-jupyter jobs found, continuing...

== Getting destination directory ==

== Uploading sbatch script ==
r-jupyter.sbatch                                                   100%  587     0.6KB/s   00:00

== Submitting sbatch ==
sbatch --job-name=sherlock/r-jupyter --partition=russpold --output=/home/users/vsochat/forward-util/r-jupyter.sbatch.out --error=/home/users/vsochat/forward-util/r-jupyter.sbatch.err --mem=12G --time=8:00:00 /home/users/vsochat/forward-util/r-jupyter.sbatch 56143 ""
Submitted batch job 30407076

== View logs in separate terminal ==
ssh sherlock cat /home/users/vsochat/forward-util/r-jupyter.sbatch.out
ssh sherlock cat /home/users/vsochat/forward-util/r-jupyter.sbatch.err

== Waiting for job to start, using exponential backoff ==
Attempt 0: not ready yet... retrying in 1..
Attempt 1: not ready yet... retrying in 2..
Attempt 2: not ready yet... retrying in 4..
Attempt 3: not ready yet... retrying in 8..
Attempt 4: not ready yet... retrying in 16..
Attempt 5: resources allocated to sh-106-04!..
sh-106-04
sh-106-04
notebook running on sh-106-04

== Setting up port forwarding ==
ssh -L 43453:localhost:43453 sherlock ssh -L 43453:localhost:43453 -N sh-106-04 &
== Connecting to notebook ==
Installing package into ‘/home/users/vsochat/R/x86_64-pc-linux-gnu-library/3.5’
(as ‘lib’ is unspecified)
trying URL 'http://cran.us.r-project.org/src/contrib/devtools_2.0.1.tar.gz'
Content type 'application/x-gzip' length 388953 bytes (379 KB)
==================================================
downloaded 379 KB

* installing *source* package ‘devtools’ ...
** package ‘devtools’ successfully unpacked and MD5 sums checked
** R
** inst
** byte-compile and prepare package for lazy loading
** help
*** installing help indices
*** copying figures
** building package indices
** installing vignettes
** testing if installed package can be loaded
* DONE (devtools)

The downloaded source packages are in
	‘/tmp/Rtmp3JNqt9/downloaded_packages’
Skipping install of 'IRkernel' from a github remote, the SHA1 (97c492b2) has not changed since last install.
  Use `force = TRUE` to force installation
[InstallKernelSpec] Removing existing kernelspec in /home/users/vsochat/.local/share/jupyter/kernels/ir
[InstallKernelSpec] Installed kernelspec ir in /home/users/vsochat/.local/share/jupyter/kernels/ir
[I 22:40:41.752 NotebookApp] Writing notebook server cookie secret to /tmp/jupyter/notebook_cookie_secret
[I 22:40:43.430 NotebookApp] Serving notebooks from local directory: /home/users/vsochat
[I 22:40:43.430 NotebookApp] 0 active kernels
[I 22:40:43.430 NotebookApp] The Jupyter Notebook is running at: http://localhost:56143/
[I 22:40:43.430 NotebookApp] Use Control-C to stop this server and shut down all kernels (twice to skip confirmation).

== View logs in separate terminal ==
ssh sherlock cat /home/users/vsochat/forward-util/r-jupyter.sbatch.out
ssh sherlock cat /home/users/vsochat/forward-util/r-jupyter.sbatch.err

== Instructions ==
1. Password, output, and error printed to this terminal? Look at logs (see instruction above)
2. Browser: http://sh-02-21.int:56143/ -> http://localhost:56143/...
3. To end session: bash end.sh sherlock/r-jupyter
When you open your browser to the address, you will see a prompt for the password that you created previously:

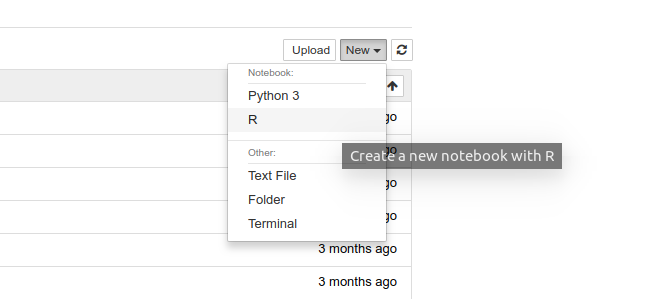
If you have an already running session, you will see this message. When you open the interface, you can find that R is now an option for a Kernel!
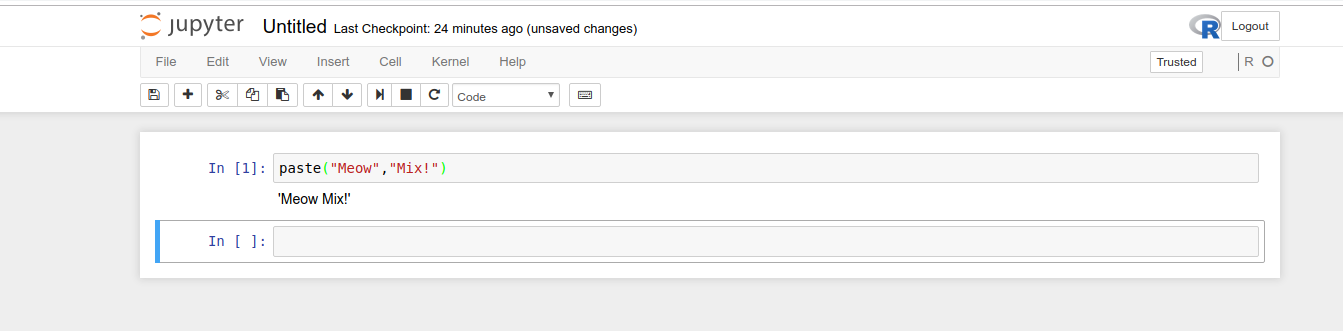
And now you have an R session.
Sometimes the job can still be running, but the port forwarding has stopped (has your computer ever gone to sleep?) In this case, you can resume the session using the equivalent command, but use resume.sh:
bash resume.sh sherlock/r-jupyter`
$ bash start.sh sherlock/r-jupyter
== Checking for previous notebook ==
Found existing job for sherlock/r-jupyter, sh-101-04 end.sh or resume.sh
When you want to stop the session (killing the job) run the equivalent command, but use the end.sh script. The command is based on the name of the job (the sbatch script name) so to kill the previous job we created, we would do:
$ bash end.sh sherlock/r-jupyter
Killing sherlock/r-jupyter slurm job on sherlock
Killing listeners on sherlock
There are additional details and debugging tips in the main repository! Happy Jupyter-ing!
Do you have questions or want to see another tutorial? Please reach out!
This series guides you through getting started with HPC cluster computing.
Slurm Manage, for submitting and reporting on job arrays run on slurm
A Quick Start to using Singularity on the Sherlock Cluster
Use the Containershare templates and containers on the Stanford Clusters
A custom built pytorch and Singularity image on the Sherlock cluster
Use Jupyter Notebooks via Singularity Containers on Sherlock with Port Forwarding
Use R via a Jupyter Notebook on Sherlock
Use Jupyter Notebooks (optionally with GPU) on Sherlock with Port Forwarding
Use Jupyter Notebooks on Sherlock with Port Forwarding
A native and container-based approach to using Keras for Machine learning with R
How to create and extract rar archives with Python and containers
Getting started with SLURM
Getting started with the Sherlock Cluster at Stanford University
Getting started with the Sherlock Cluster at Stanford University
Using Kerberos to authenticate to a set of resources