Dashboard
The dashboard can be started with qme start
$ qme start
DATABASE: filesystem
Server initialized for gevent.
QueueMe!
If you add --debug it will run in debug mode:
$ qme start --debug
DATABASE: filesystem
Server initialized for gevent.
QueueMe!
 * Restarting with stat
DATABASE: filesystem
Server initialized for gevent.
QueueMe!
 * Debugger is active!
 * Debugger PIN: 210-139-092
By default, it will deploy the dashboard to localhost:5000. The prototype is shown below (hugely subject to change!)
You can customize the port with --port:
$ qme start --port 8000
For development, it is starting with --debug set to True. When qme is out of
development, you will need to explicitly set this:
$ qme start --debug
When it starts, it will initialize the queue and database as it would do with any other command, so if you need to set this variable (and haven’t done so in your global config) you should do that here:
$ qme start --config_dir /tmp/custom_home
The server can also be run by calling the start function directly, and providing a queue:
from qme.app.server import start
from qme.main import Queue

queue = Queue(config_dir="/tmp/custom_home")
start(debug=True, queue=queue, port=5000)
or you can use the Queue defaults (config directory in $HOME/.qme with your database
specified in your $HOME/.qme/config.ini if you execute the script
directly:
$ python qme/app/server.py
This would be equivalent to calling the start command with defaults.
Secret Key
The server requires a secret key, and scripts have been provided to generate one for you. For example we can run:
$ qme generate-key
El3;v)DenOah=nyCd2cOQq+3M@?@4C<^Q~?(K)*HM8x5Z:;|kx
and export this to QME_SERVER_KEY on our host:
export QME_SERVER_KEY=El3;v)DenOah=nyCd2cOQq+3M@?@4C<^Q~?(K)*HM8x5Z:;|kx
and it will be detected in the environment. You could also do:
$ export QME_SERVER_KEY=$(qme generate-key)
If you use Qme in a container, you should provide the key as an environment variable on start.
$ docker run -it --entrypoint /bin/bash --env QME_SERVER_KEY=mysecretkey --rm -p 5000:5000 quay.io/vanessa/qme
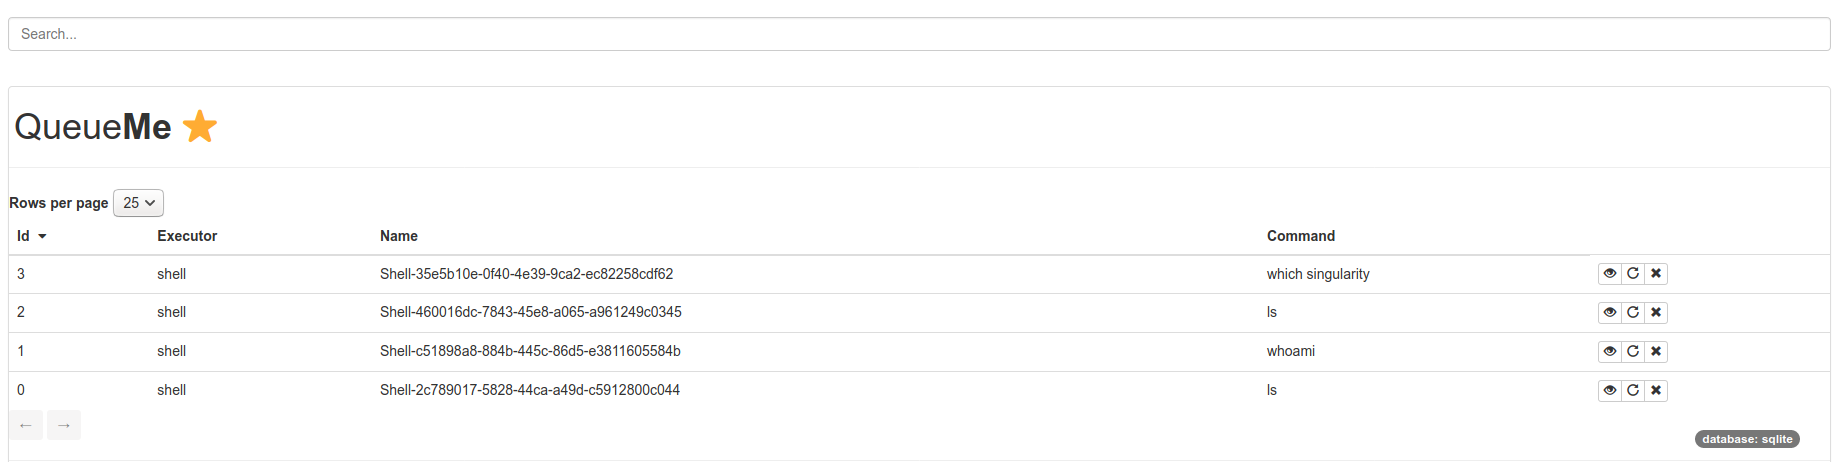
Table
The “home” table includes a list of tasks executed, and actions that are applicable to all of them. For example, the actions in the right of the table include, for each task, the ability to delete, re-run, or view. If you re-run or delete, you’ll see a status notification in the top of the screen:

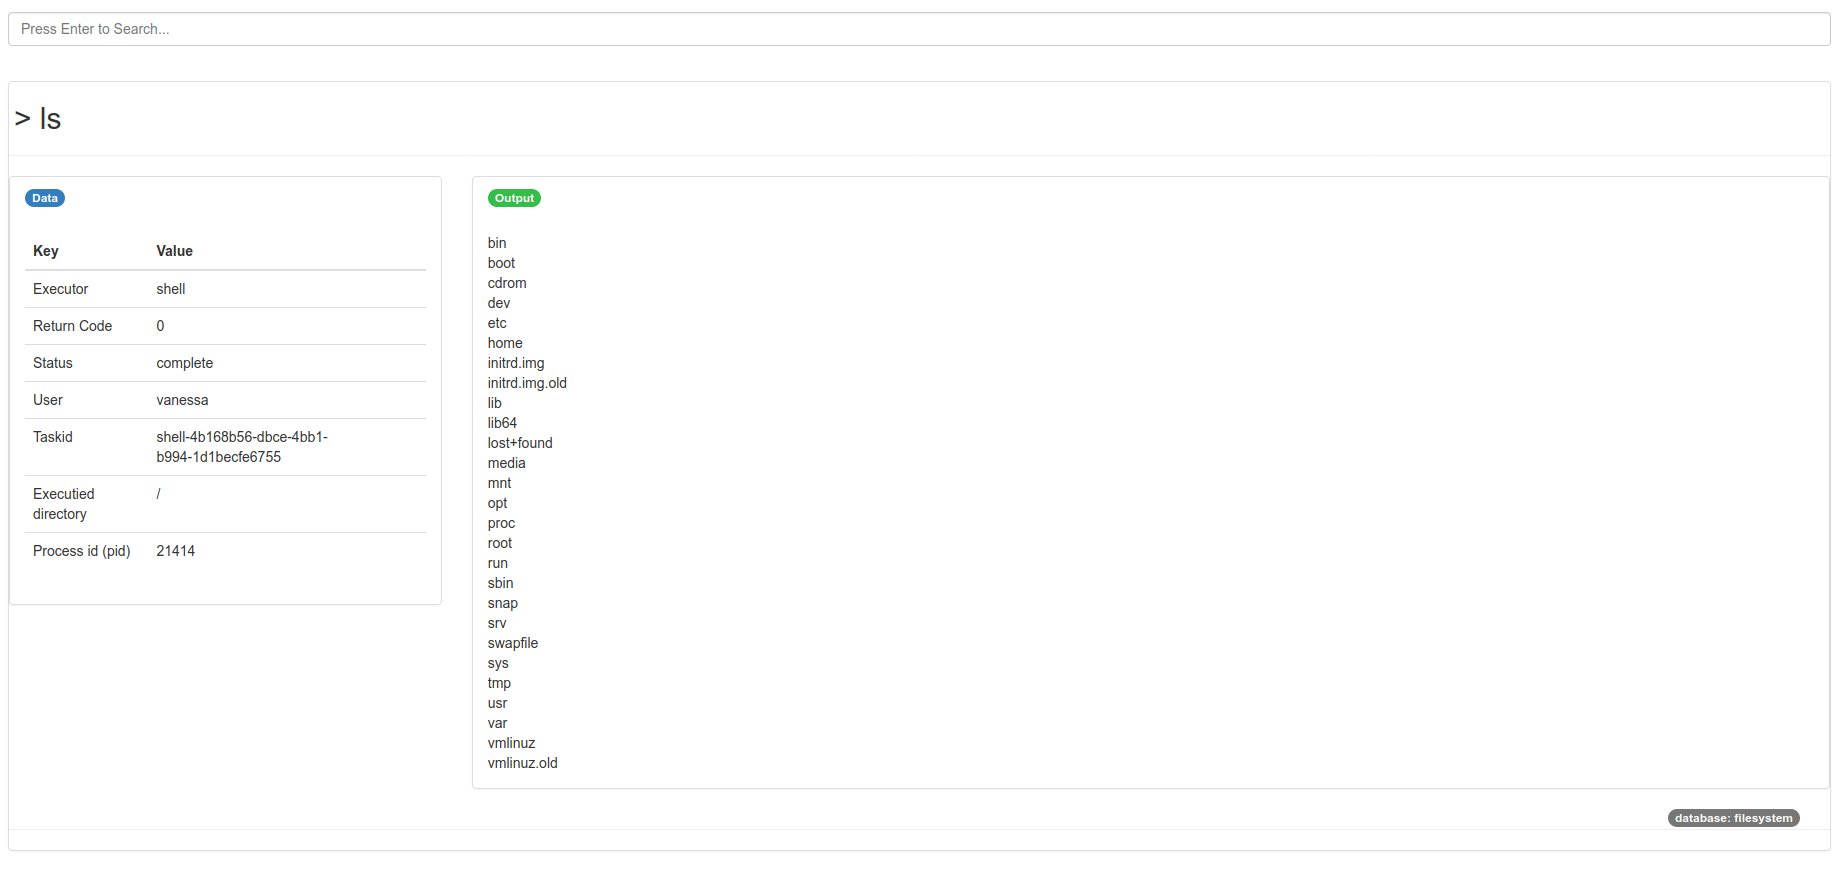
Executors
If you click on the “view” function, you can inspect a particular executor. Each executor type (e.g., shell) has a specific template that will render in the web interface. For example, the shell executor is optimized to show you a command executed front and center, basic metadata in a left column, and output and error (if present) in a right column.
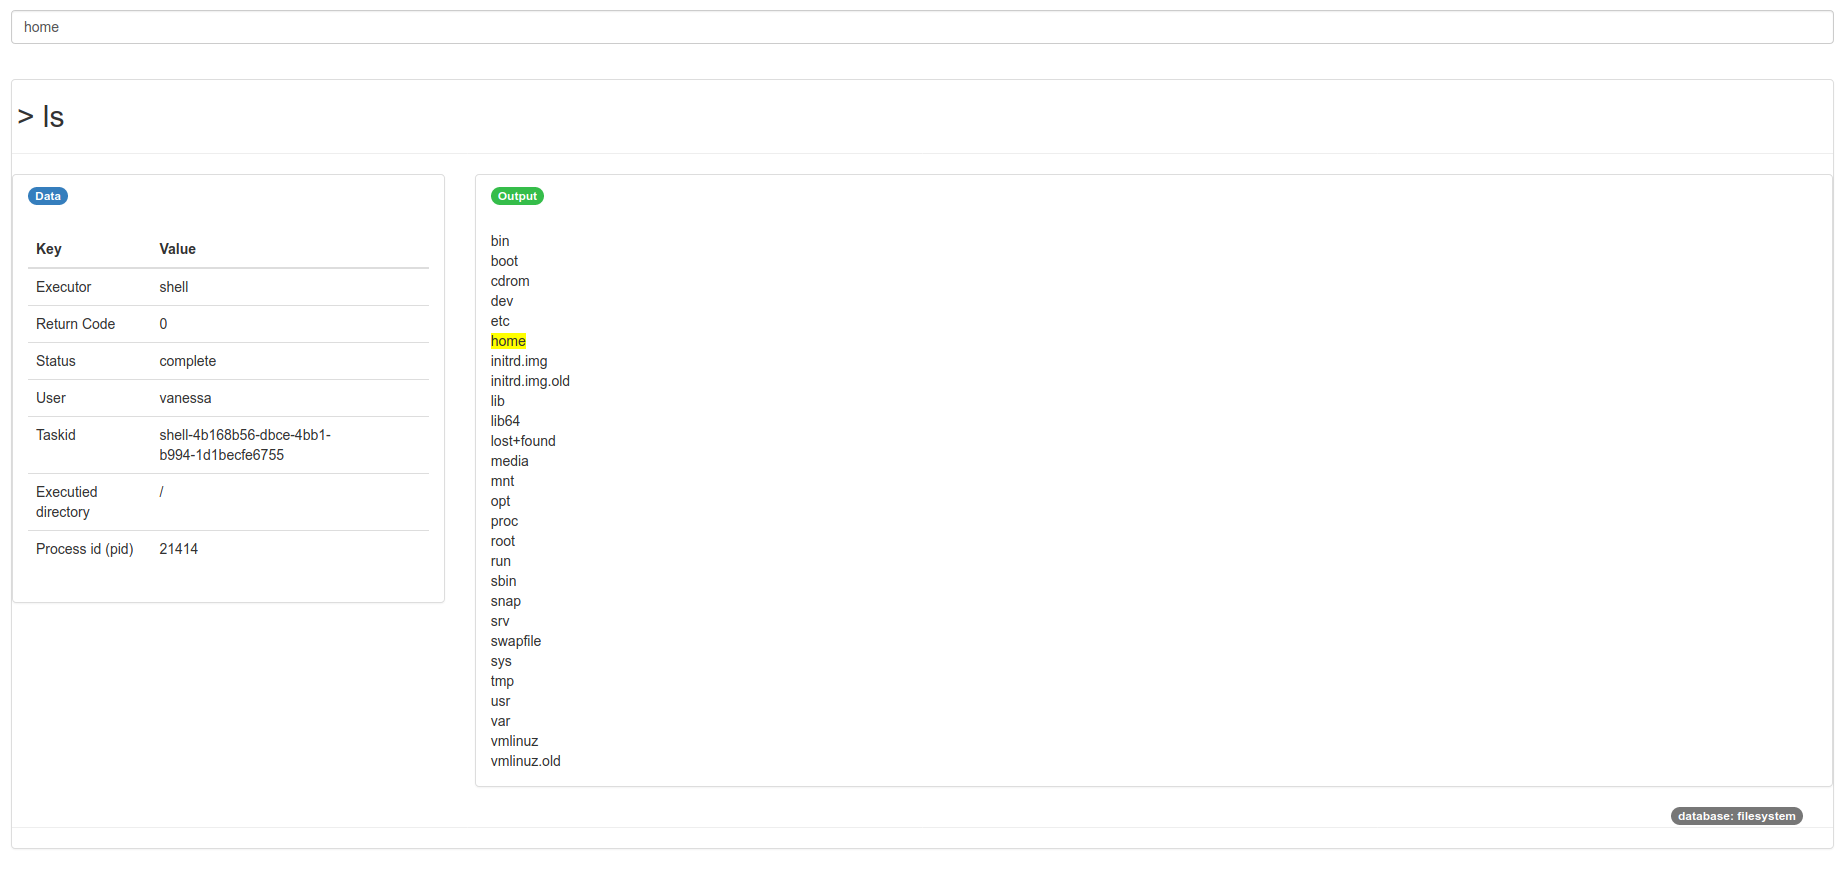
To make it easy to search output, a search box at the top will highlight results in yellow that match the user search:
Logging
If you want to look at server logs for the dashboard, they will be printed
by defualt to your Qme Home ($HOME/.qme) in a file called dashboard.log:
$ cat /home/vanessa/.qme/dashboard.log
Starting Thread
2020-05-16 16:13:29,555 - qme.app.server - DEBUG - Client connected
2020-05-16 16:13:29,555 - qme.app.server - DEBUG - Starting Thread
2020-05-16 16:13:33,644 - qme.app.server - DEBUG - Client connected
You might next want to browse tutorials available.