For this tutorial, you should be familiar with using Singularity containers. Specifically, we are going to pull the Docker container provided and described in the containers guide.
1. Log in to your cluster
First let’s login with ssh, and then grab an interactive node.
sdev
2. Pull the Container
Once we are here, we might need to load singularity (as a module perhaps)
or make sure to export SINGULARITY_CACHEDIR to somewhere with enough space to pull
a container. Then, pull it!
$ singularity pull docker://quay.io/vanessa/qme
Qme is installed in the container!
$ ./qme_latest.sif --help
usage: qme [-h] [--version] [--config_dir CONFIG_DIR]
           {version,config,clear,exec,ls,run,rerun,start,get} ...

QueueMe job executor and dashboard.

optional arguments:
  -h, --help            show this help message and exit
  --version             suppress additional output.
  --config_dir CONFIG_DIR
                        select database and configuration directory (defaults
                        to $HOME/.qme).

actions:
  actions for qme

  {version,config,clear,exec,ls,run,rerun,start,get}
                        qme actions
    version             show software version
    config              configure qme.
    clear               Run a command to add to the queue.
    exec                Execute an action for the last task, or a taskid
    ls                  List tasks
    run                 Run a command.
    rerun               Re-run a particular task.
    start               View the queue web interface (requires Flask)
    get                 Get task
2. Run Commands
Let’s give a shot at running some commands. With qme installed locally we would just do:
$ qme run <command>
But since the entrypoint to the container is qme, we instead give the run command to it:
./qme_latest.sif run ls
Database: sqlite
[shell-fbe98ffa-de48-4794-bf68-251f994a4536][returncode: 0]
The above is the shell executor, meaning a general shell command that is parsed and not matched to any particular executor. Let’s try the slurm executor. Here is a simple “job script” that we want to run:
$ cat run_job.sh
#!/bin/bash

echo "HELLO WORLD"
Since slurm requires libraries and other settings on the host that aren’t by default bound to the container (and we want to avoid a super complicated command to just “make it work”) we are instead going to install qme natively. Yes, this tutorial is about Singularity containers, but this is an example use case (interacting with slurm) that is better run natively. We also want to show that your dashboard is shared between both. Here is how to install qme:
$ pip install qme[all]
and then configure to use the same sqlite database:
$ qme config --database sqlite
Now let’s run an sbatch command that will run a slurm job.
$ qme run sbatch --partition owners --time 00:00:10 run_job.sh
We can then see more information about our last run command with qme get:
$ ./qme_latest.sif get
Database: sqlite
{
    "executor": "slurm",
    "uid": "slurm-6f84c002-e3e0-4137-9af9-bb4f2c966399",
    "data": {
        "pwd": "/home/users/vsochat",
        "user": "vsochat",
        "timestamp": "2020-05-21 14:57:14.394951",
        "output": [
            "Submitted batch job 954670\n"
        ],
        "error": [],
        "returncode": 0,
        "pid": 115456,
        "cmd": [
            "sbatch",
            "--partition",
            "owners",
            "--time",
            "00:00:10",
            "run_job.sh"
        ],
        "status": "complete",
        "jobid": "954670",
        "errorfile": "/home/users/vsochat/slurm-954670.err",
        "outputfile": "/home/users/vsochat/slurm-954670.out"
    },
    "command": "sbatch --partition owners --time 00:00:10 run_job.sh"
}
Keep in mind that interactive nodes might not support using sbatch, but if you run into this, you can just open another terminal on a login node and issue the same command. Since the database is located in your home, it doesn’t matter that you run in a different terminal, or even a different install of qme (configured the same).
Notice that the default database for the container is sqlite! This means
that it’s stored in your $HOME directory at $HOME/.qme:
$ tree $HOME/.qme
/home/users/vsochat/.qme
├── config.ini
└── qme.db
If you had installed qme natively and wanted to set the default database to be sqlite, you could simply do:
$ qme config --database sqlite
3. Start a Dashboard
If your cluster has a way to expose a port, you can run a simple dashboard from
a node! You’ll first need to export a custom QME_SERVER_KEY:
export QME_SERVER_KEY=$(./qme_latest.sif generate-key)
# is the same as
export QME_SERVER_KEY=$(singularity run qme_latest.sif generate-key)
# is the same as
export QME_SERVER_KEY=$(singularity exec qme_latest.sif qme generate-key)
Then choose a port. You can usually choose one in the range of
49152-65335. You’ll also need to know the hostname of the node you are on.
You can get on your node with:
$ hostname
sh02-01n58.int
We will be calling this the MACHINE later on. Next, start the server on the node!
This command could be run with the native qme if desired - as long as they use the same
database, it will be relatively consistent.
./qme_latest.sif start --port 55124
Database: sqlite
Server initialized for gevent.
QueueMe!
On your local machine, you’ll need to forward the shell to see the dashboard.
Note that the port is the one you started QueueMe with, and MACHINE is again
the hostname of the node. Here we are running this on our own, local computer:
export PORT=55124
export MACHINE=sh02-01n58.int
ssh -L $PORT:localhost:$PORT <username>@mycluster.institution.edu ssh -L $PORT:localhost:$PORT -N "$MACHINE"
If you have authentication, you should be asked to go through the flow after pressing enter above.
One thing that might trip some people up is that if you have a special login node address (e.g.,
myname@login.mycluster.myinstitution.edu) for the above command, you likely just need to do
myname@mycluster.myinstitution.edu (notice that we’ve removed the specific login node alias because
we are trying to connect to a compute note).
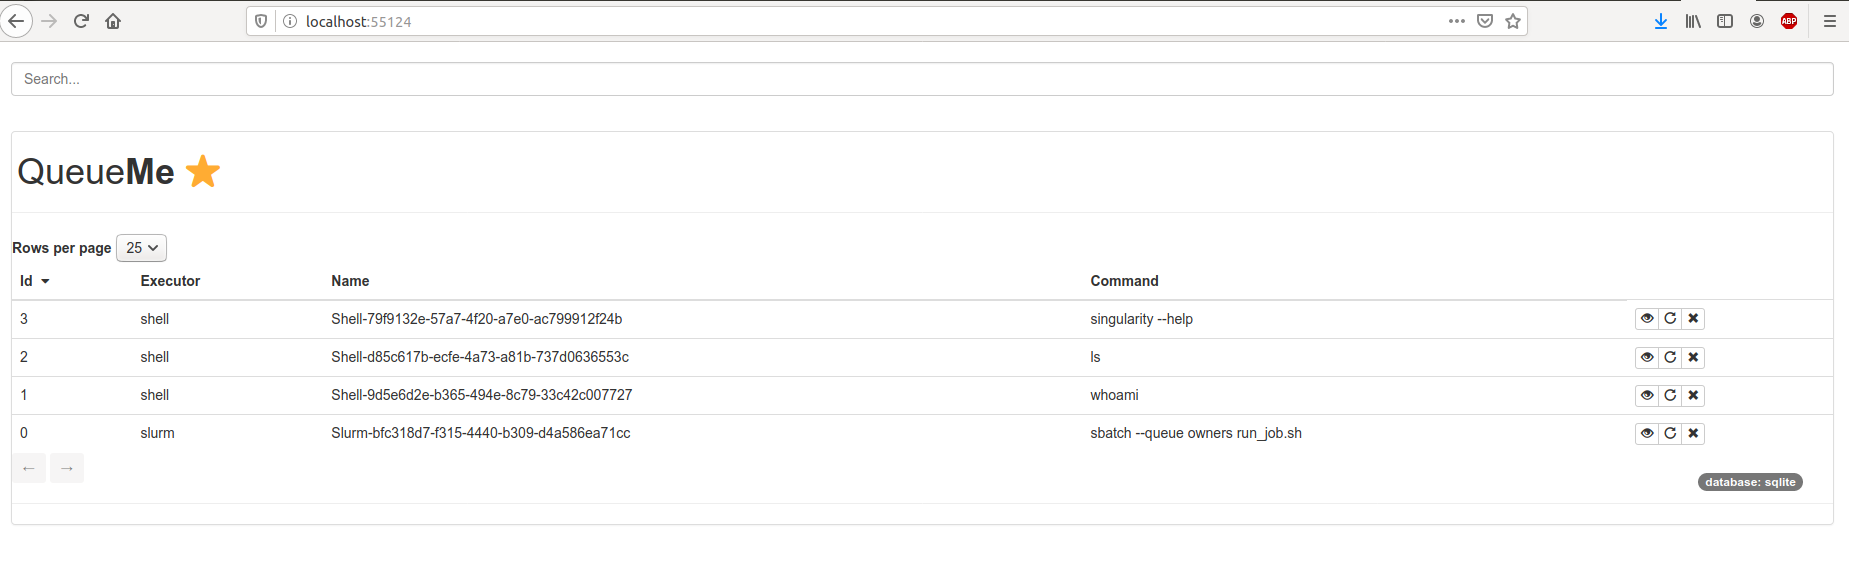
You should then be able to see the dashboard at localhost:55124 (or whatever
port you chose! The dashboard will update live from the database, meaning if you
run another command in a different shell that updates your database, the dashboard will
update too. This is done via web sockets.
You can actually run qme from the container, or even a different version installed on your host, and if you use the same database both executions will update the same database and interface. Neat! You can press Control+C on your cluster and local machine to stop the server.